Intro
Nature is at the core of every decision in my textile development—from the colours and materials I work with, to the pace of production that mirrors its quiet, intentional rhythm.
Chapter 1: Exploration
Colour Research
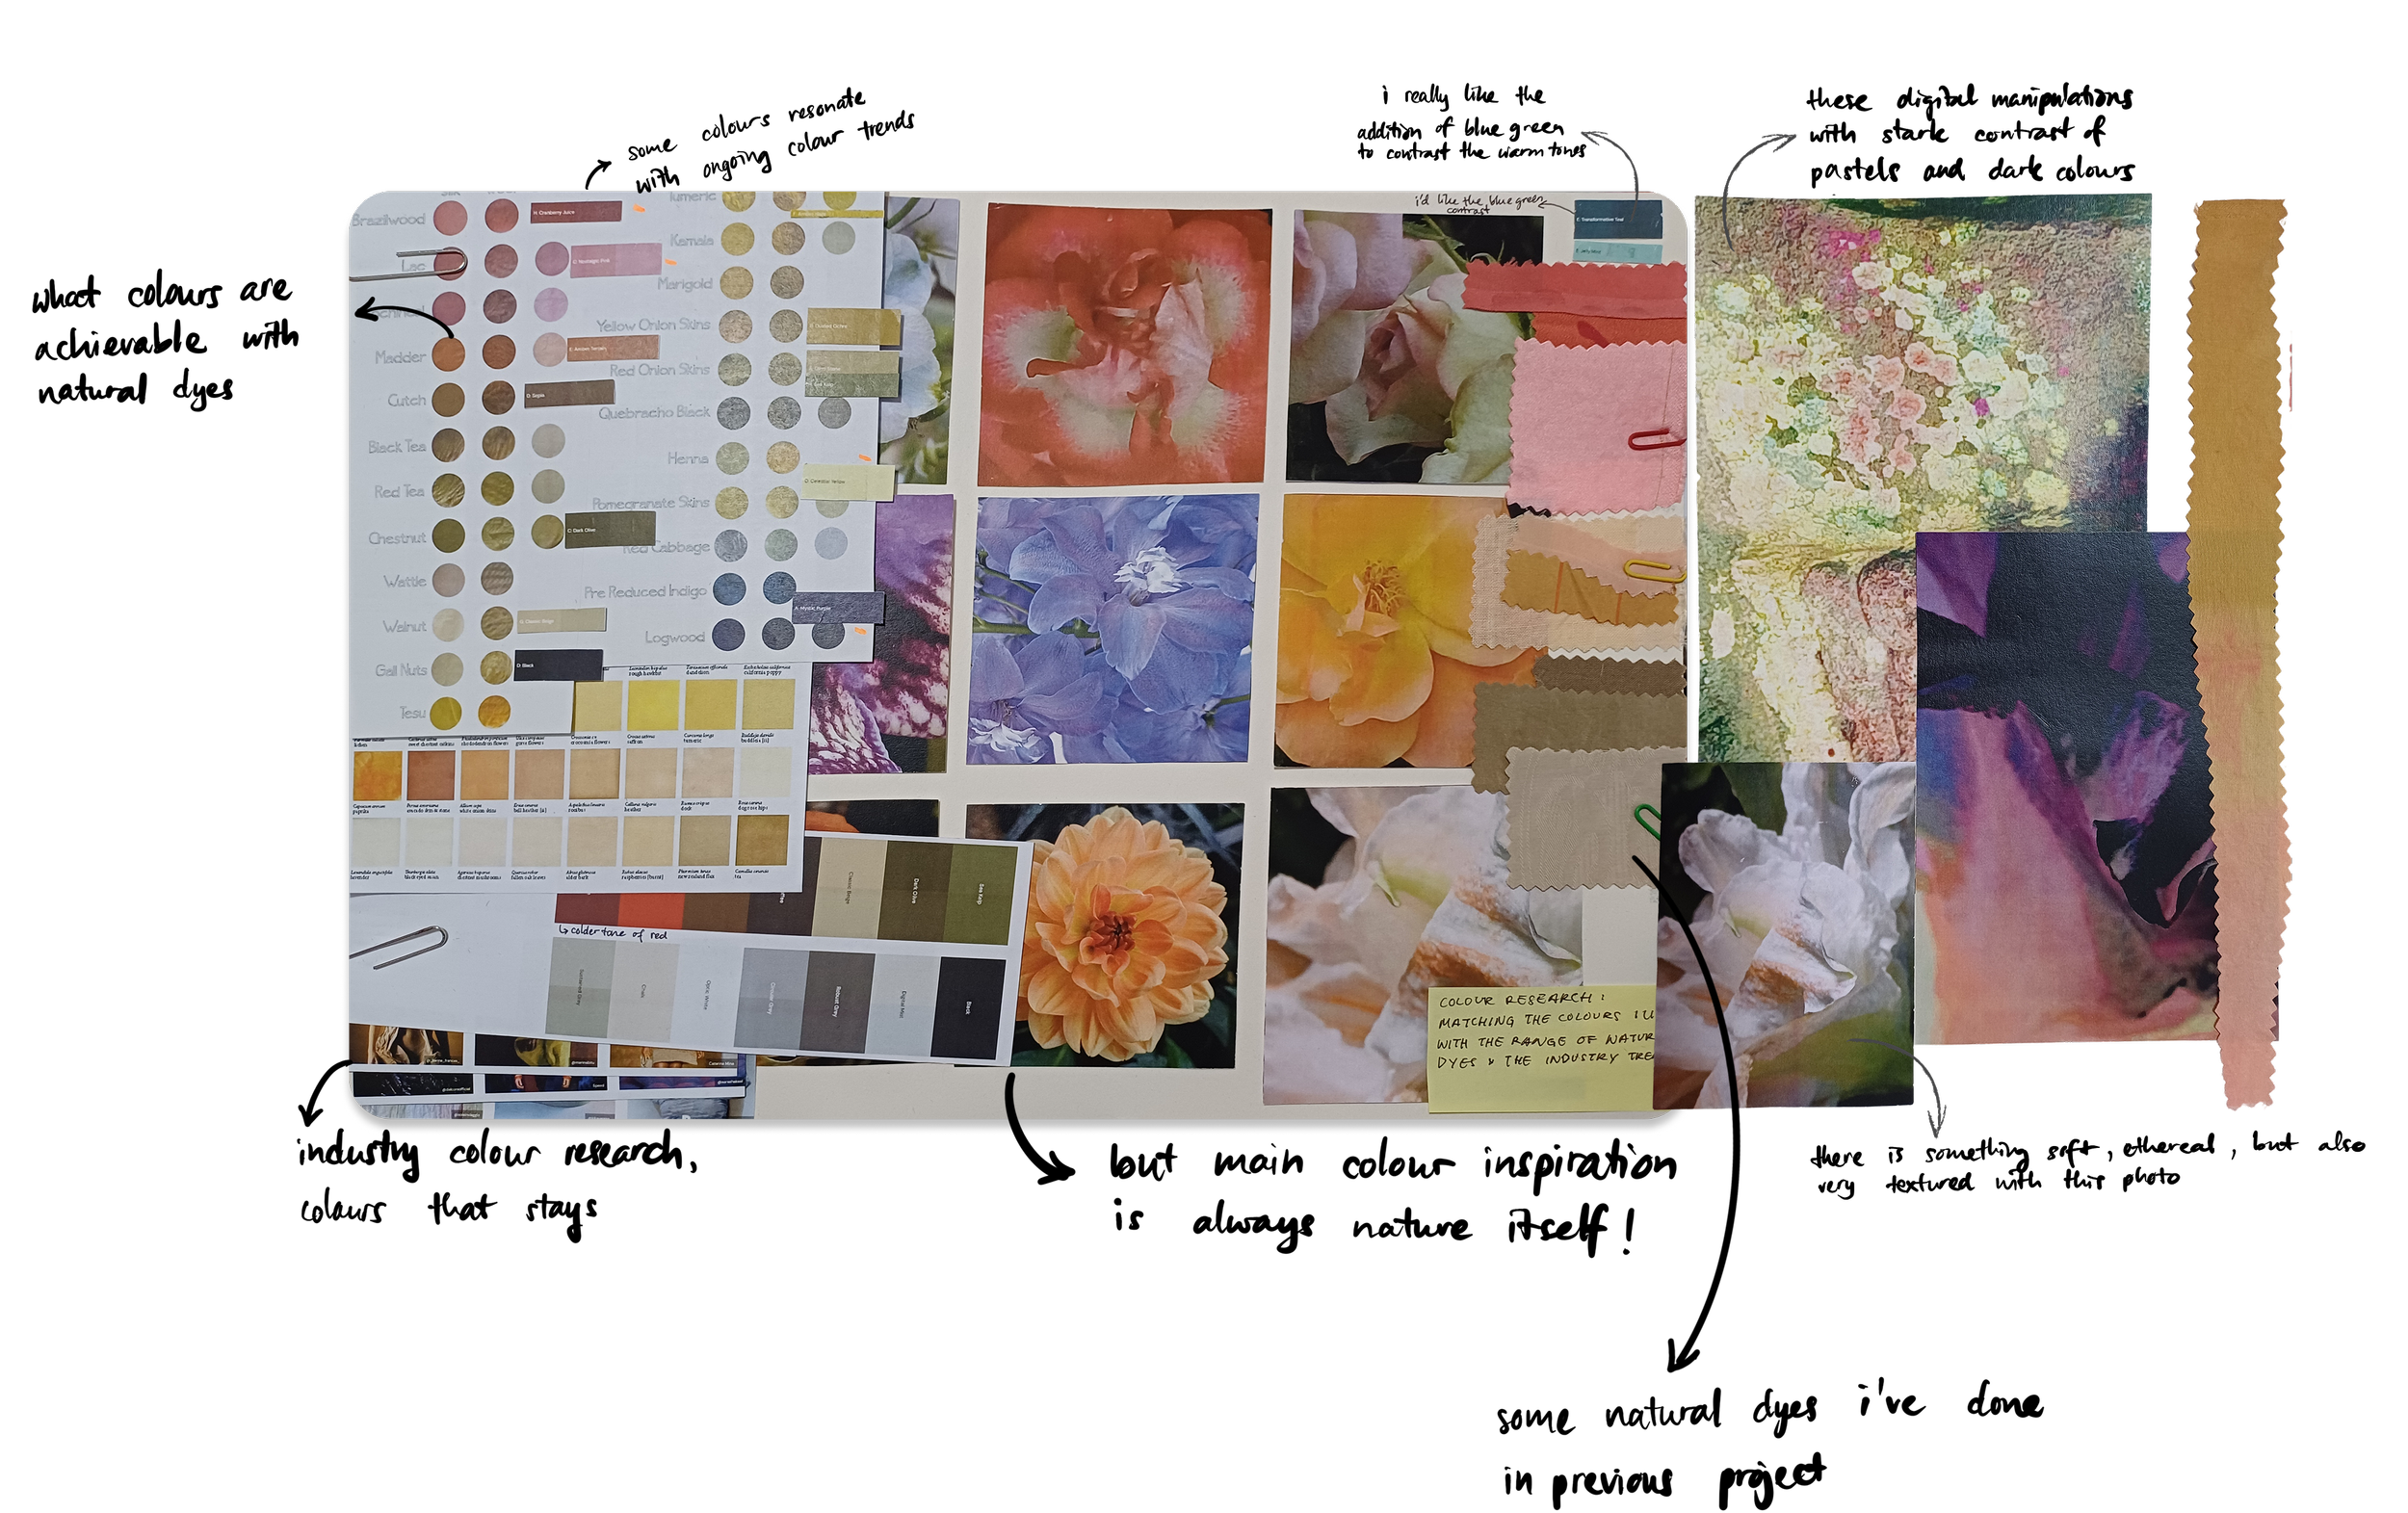
Initial Colour Board


Choosing these colours with the considerations of what colours are achievable with natural dyes as well as a combination of colours I personally resonate with
Workshop Colour Board
Taking inspiration from Miu Miu’s Spring Summer 2025’s colour story of bright pastels and warm browns, I was advised to add buttery yellow, more shades of light blue, as well as dark browns and neutrals.

Source: Miu Miu SS 2025

Final Colour Board
Pattern & Motif
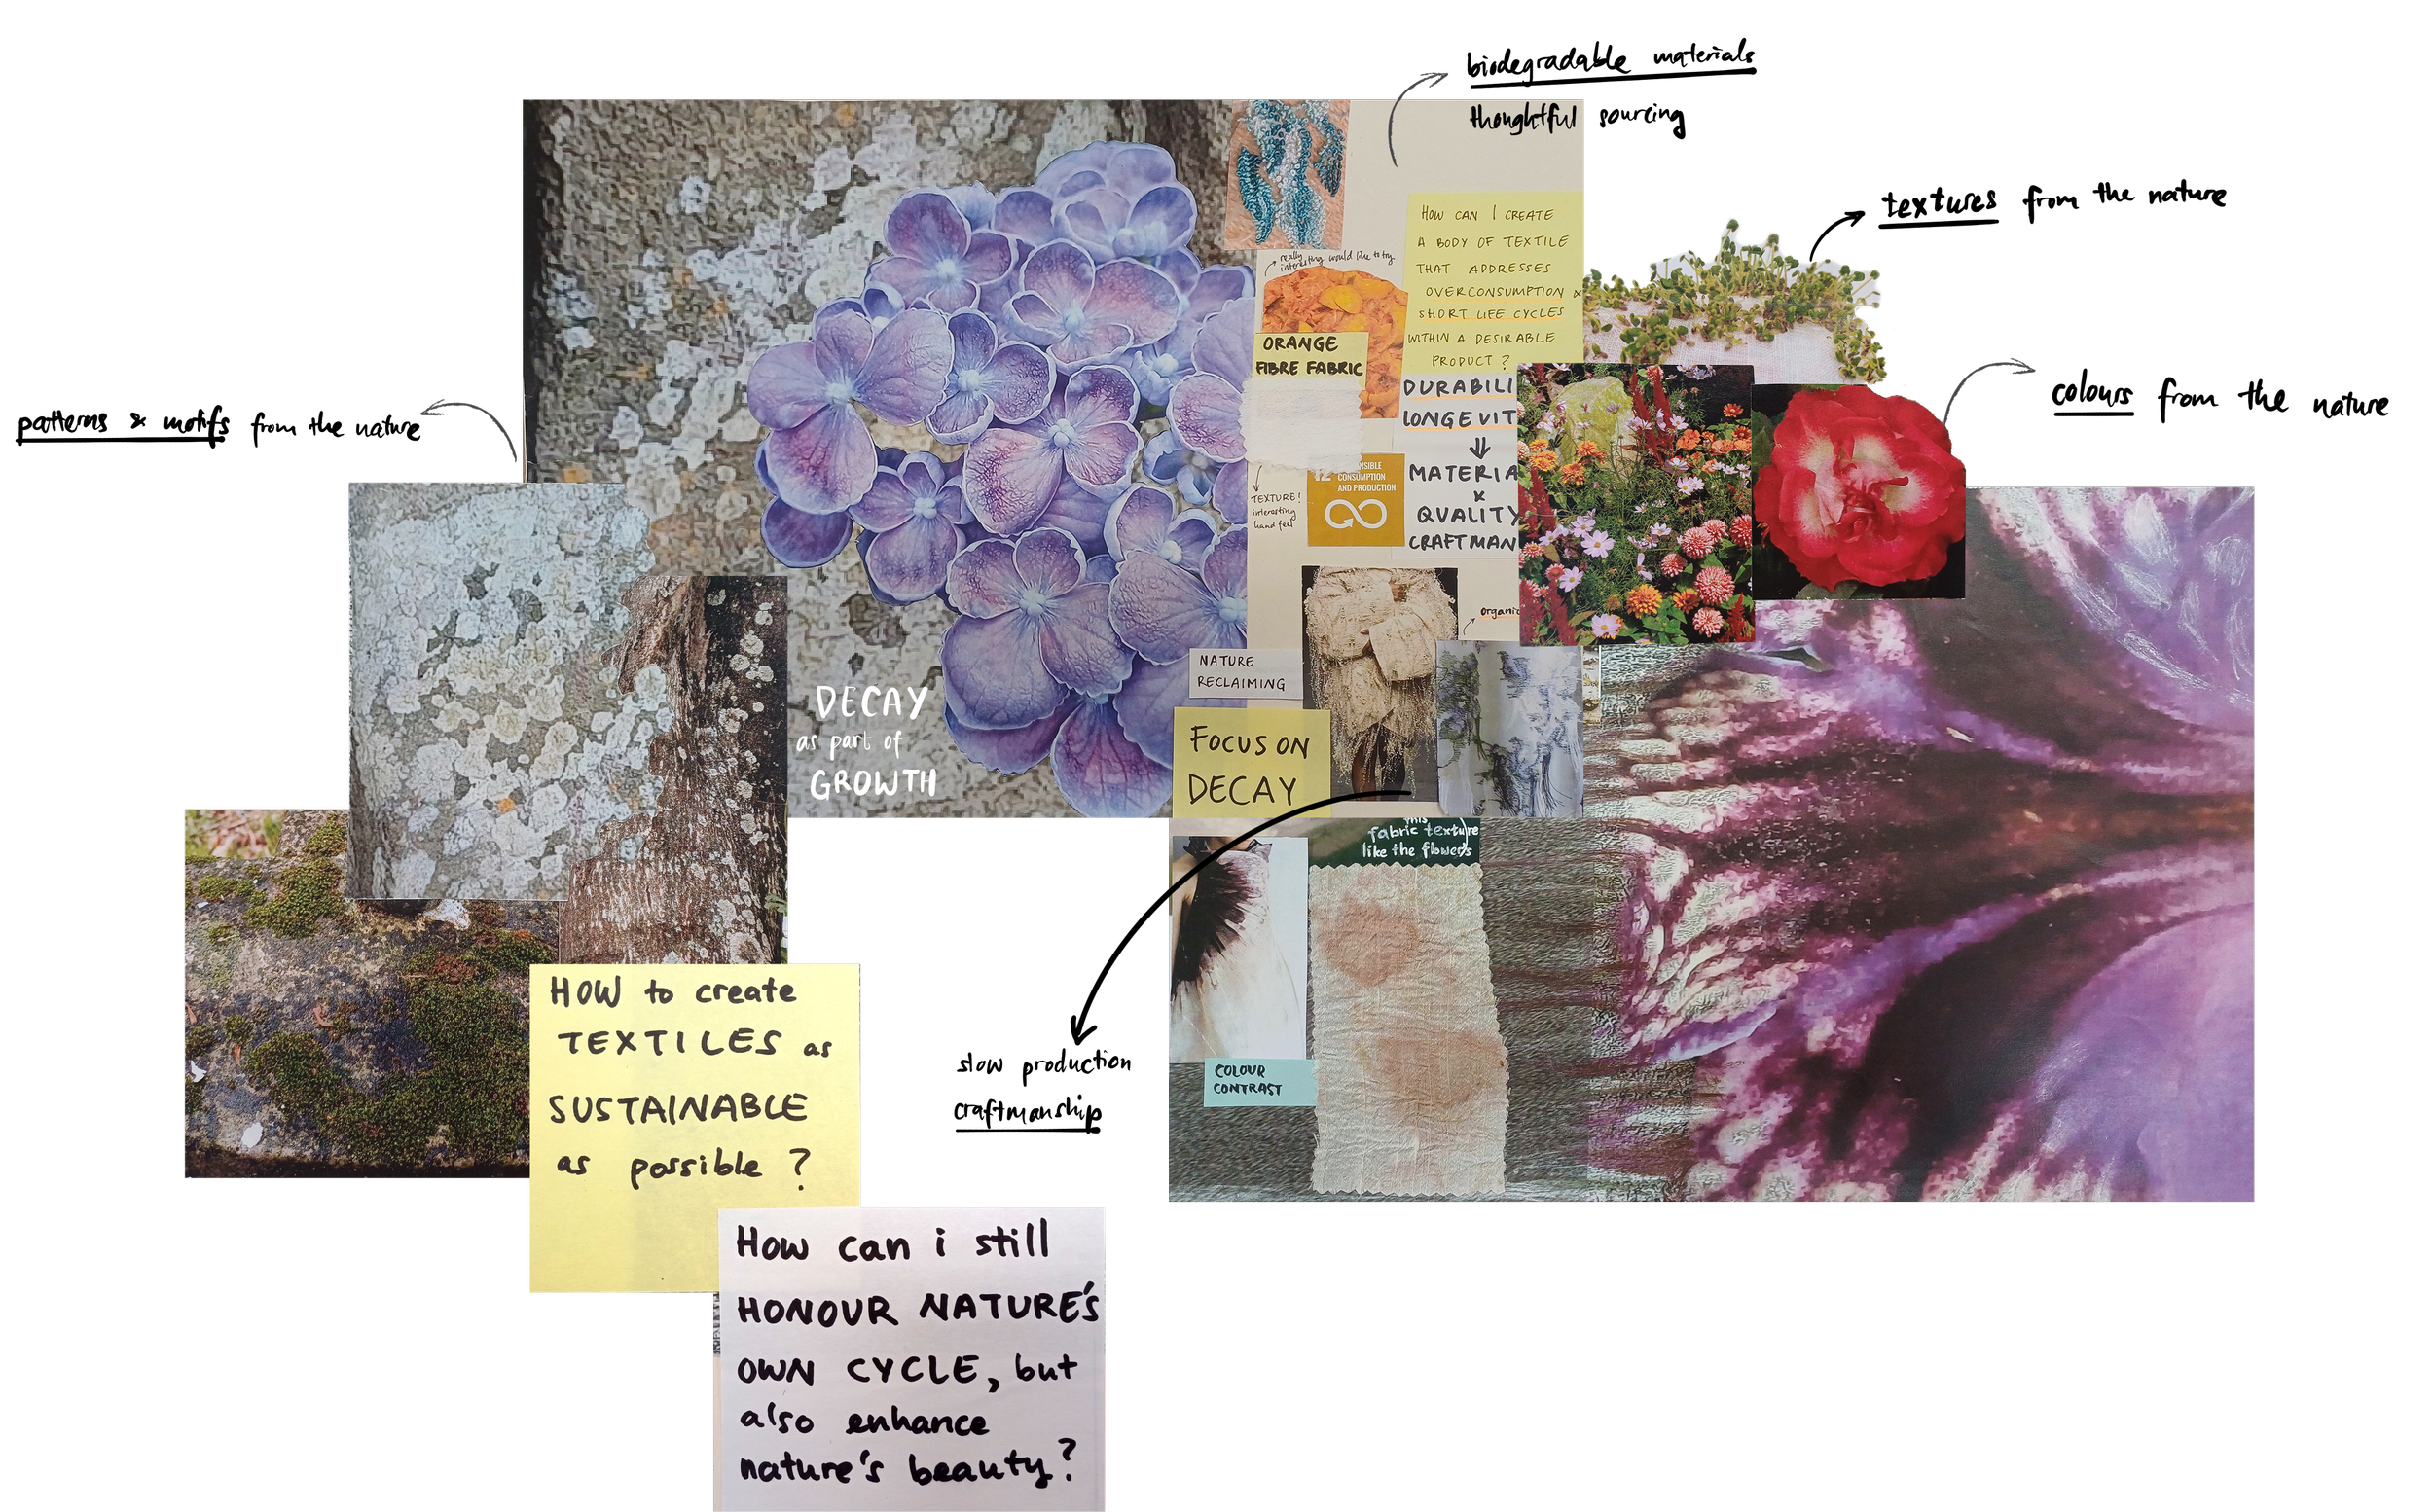
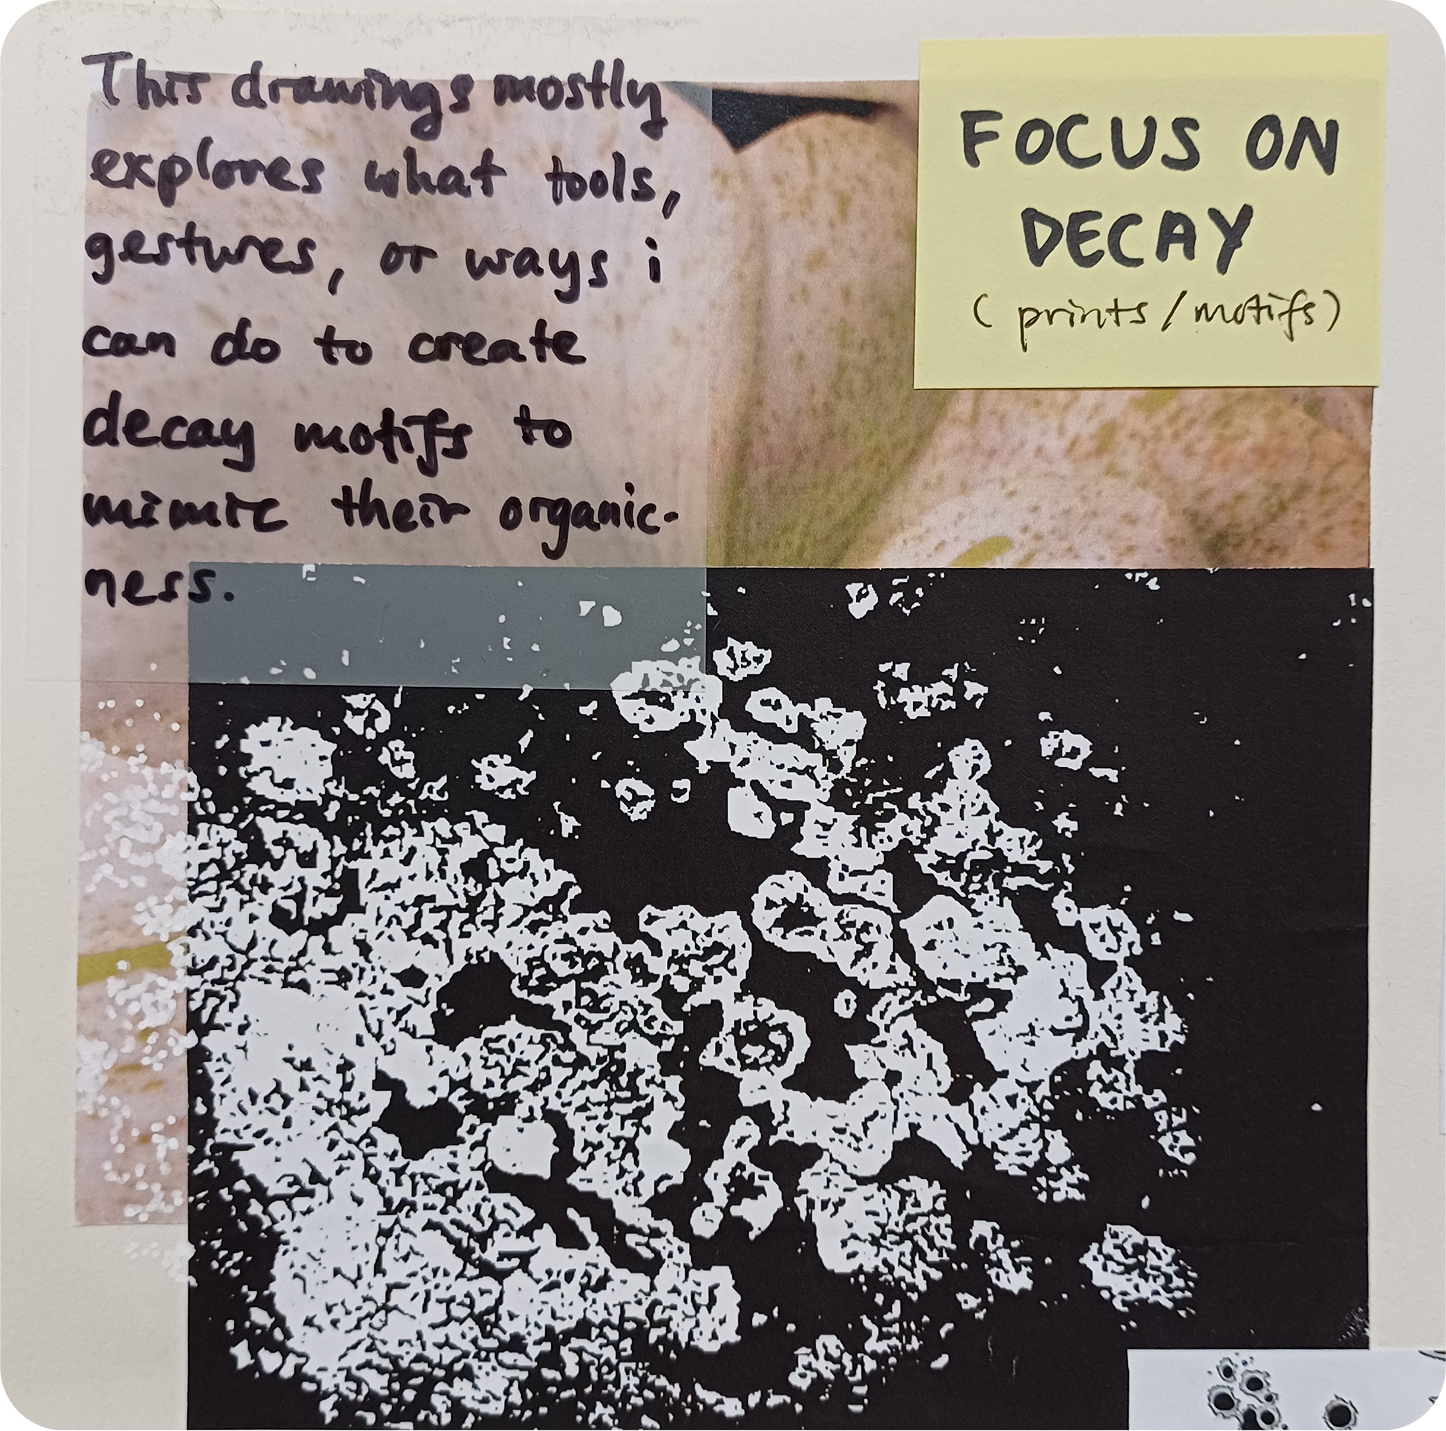
The visual foundation of this project begins at Candi Sewu in Yogyakarta, where I was drawn to the quiet beauty of decay—moss-covered stone, fungal blooms, and the organic, circular forms through which nature gently reclaims human-made structures, revealing how the two can beautifully coexist.

Painting with Rain
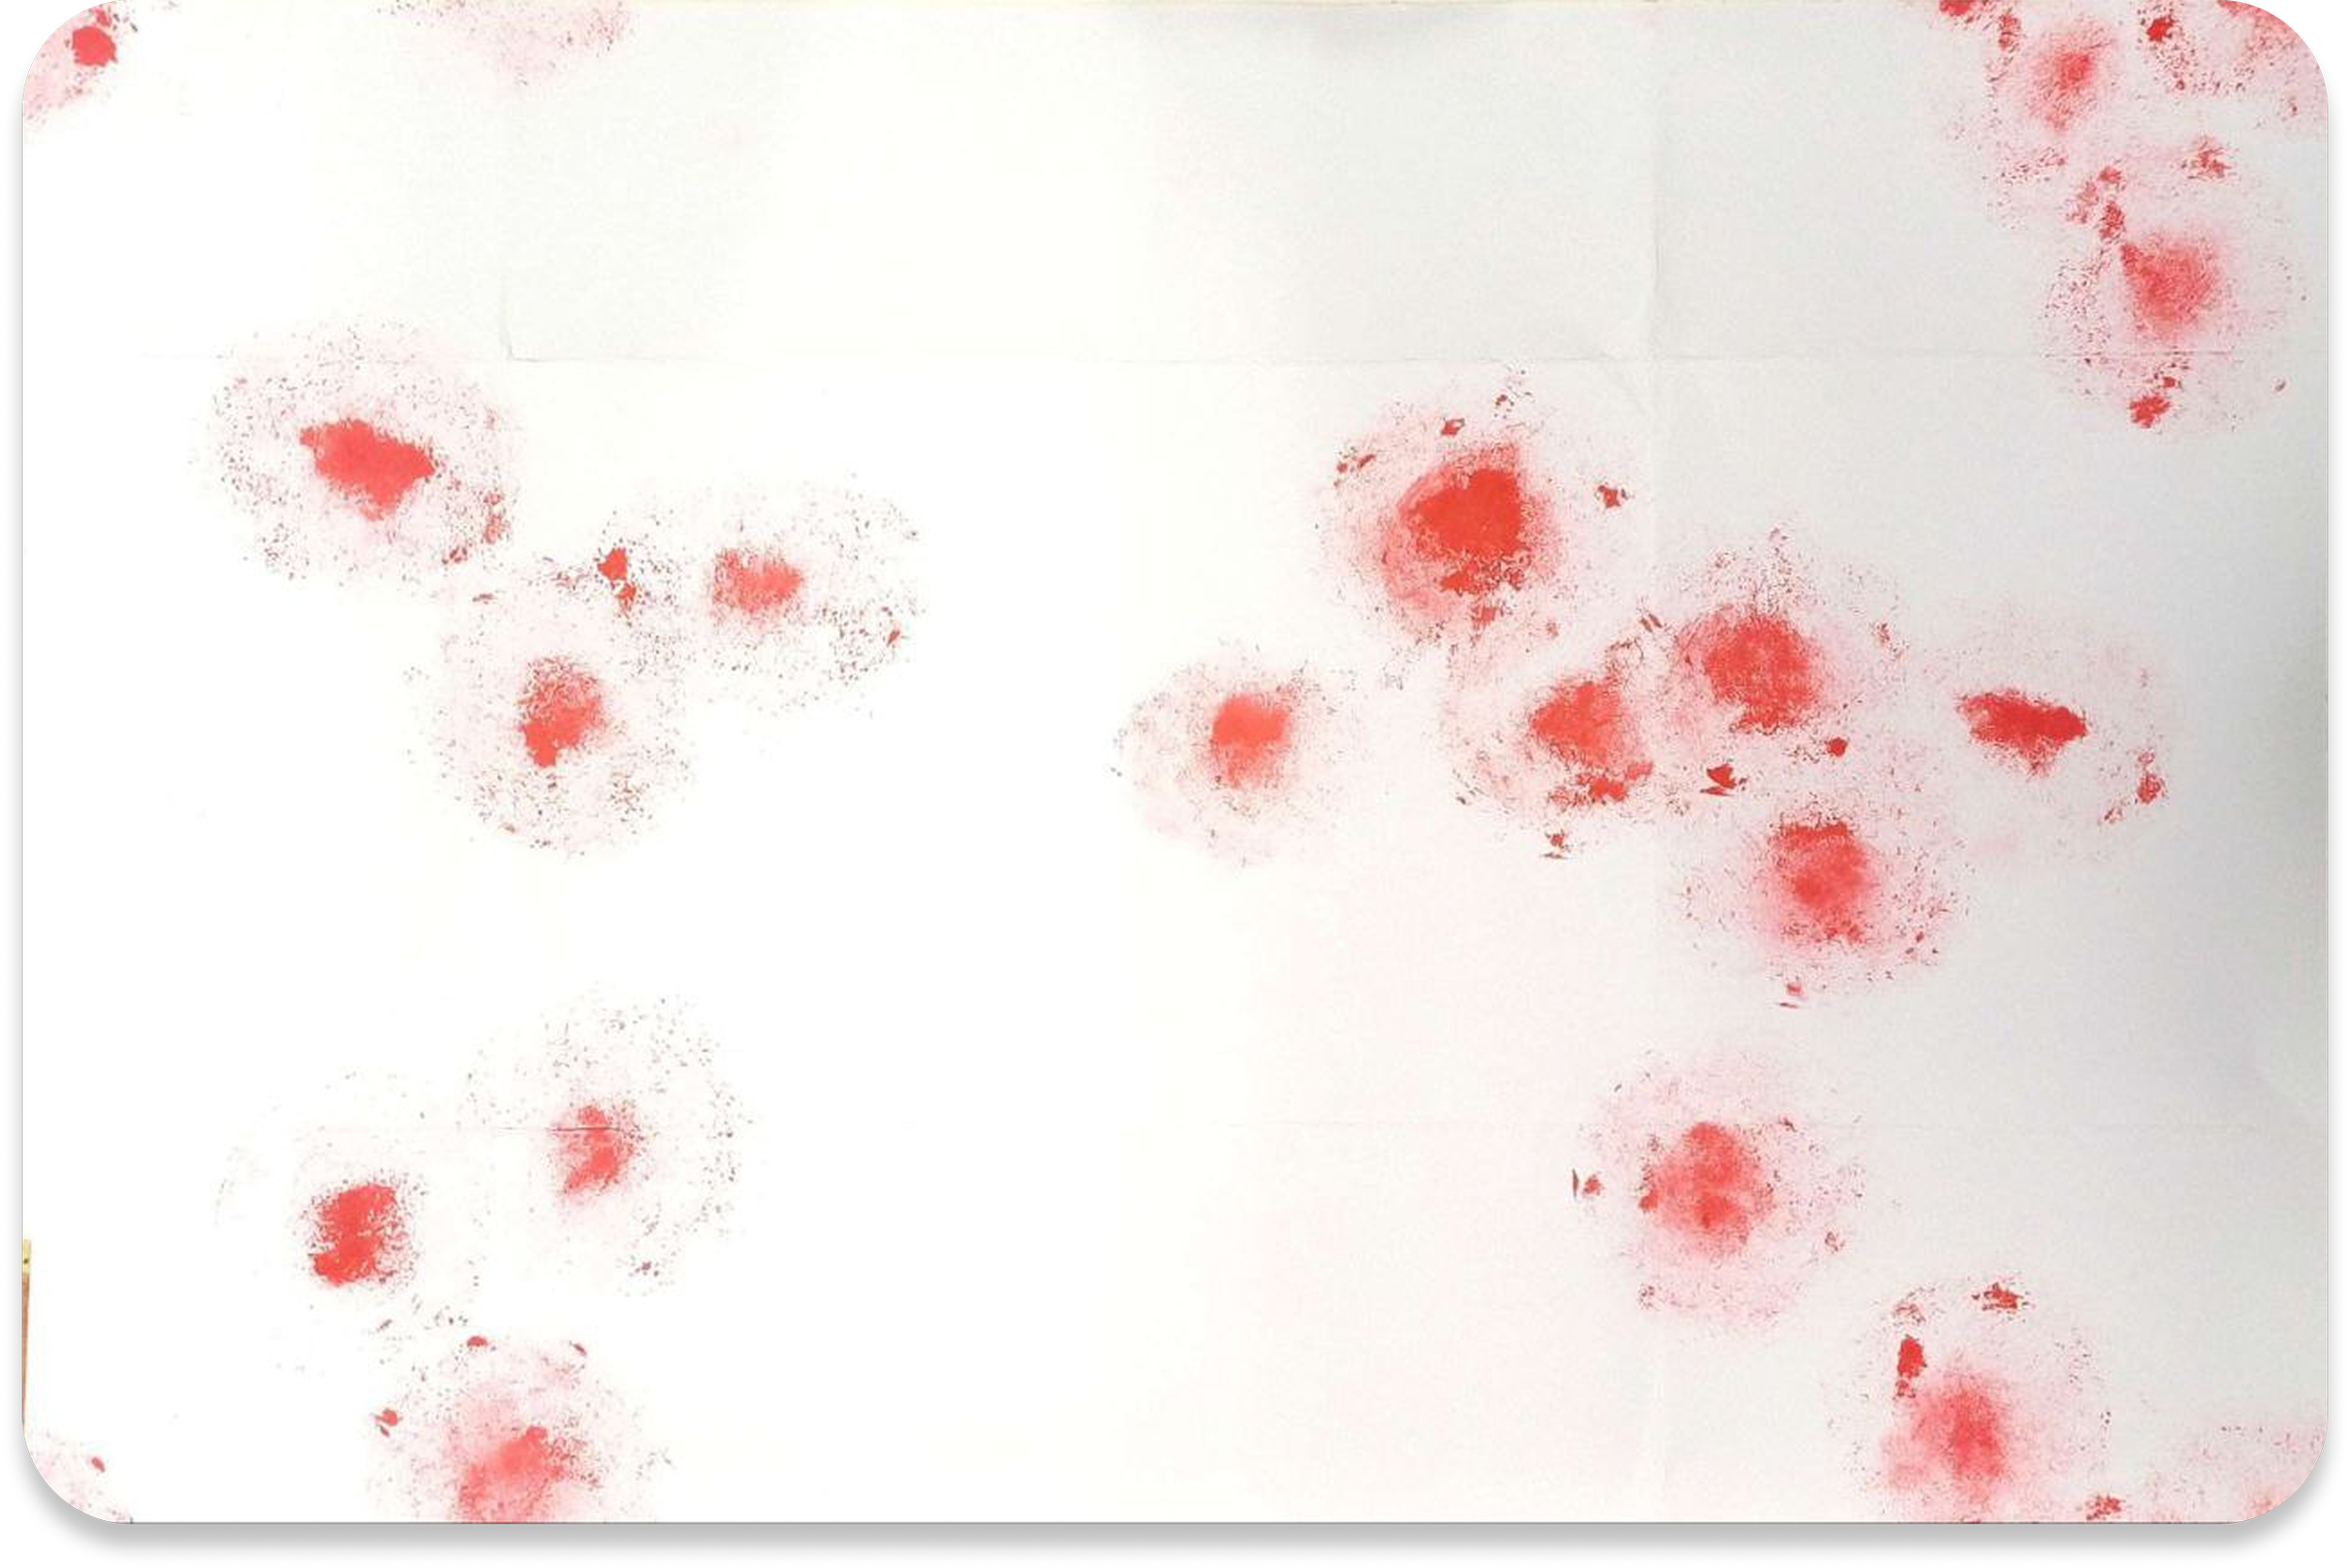
To reflect nature’s presence not just in imagery but in process, I began exploring mark-making methods that let nature leave its own trace—starting with painting using rain.


Painting on top of rain puddles pressed onto paper

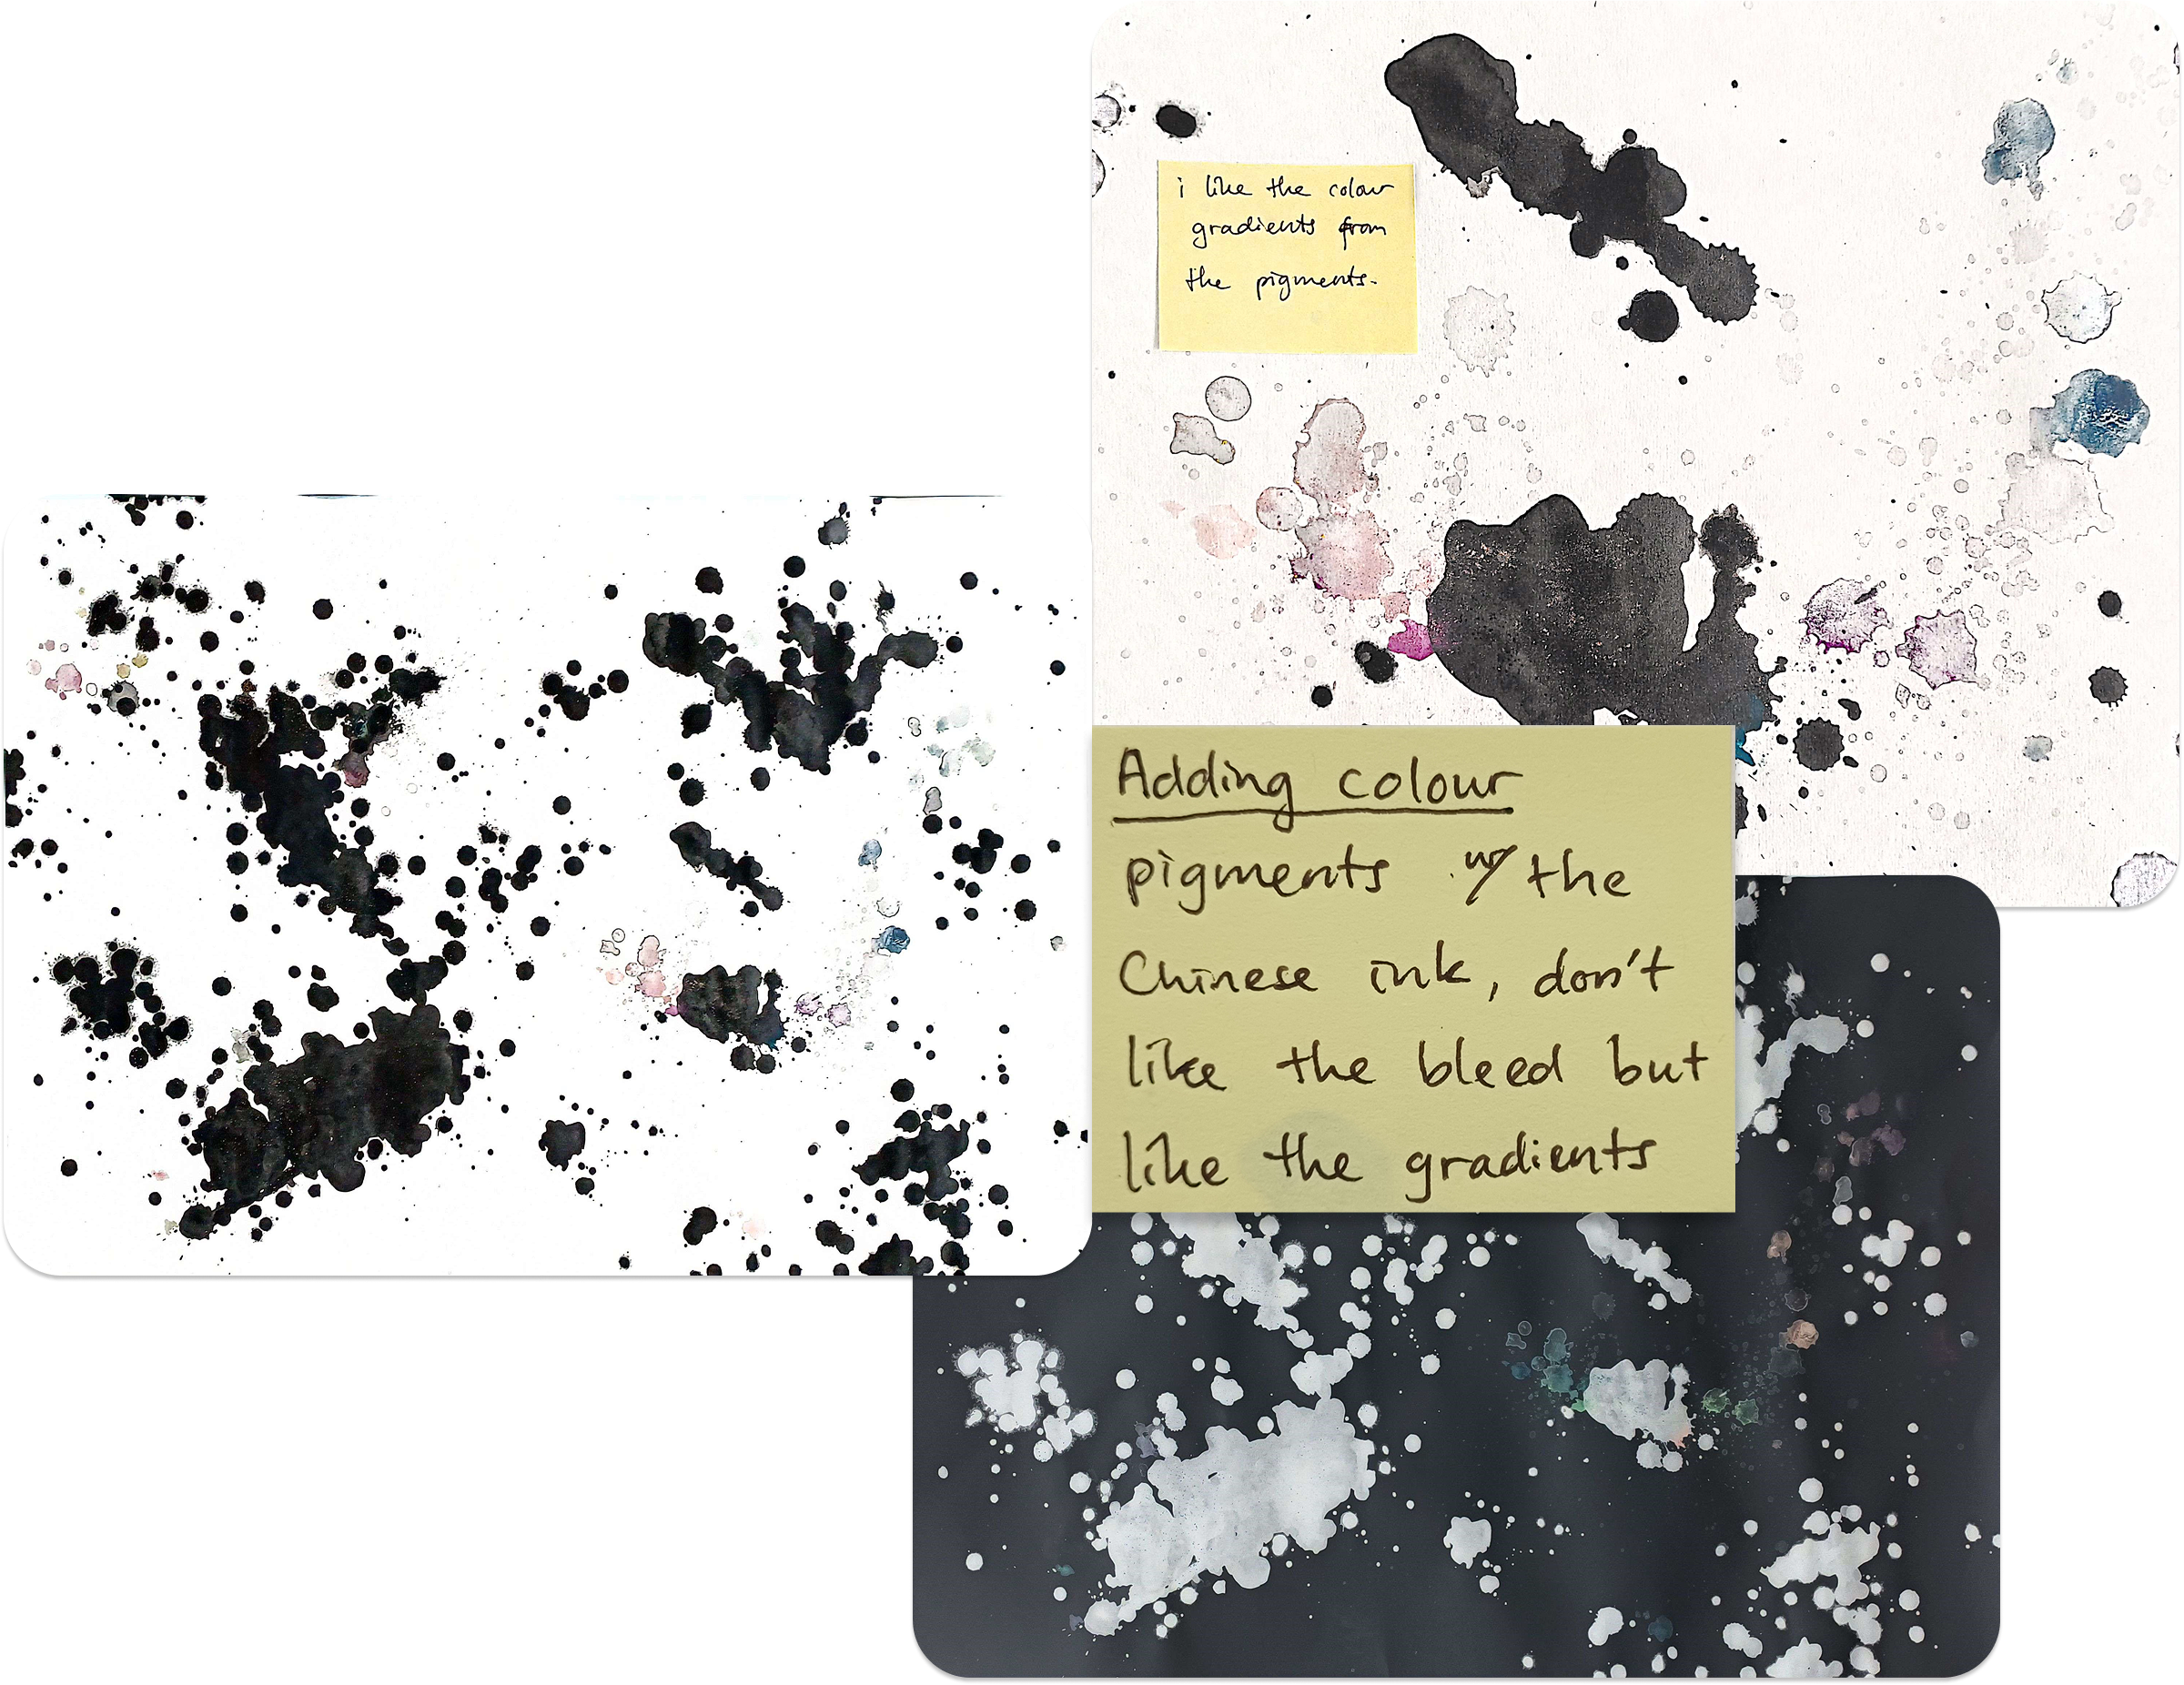
Loose pigment, splashed by rain drops

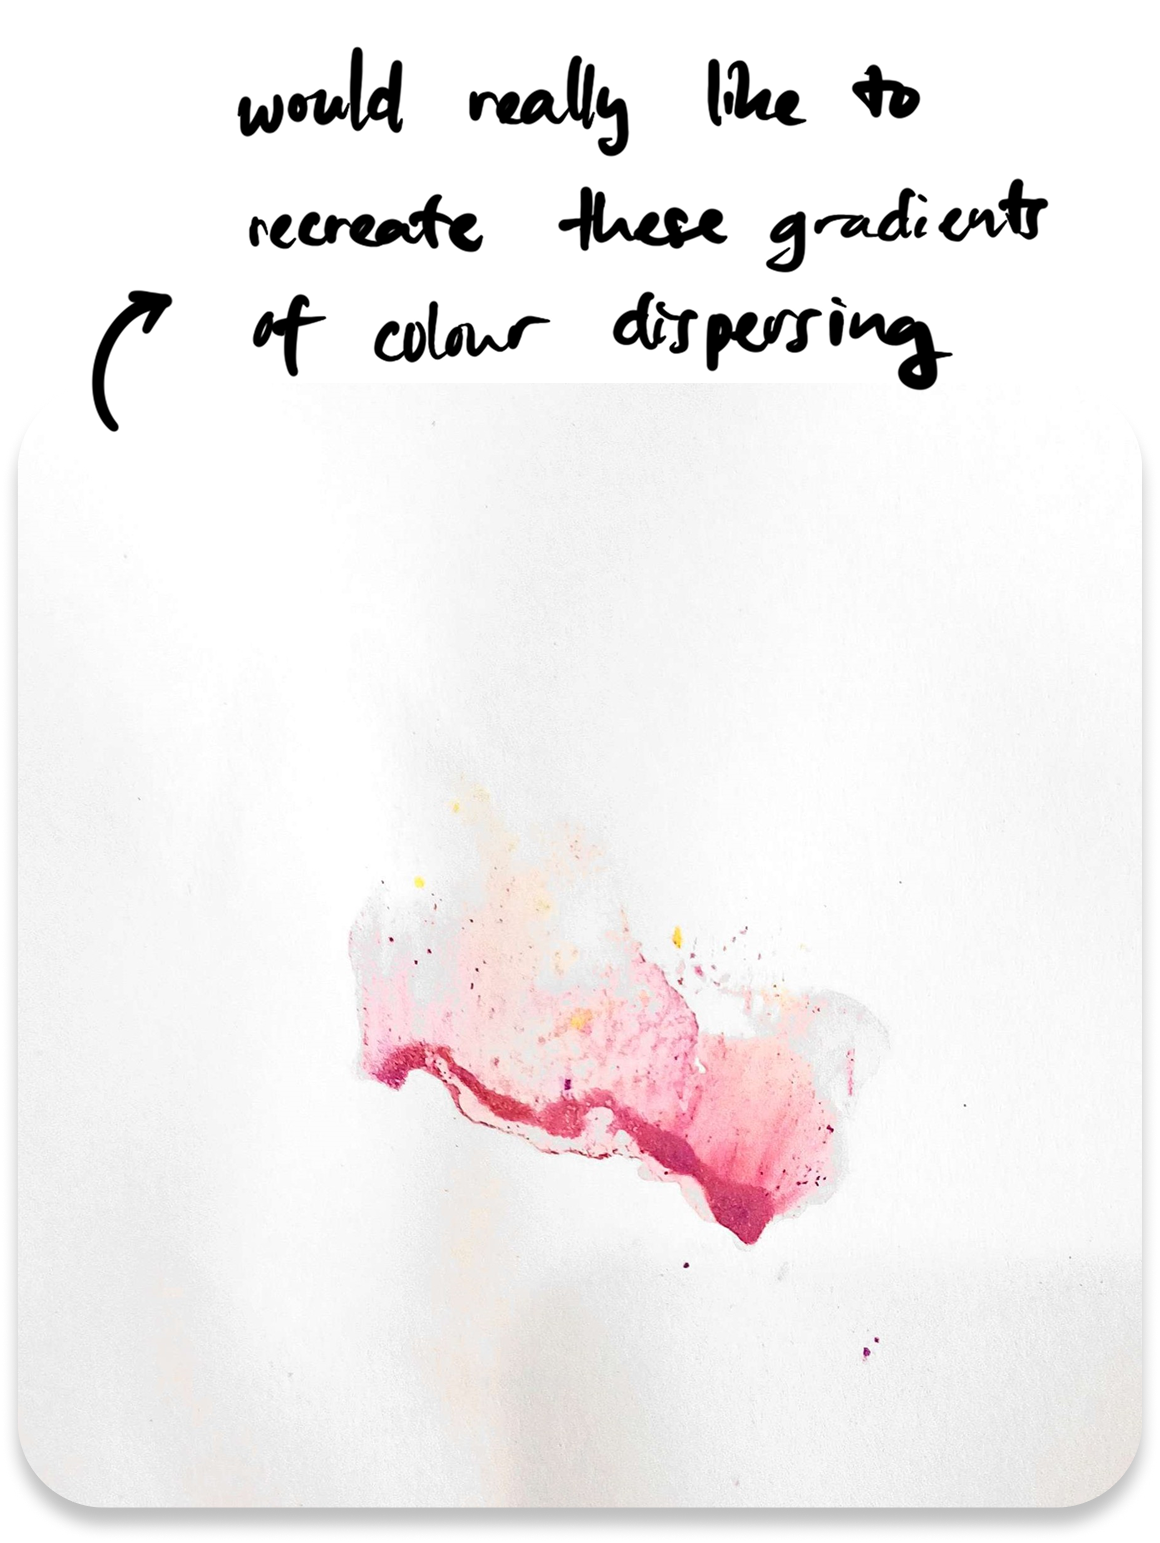
Loose pigments added to rain drops pressed onto paper

Close-ups of the artwork


Mimic the decay motifs with hand drawn
I then explored ways to echo the soft, circular growth patterns seen in the temple’s decay—experimenting with different tools and mediums to find techniques that could later translate into adding pattern and depth onto my naturally dyed fabrics.
1st two explorations + digitally inverted versions

2nd exploration

3rd exploration + digitally inverted
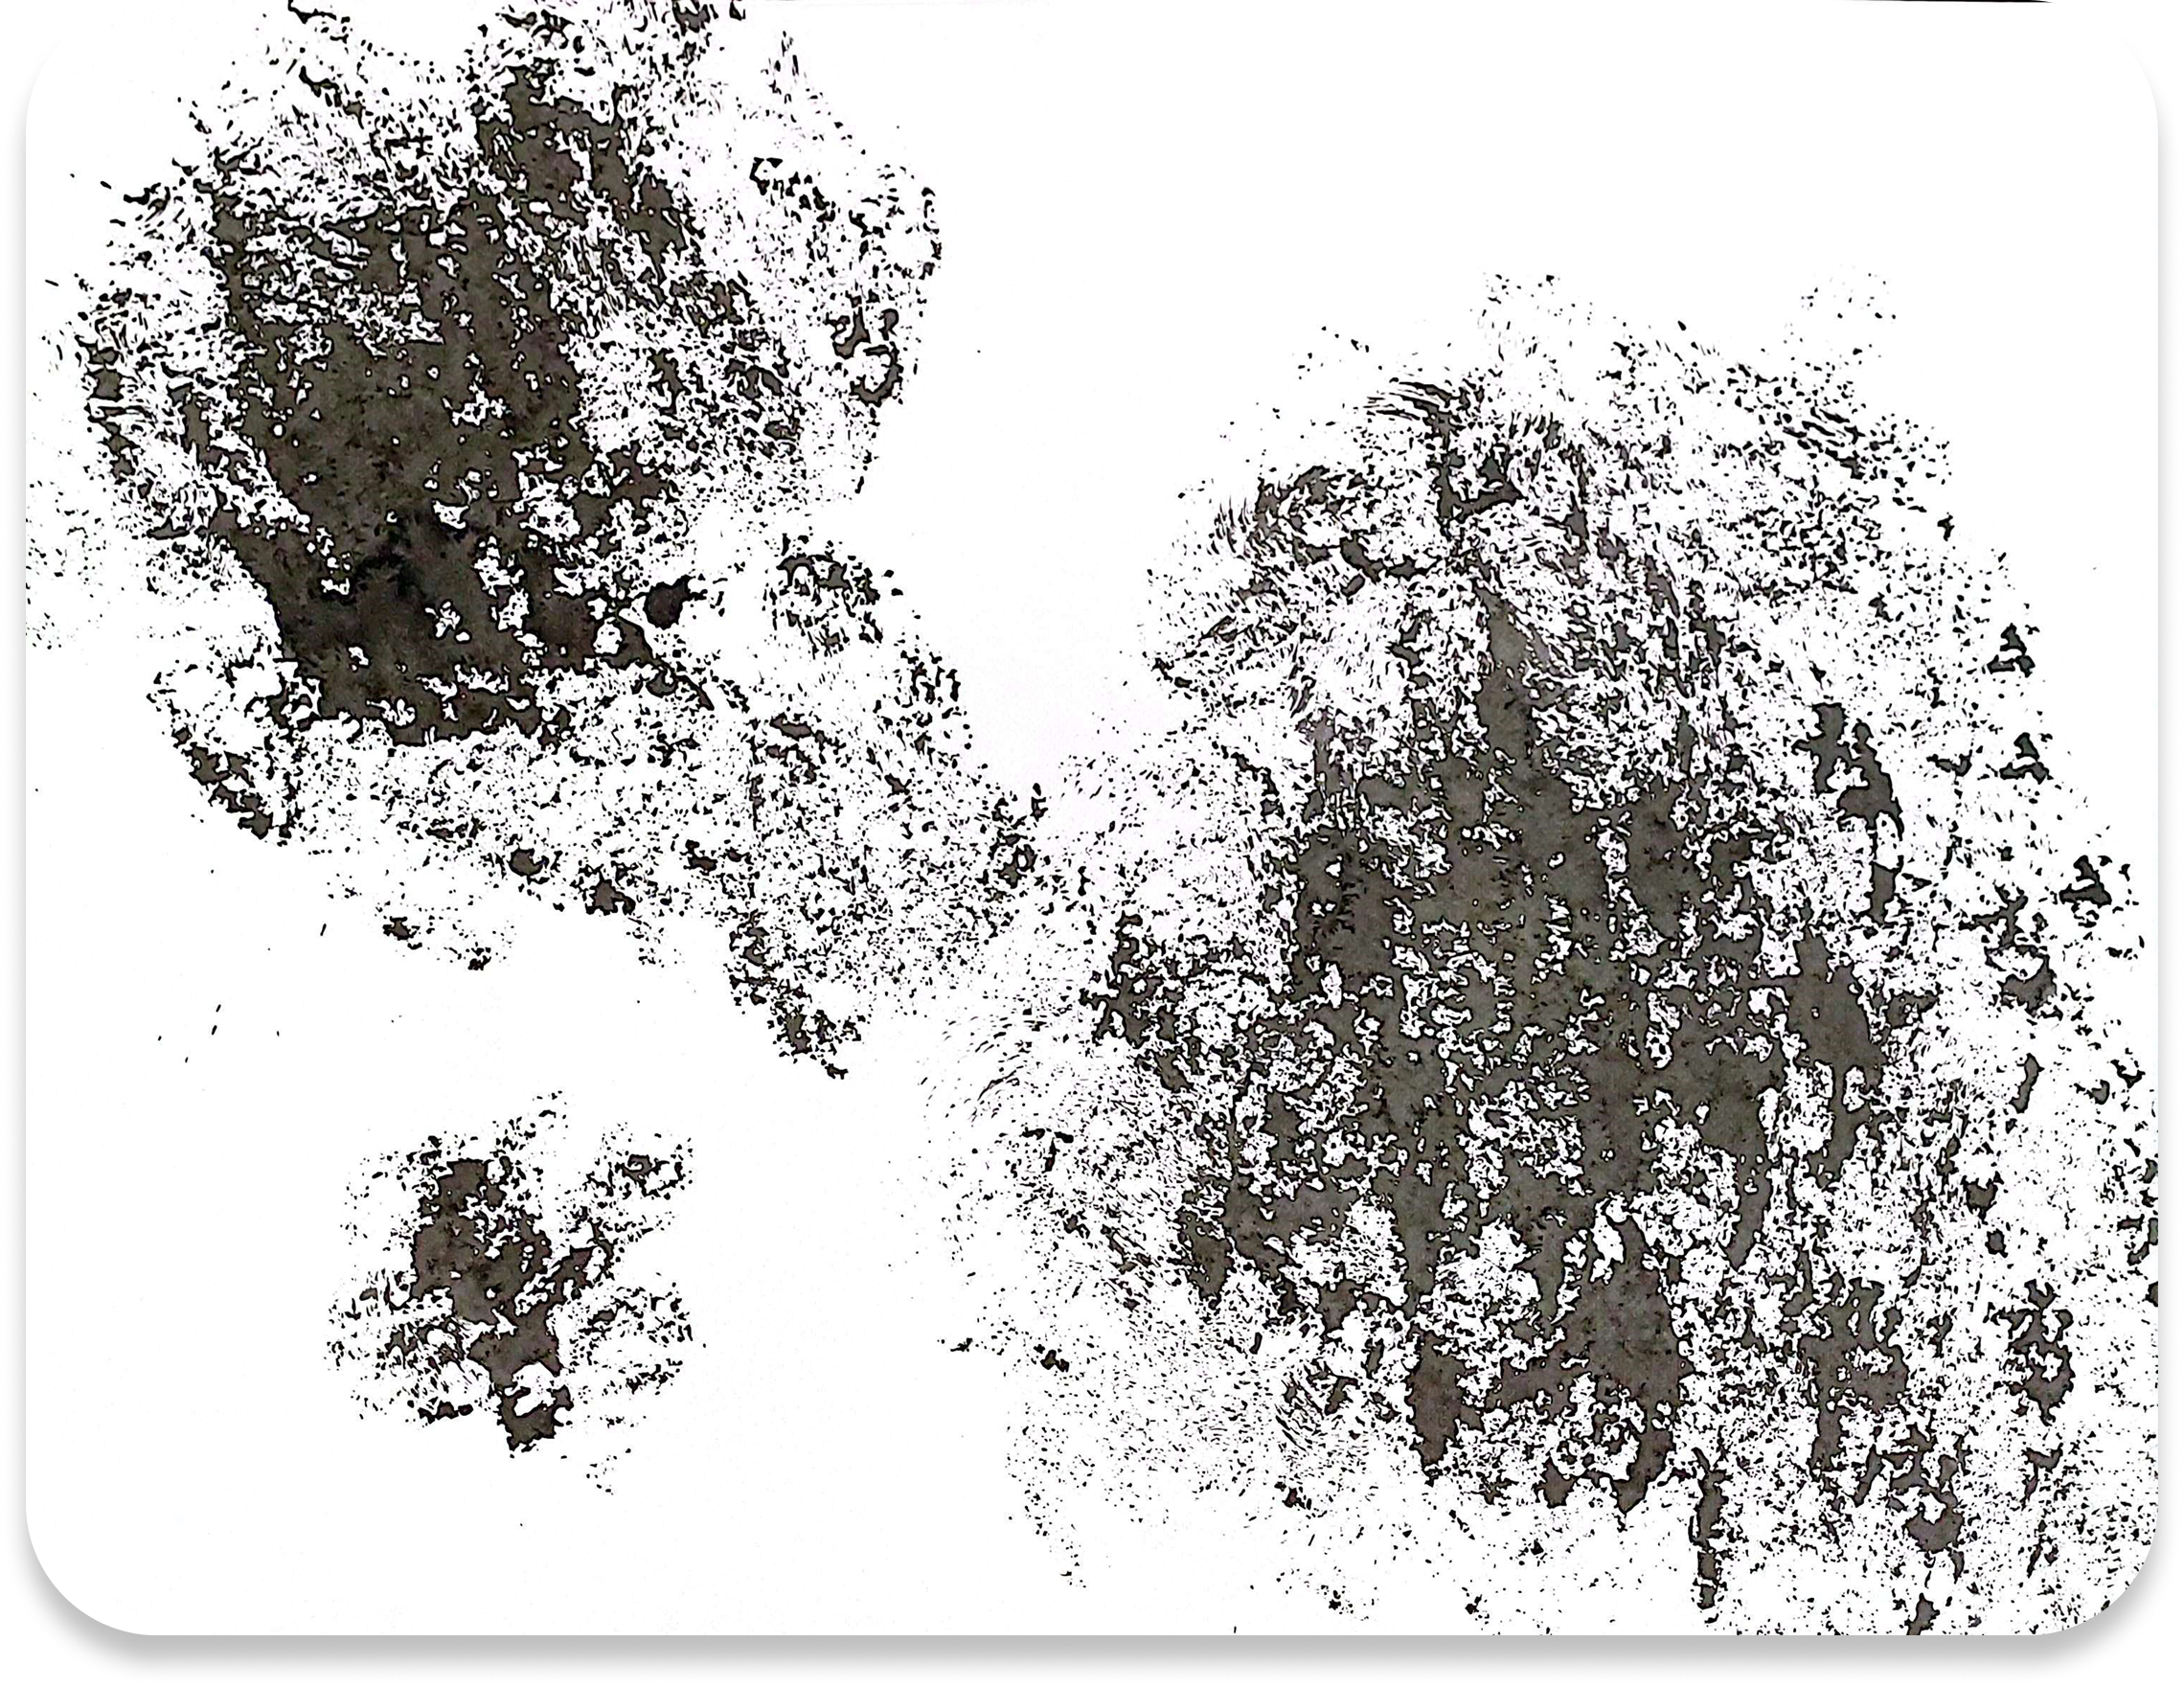
4th exploration with sponges stamped on paper with wet medium and paste like medium


Last exploration trying to make repeated pattern with cotton rounds and stamp ink, but decide not to digitise this explorations as everything must be organic


Chapter 2: Technique
Natural Dyeing
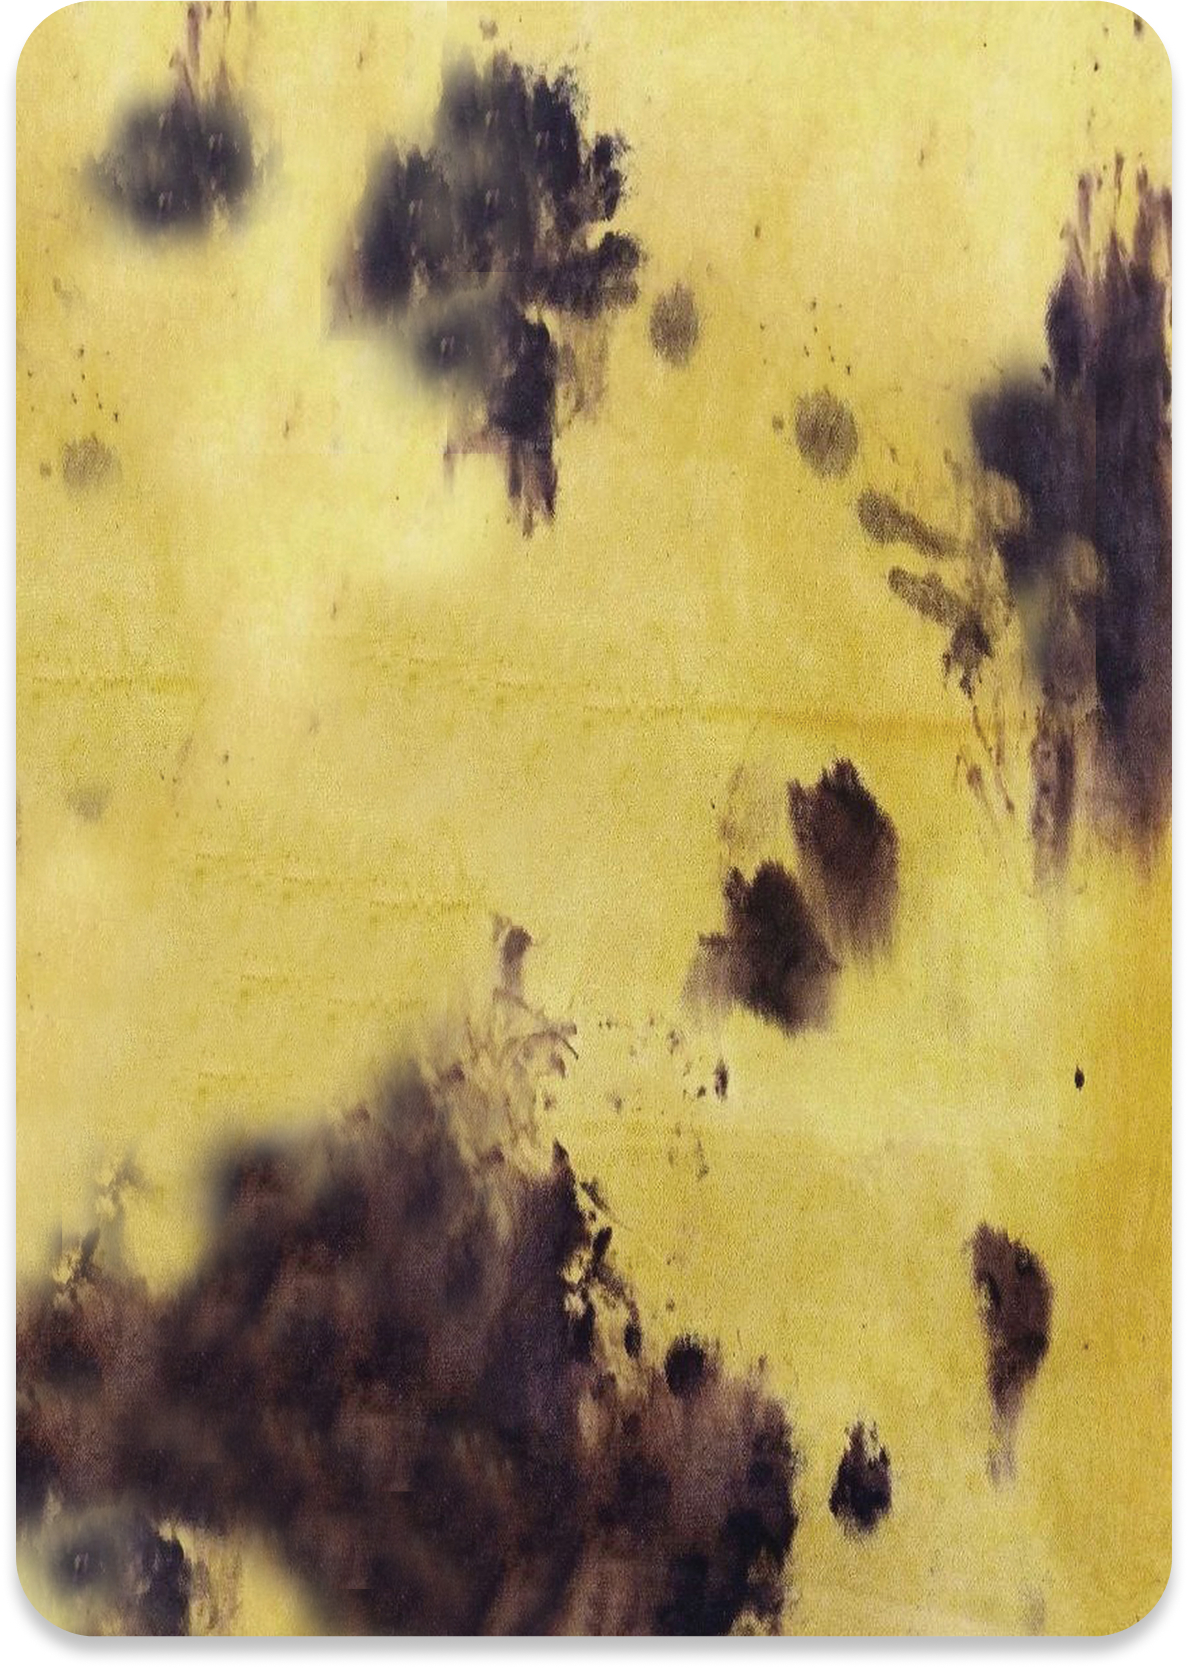
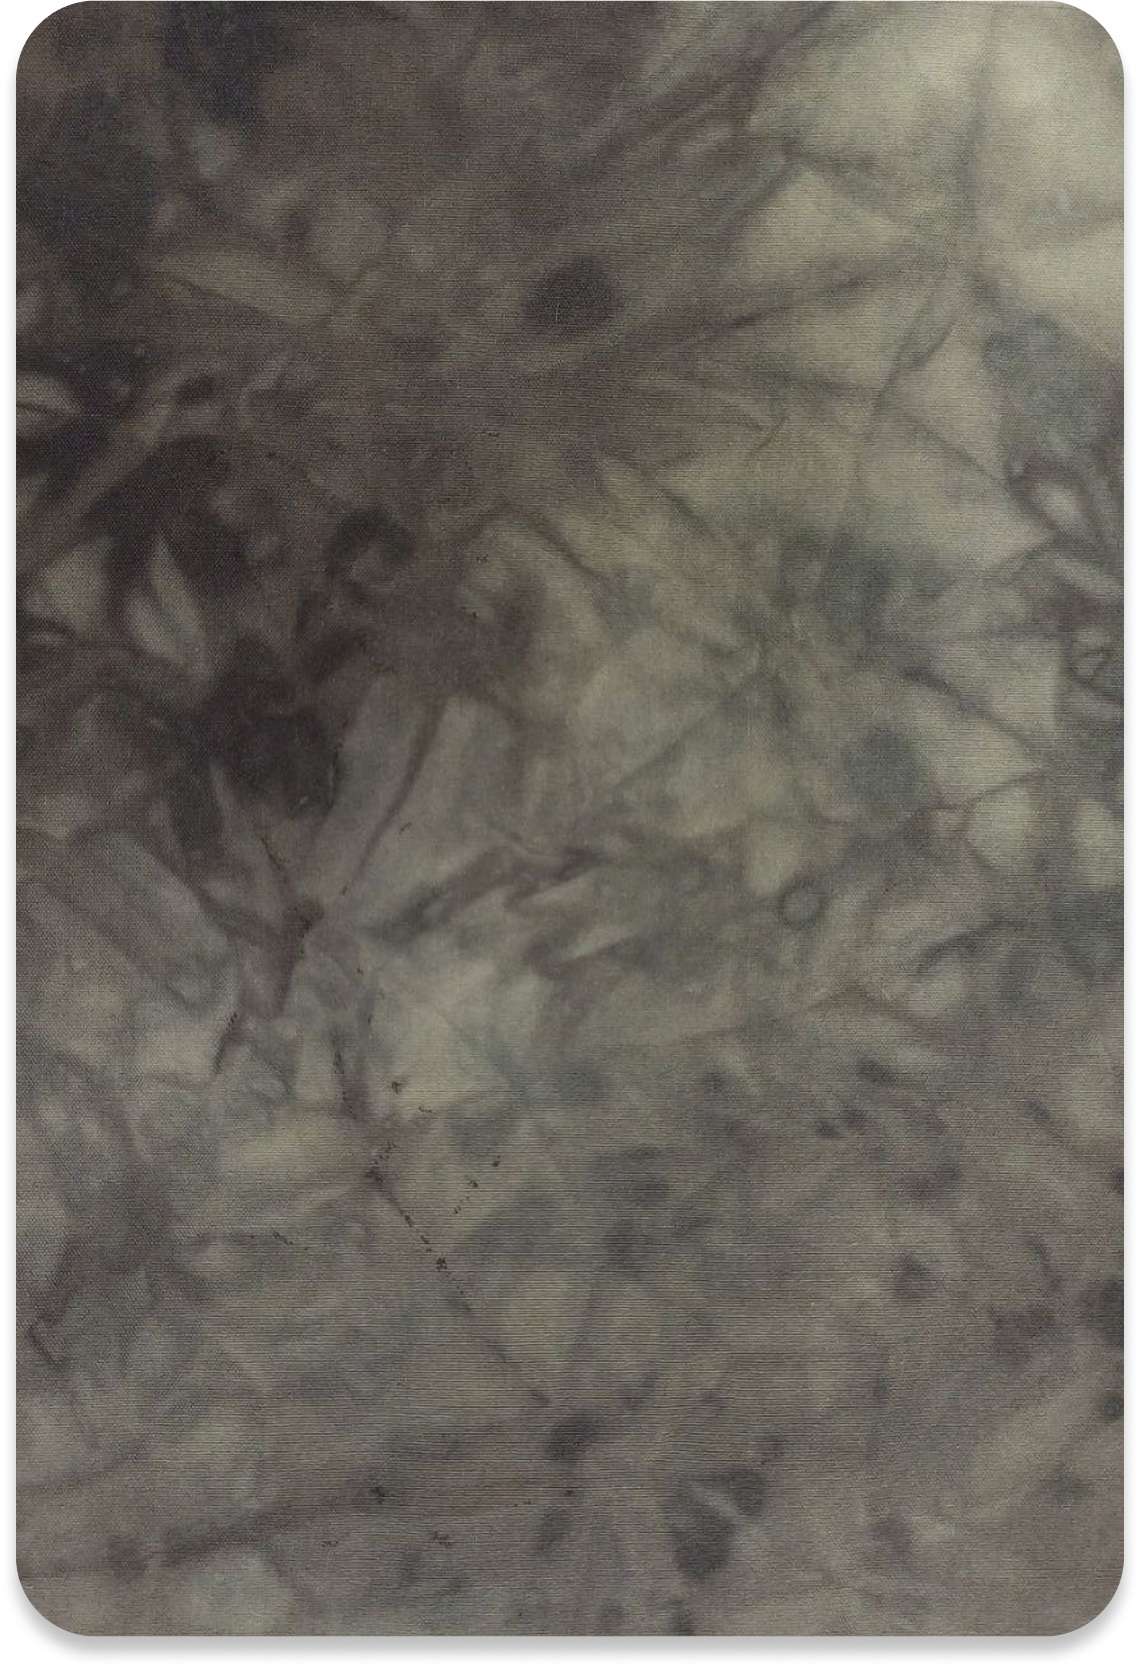
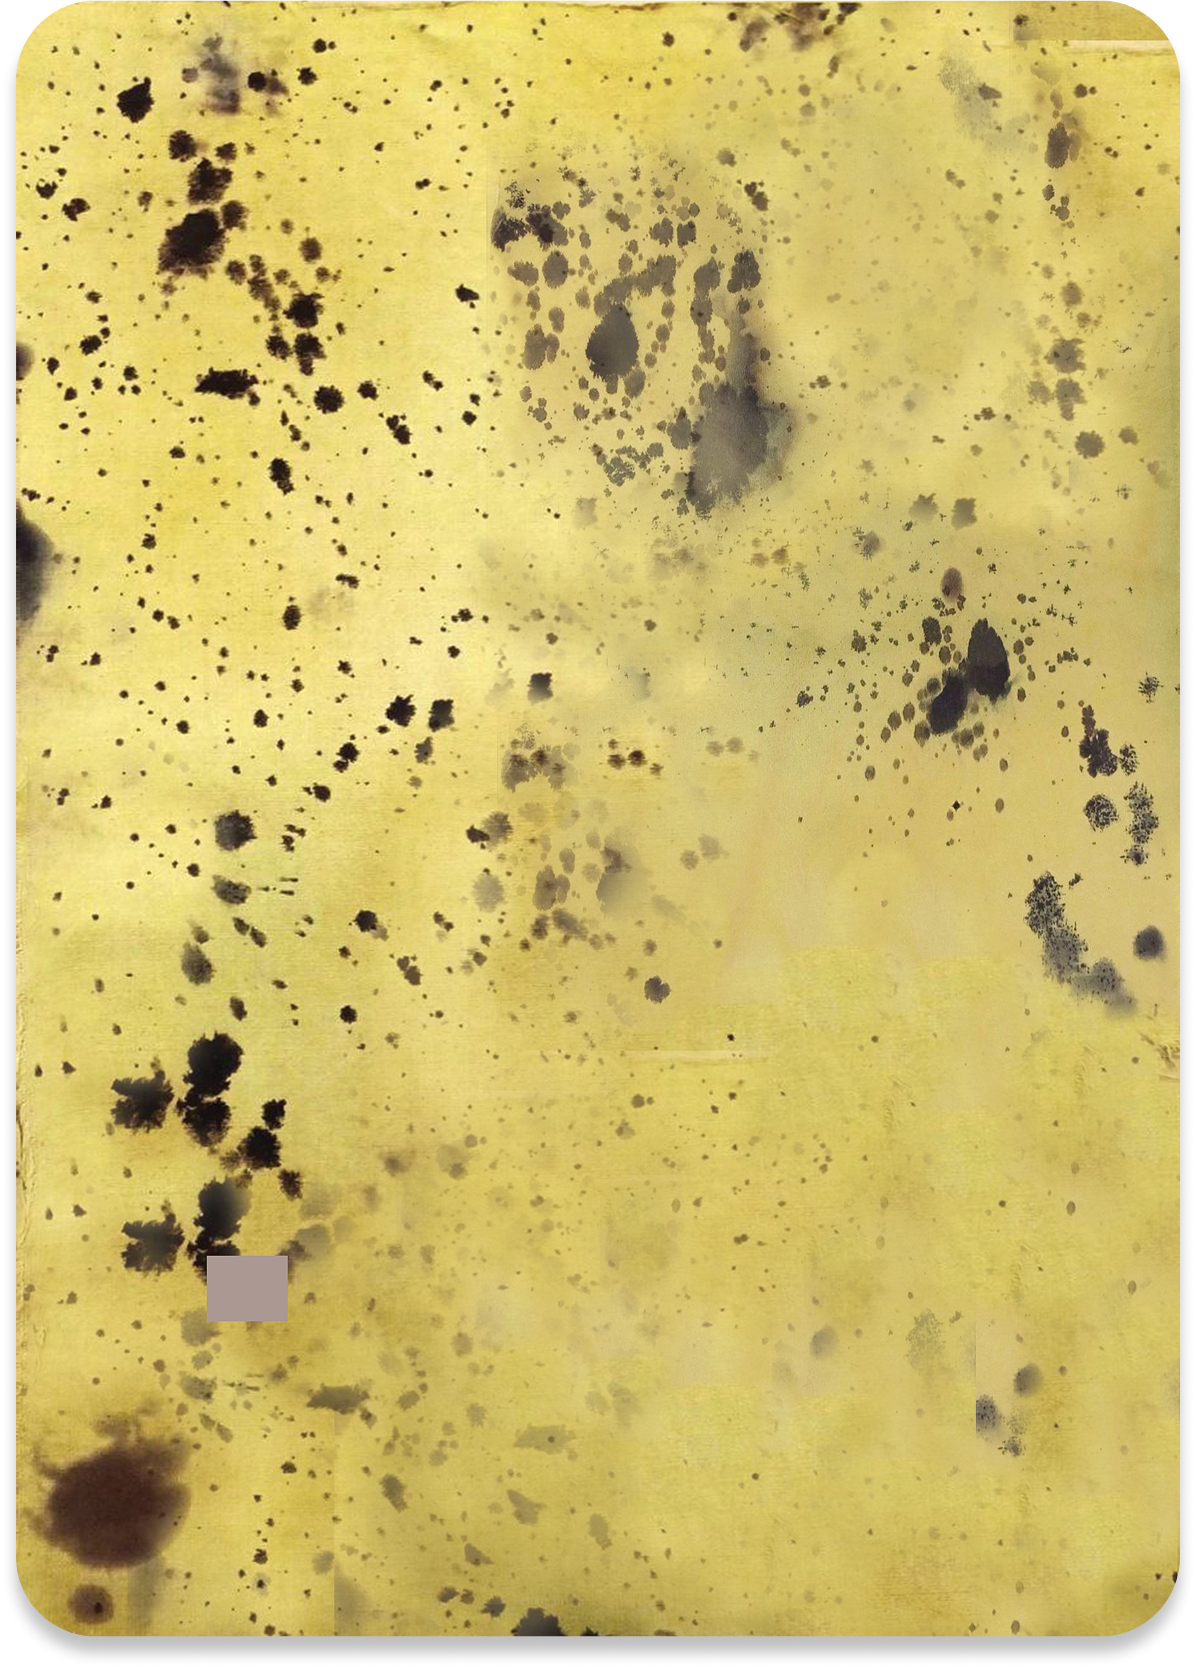
The motif exploration eventually led me to using natural dyes with modifiers to mimic the blooms found in decay patterns. Modifiers—such as iron, acid, or alkali—most of the time alter the colour of a dye after it’s applied, allowing one base dye to produce multiple hues. This reactive process mirrors the way decay evolves gradually, creating organic contrasts and unexpected transitions across the fabric surface.
Tested different fibres, different ways of modifiers application mostly with myrobalan dye because of their drastic colour changes (black with iron, yellow ochre with soda ash).


Placement pattern with madder root dye

Thinking Scale
Some dyes do not react to modifiers, so maybe overdyeing for organic motifs, through stamping or try rice flour paste for resist dye.
Results will be lower in contrast, adding a softer variation among strong contrasts like the myrobalan dye.
Application like watercolour, tried wet-on-wet and wet-on-dry spray and drip technique for the modifiers.

Wet
Dry

Final Swatches Modifiers Pattern-Making Process

All over motif
Linear motif


A very meditative, going-with-the-flow mark making process
Gradient motif
Soft contrast motif
Placement motif
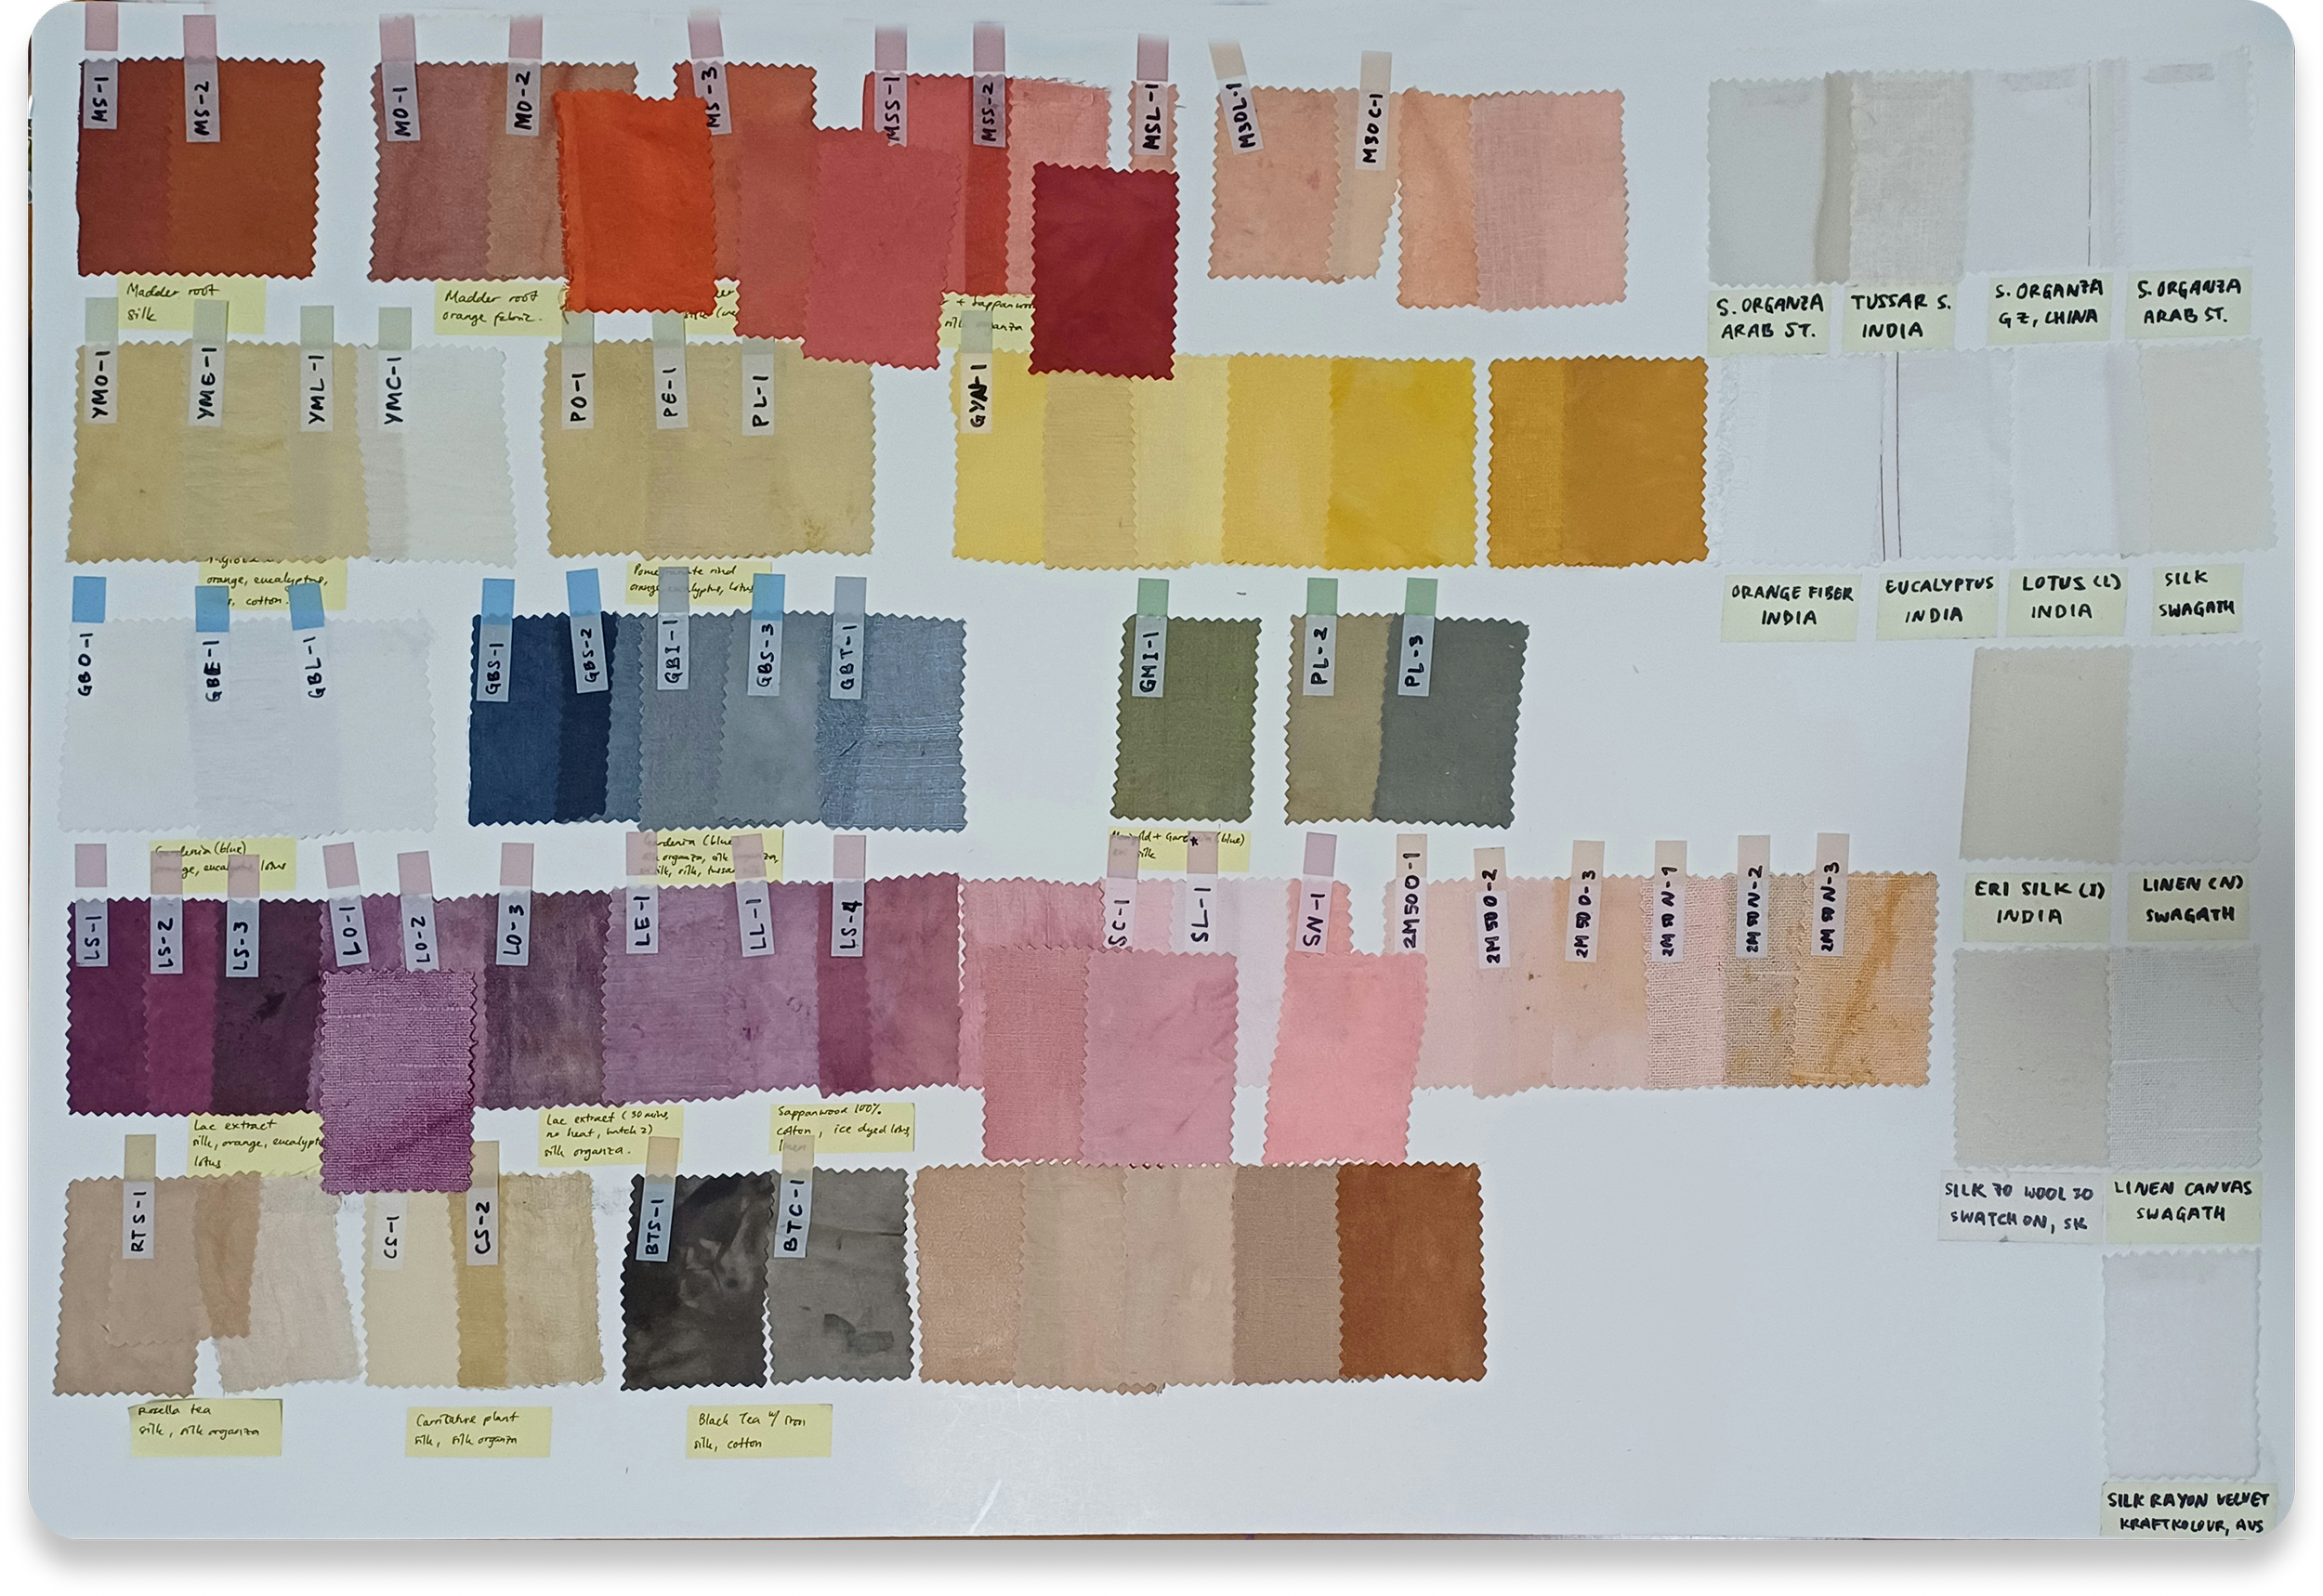
The modifier patterns were already a step toward evolving plain natural-dyed fabrics into something more layered and expressive. For my final submission, I created a full catalogue of colour variations—each dye source applied across all selected fabrics—serving as my low-end swatches and a foundation for further development of textures and form.
Embroidery & Beading
To challenge the perception that sustainable textiles are plain and overly organic-looking, I began by exploring ways to add texture—starting with hand embroidery and beading to introduce craftsmanship as well as mimic nature’s textures.

Embroidery stitches as base to add texture. To try dense french knots to create an organic look, like moss.
Hand Embroidery Exploration
However, personally I don’t like doing french knots because of their inconsistencies and odd tails when not done right. So I tried different alternative knots to see which works better.


Living Textiles
While exploring surface techniques with biodegradability in mind, I also experimented with living textiles—growing plants directly on fabric as a way to rethink what textiles could become.
Though I chose not to continue this technique in the final project, the research remains ongoing, inspired by pioneers like Paula Ulargui who push the boundaries of material and life.
[read here for more]
Beading Exploration
First I tried different ways of highlighting the existing dark spots from the modifiers, tone-on-tone. I tried both glass and wooden beads, a more eco-conscious choice as they are recyclable.

Overall the wooden beads and embroidery is too flat and gives off a rustic feel, not exactly the “elevated textile” look I want.
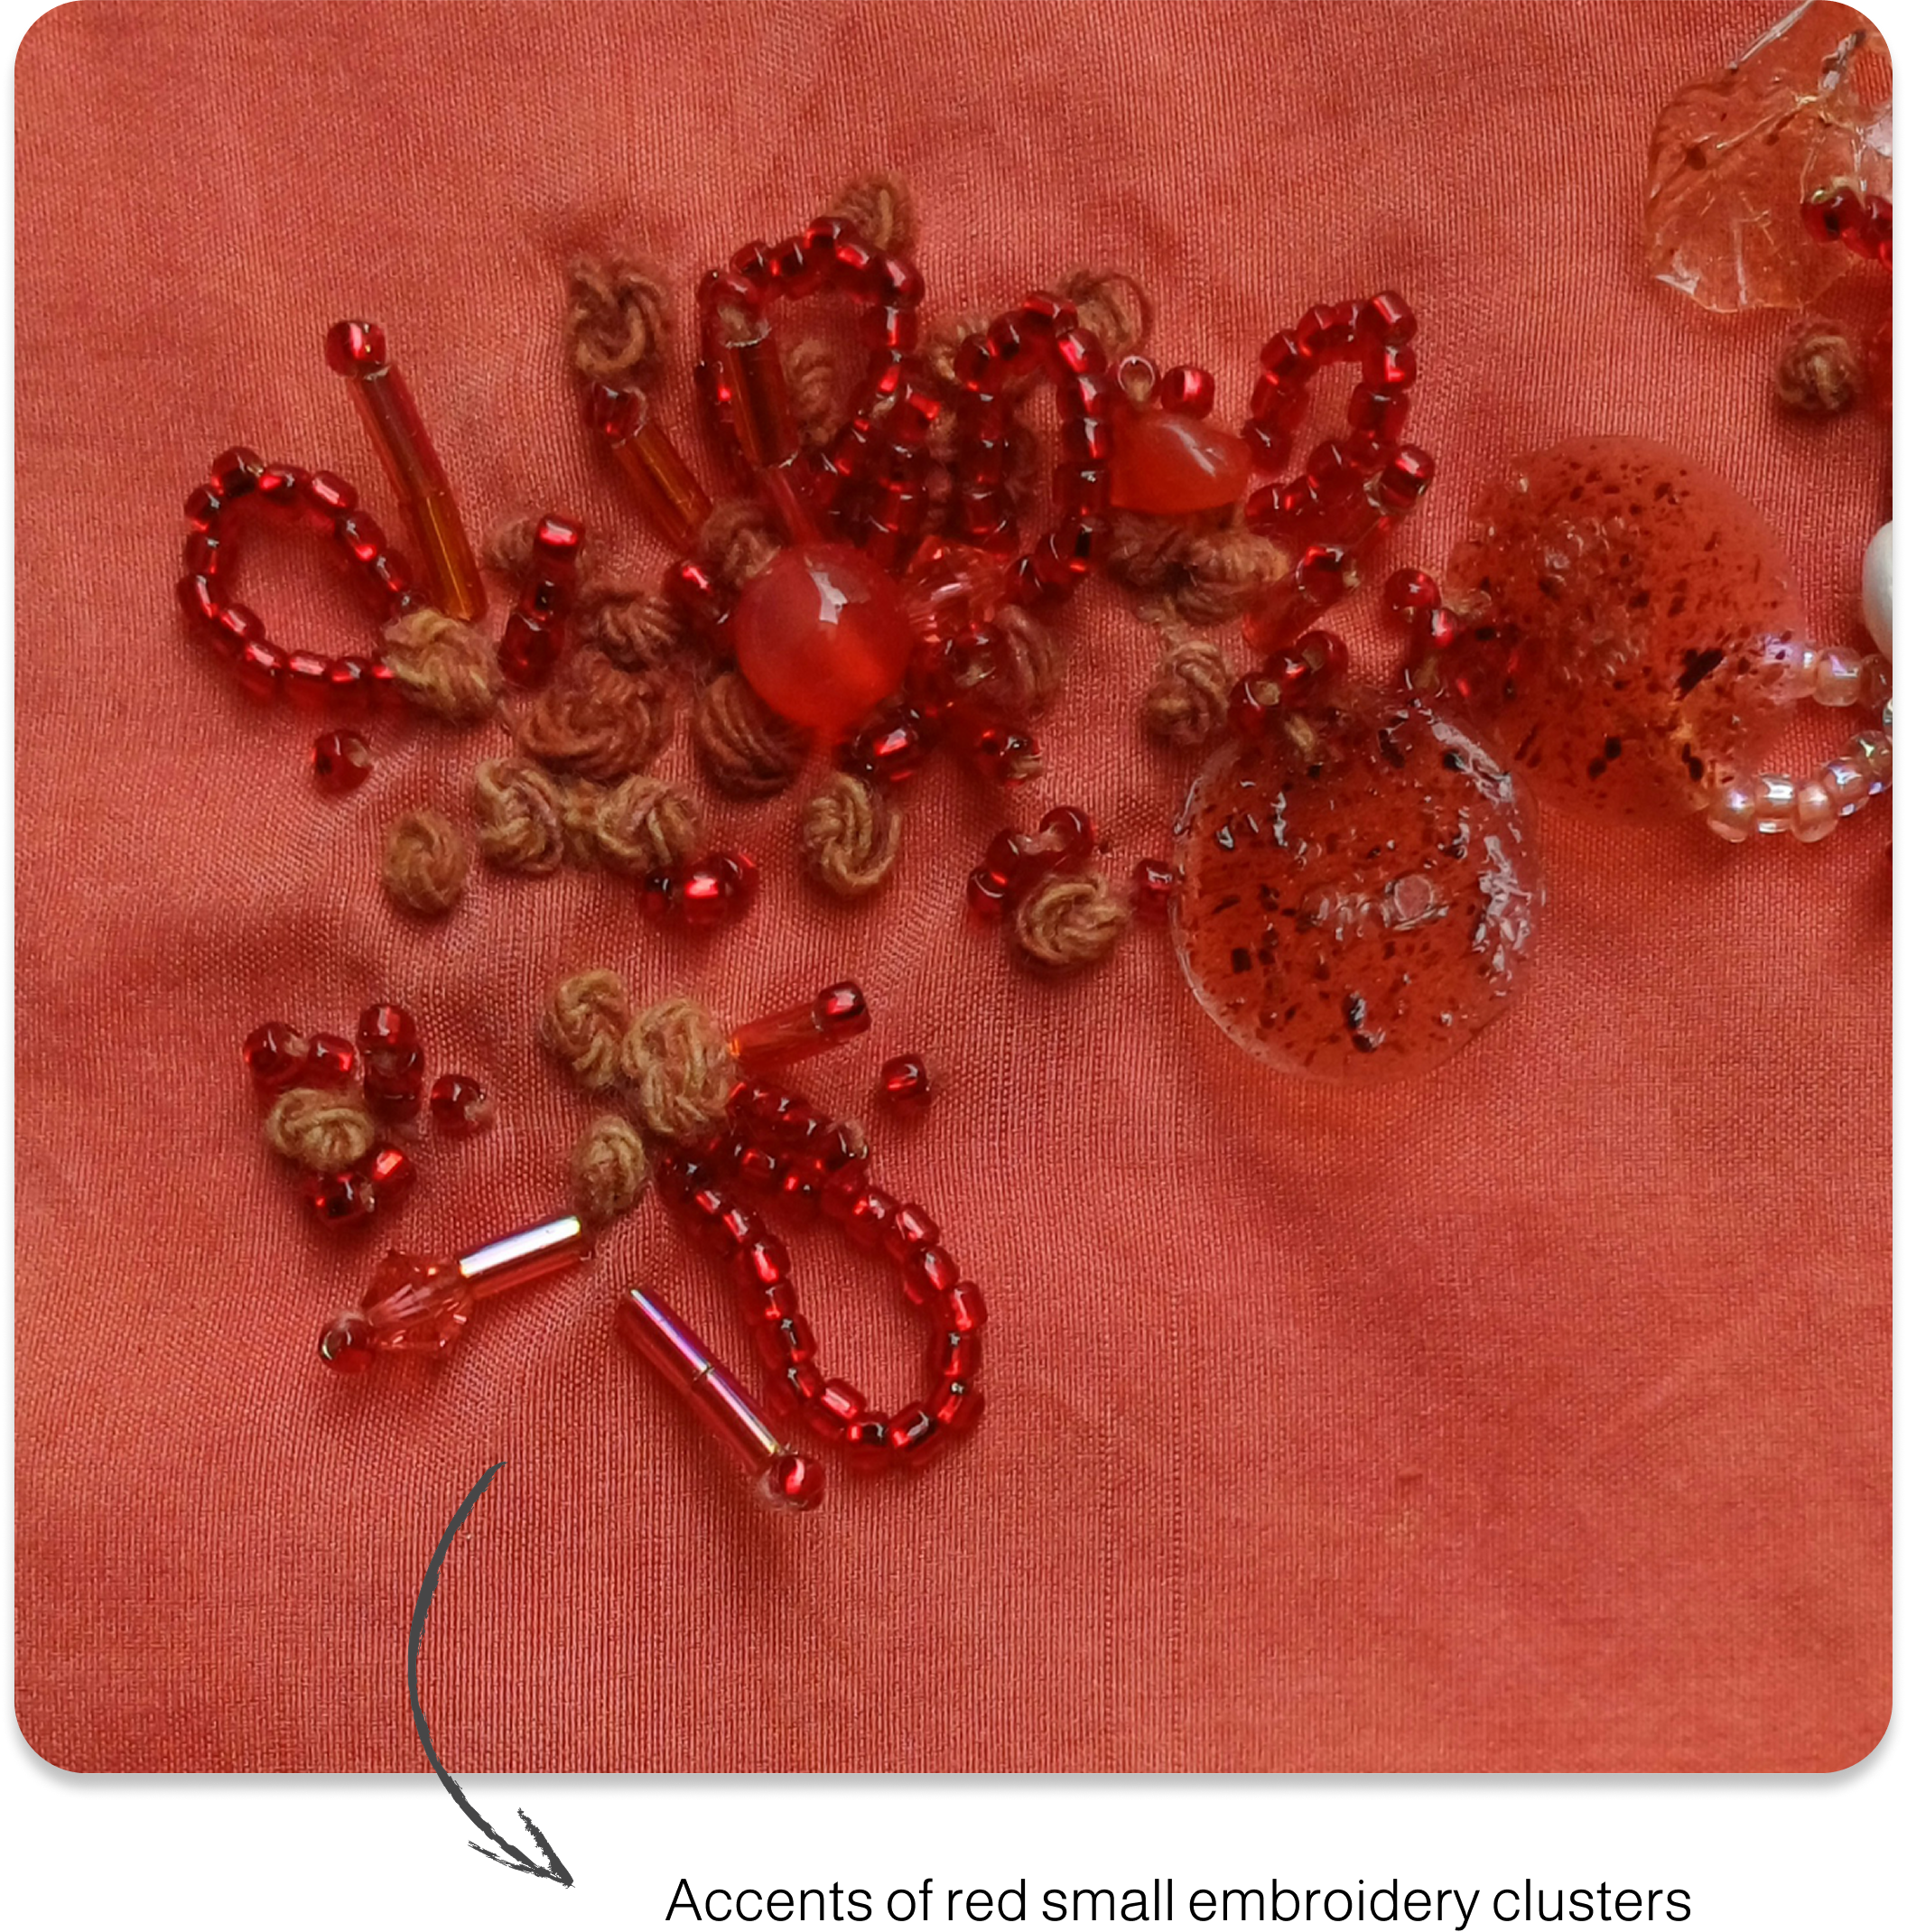
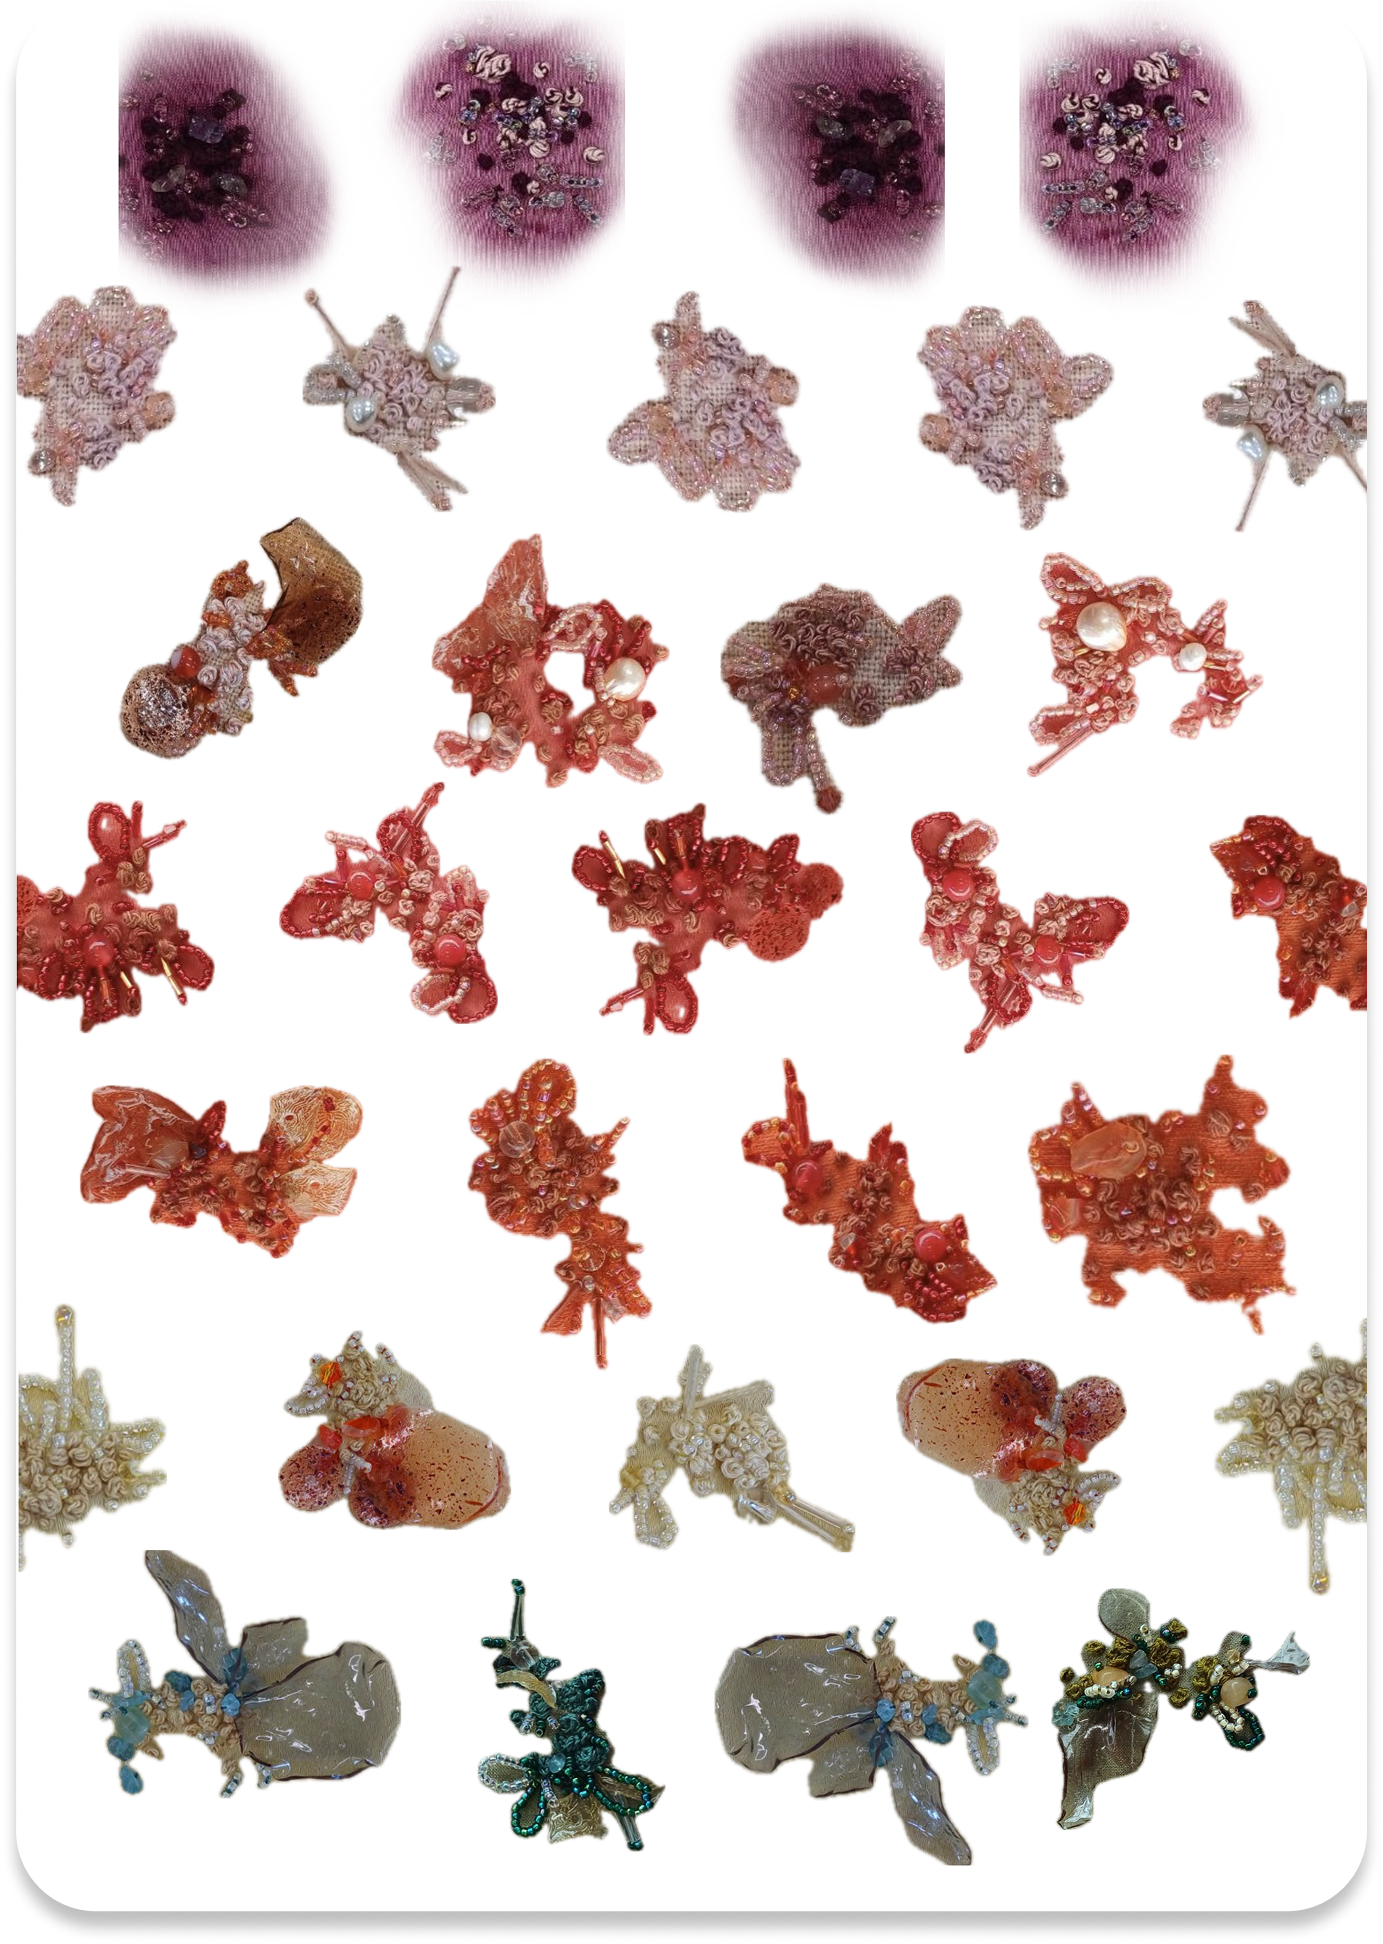
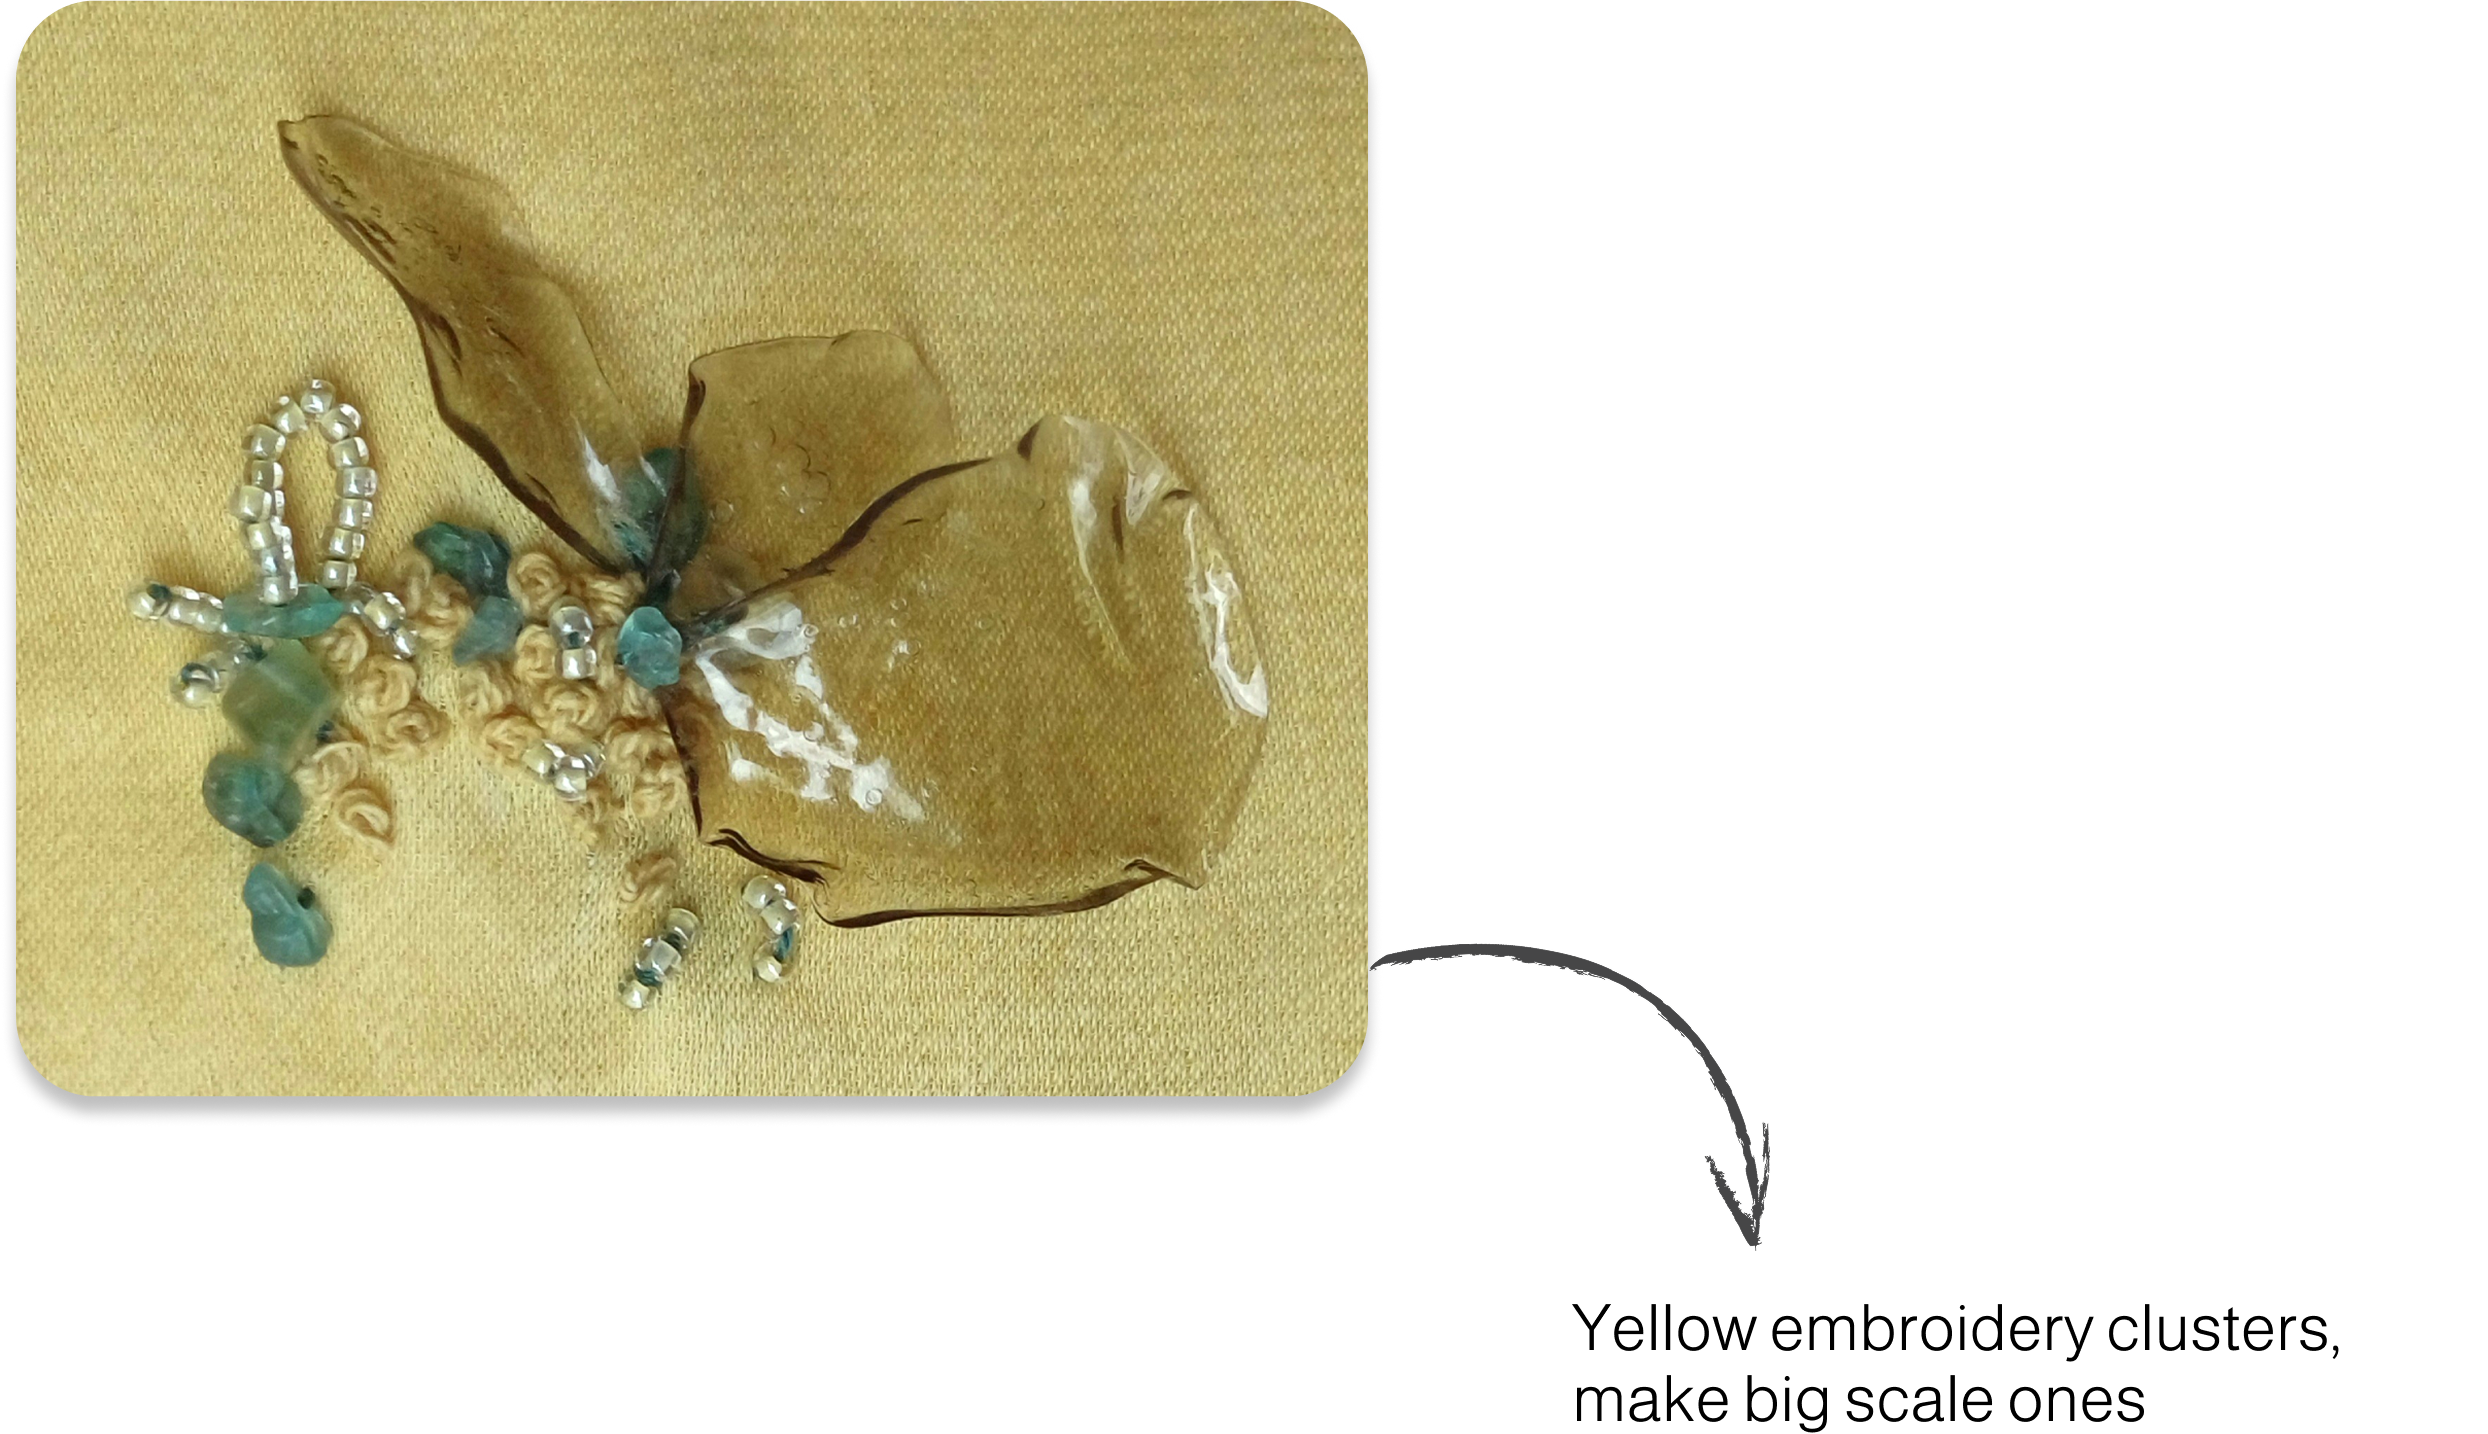
I moved forward with both small and large-scale embroidery clusters—smaller ones featuring denser beading and more 3D arrangements, while larger clusters focused on denser French knots with scattered sand-glass beads to subtly catch the light.
Small Embroidery Clusters
Large Embroidery Clusters

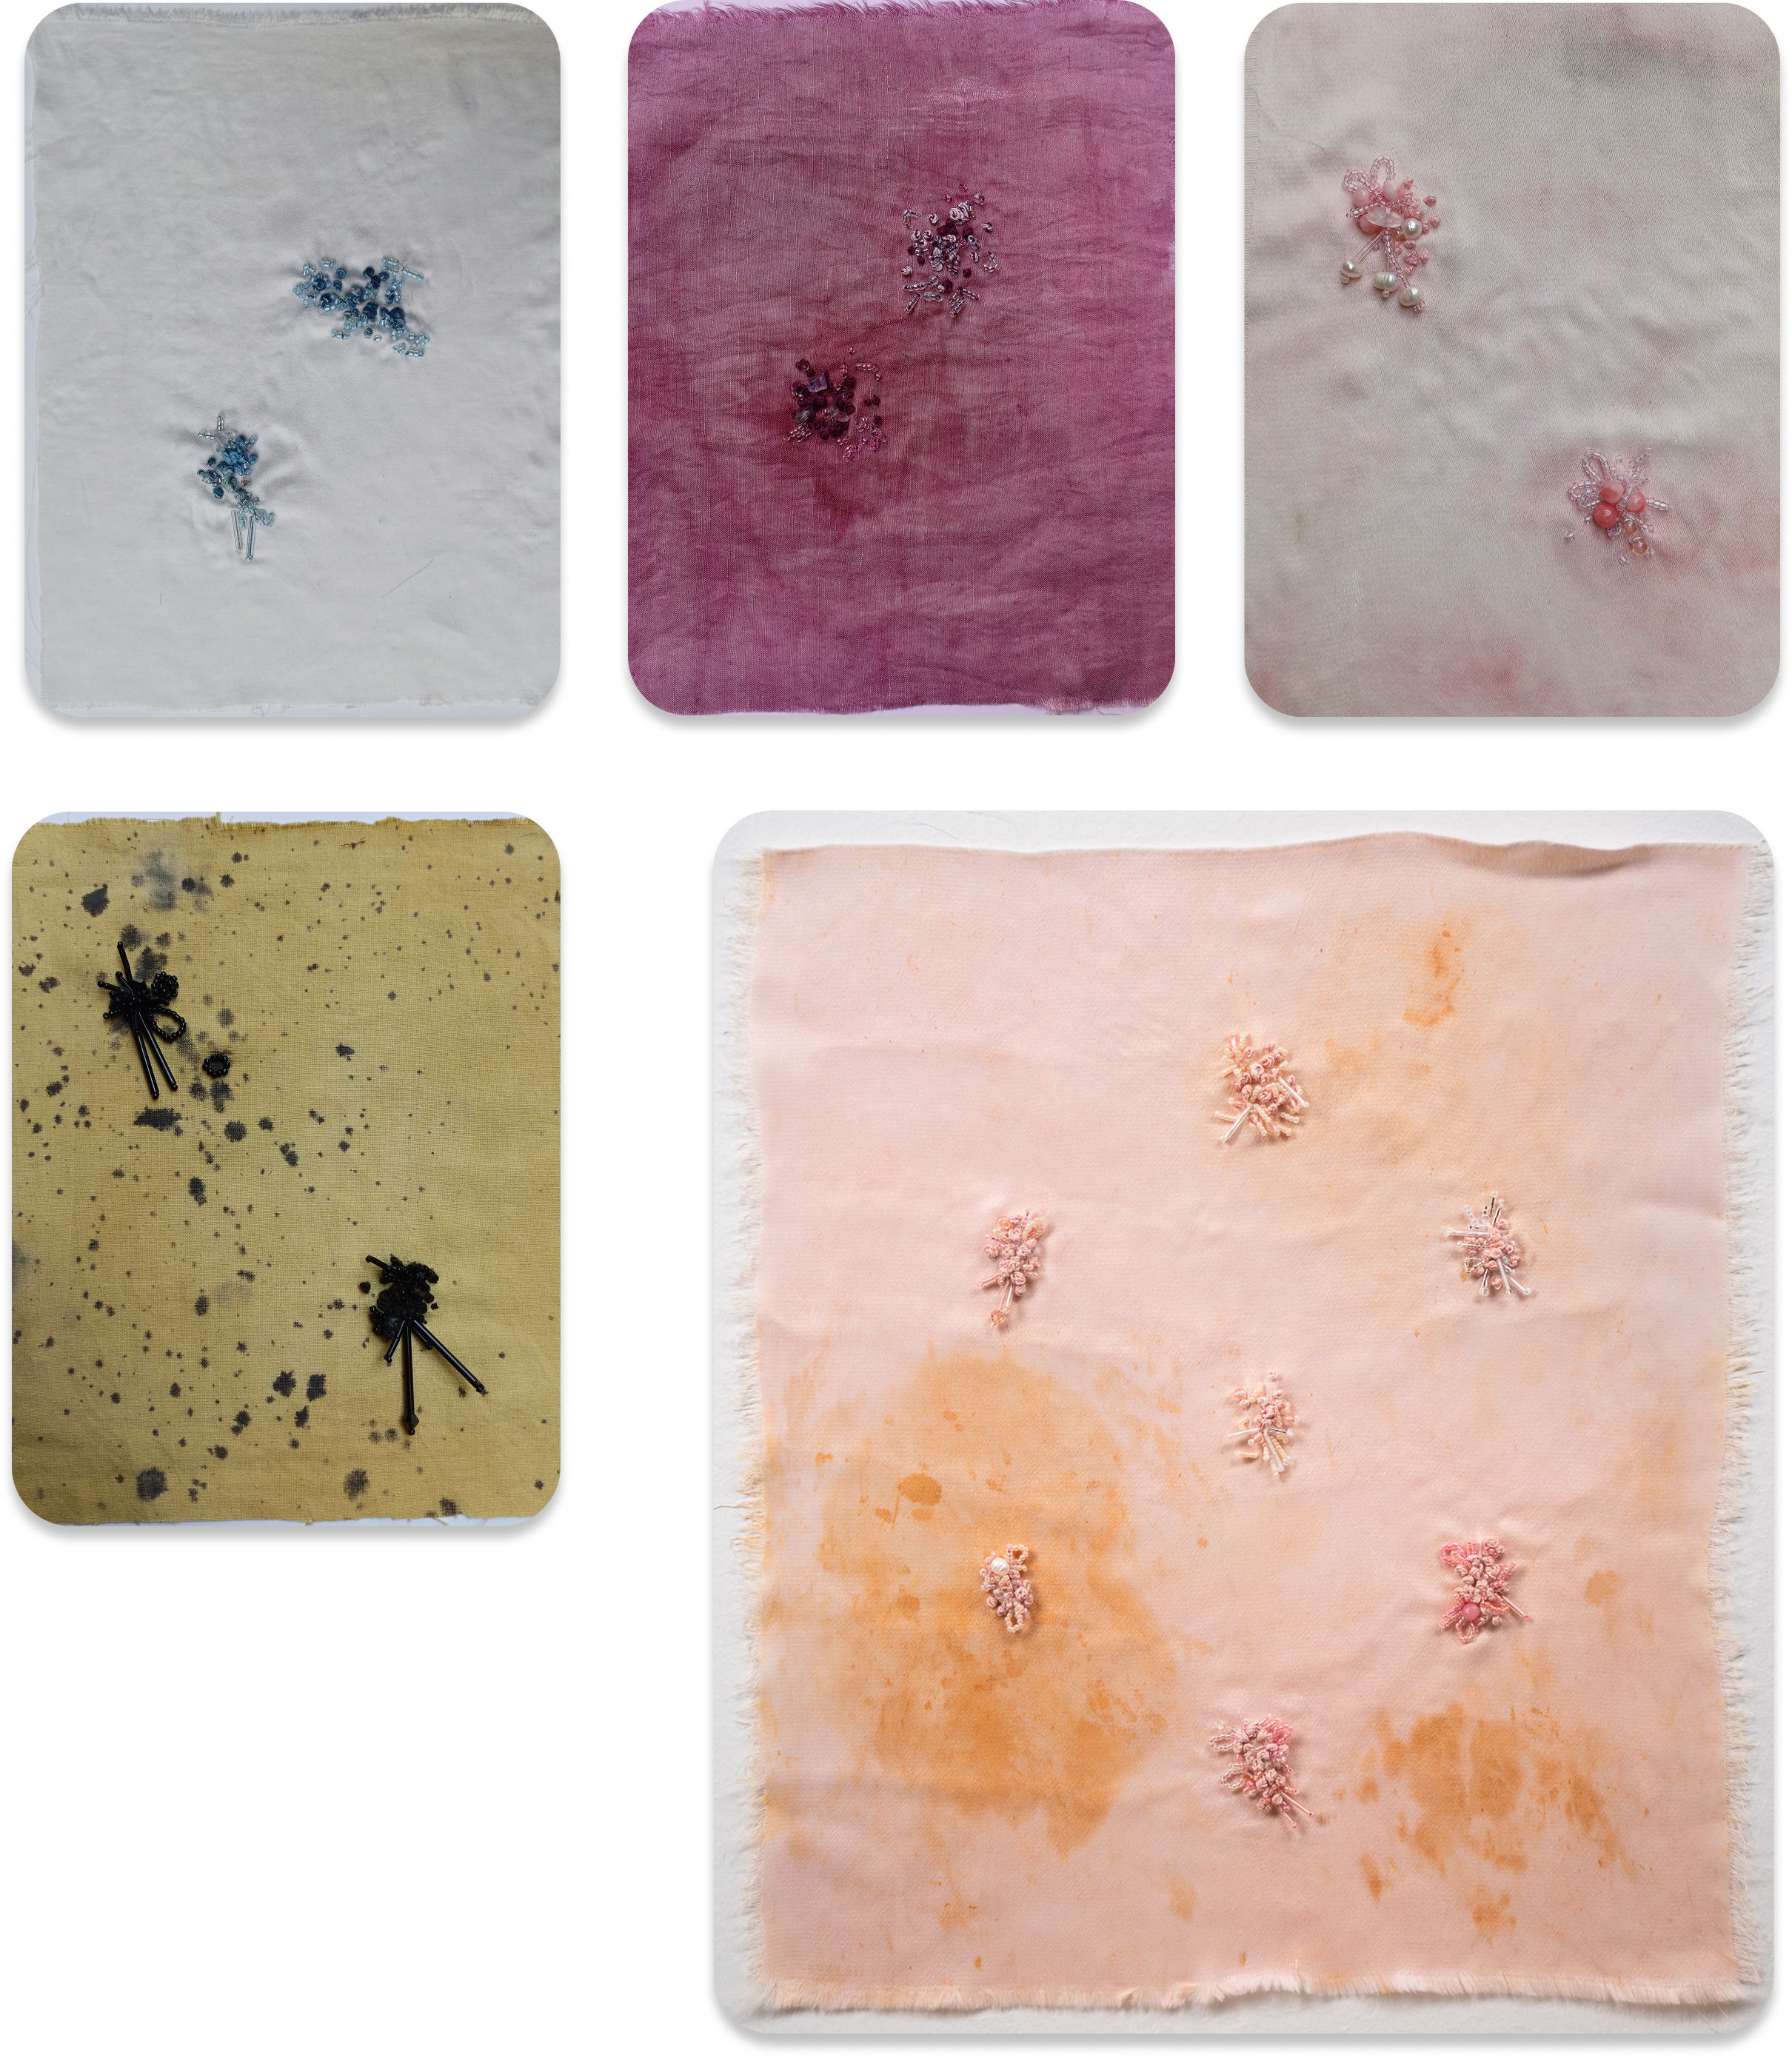
The embroidery and beading clusters build on the base of natural dye and modifiers—adding texture and detail.
But it still raised the question: how else can we make sustainable textiles more interesting?
Bioplastics Exploration
In search of biodegradable ways to create form and detail, I began experimenting with bioplastics as a technique for sculptural, 3D embellishments. The first thought is to find an alternative for sequins as well, like flat circular beads.
Bioplastic as Beading

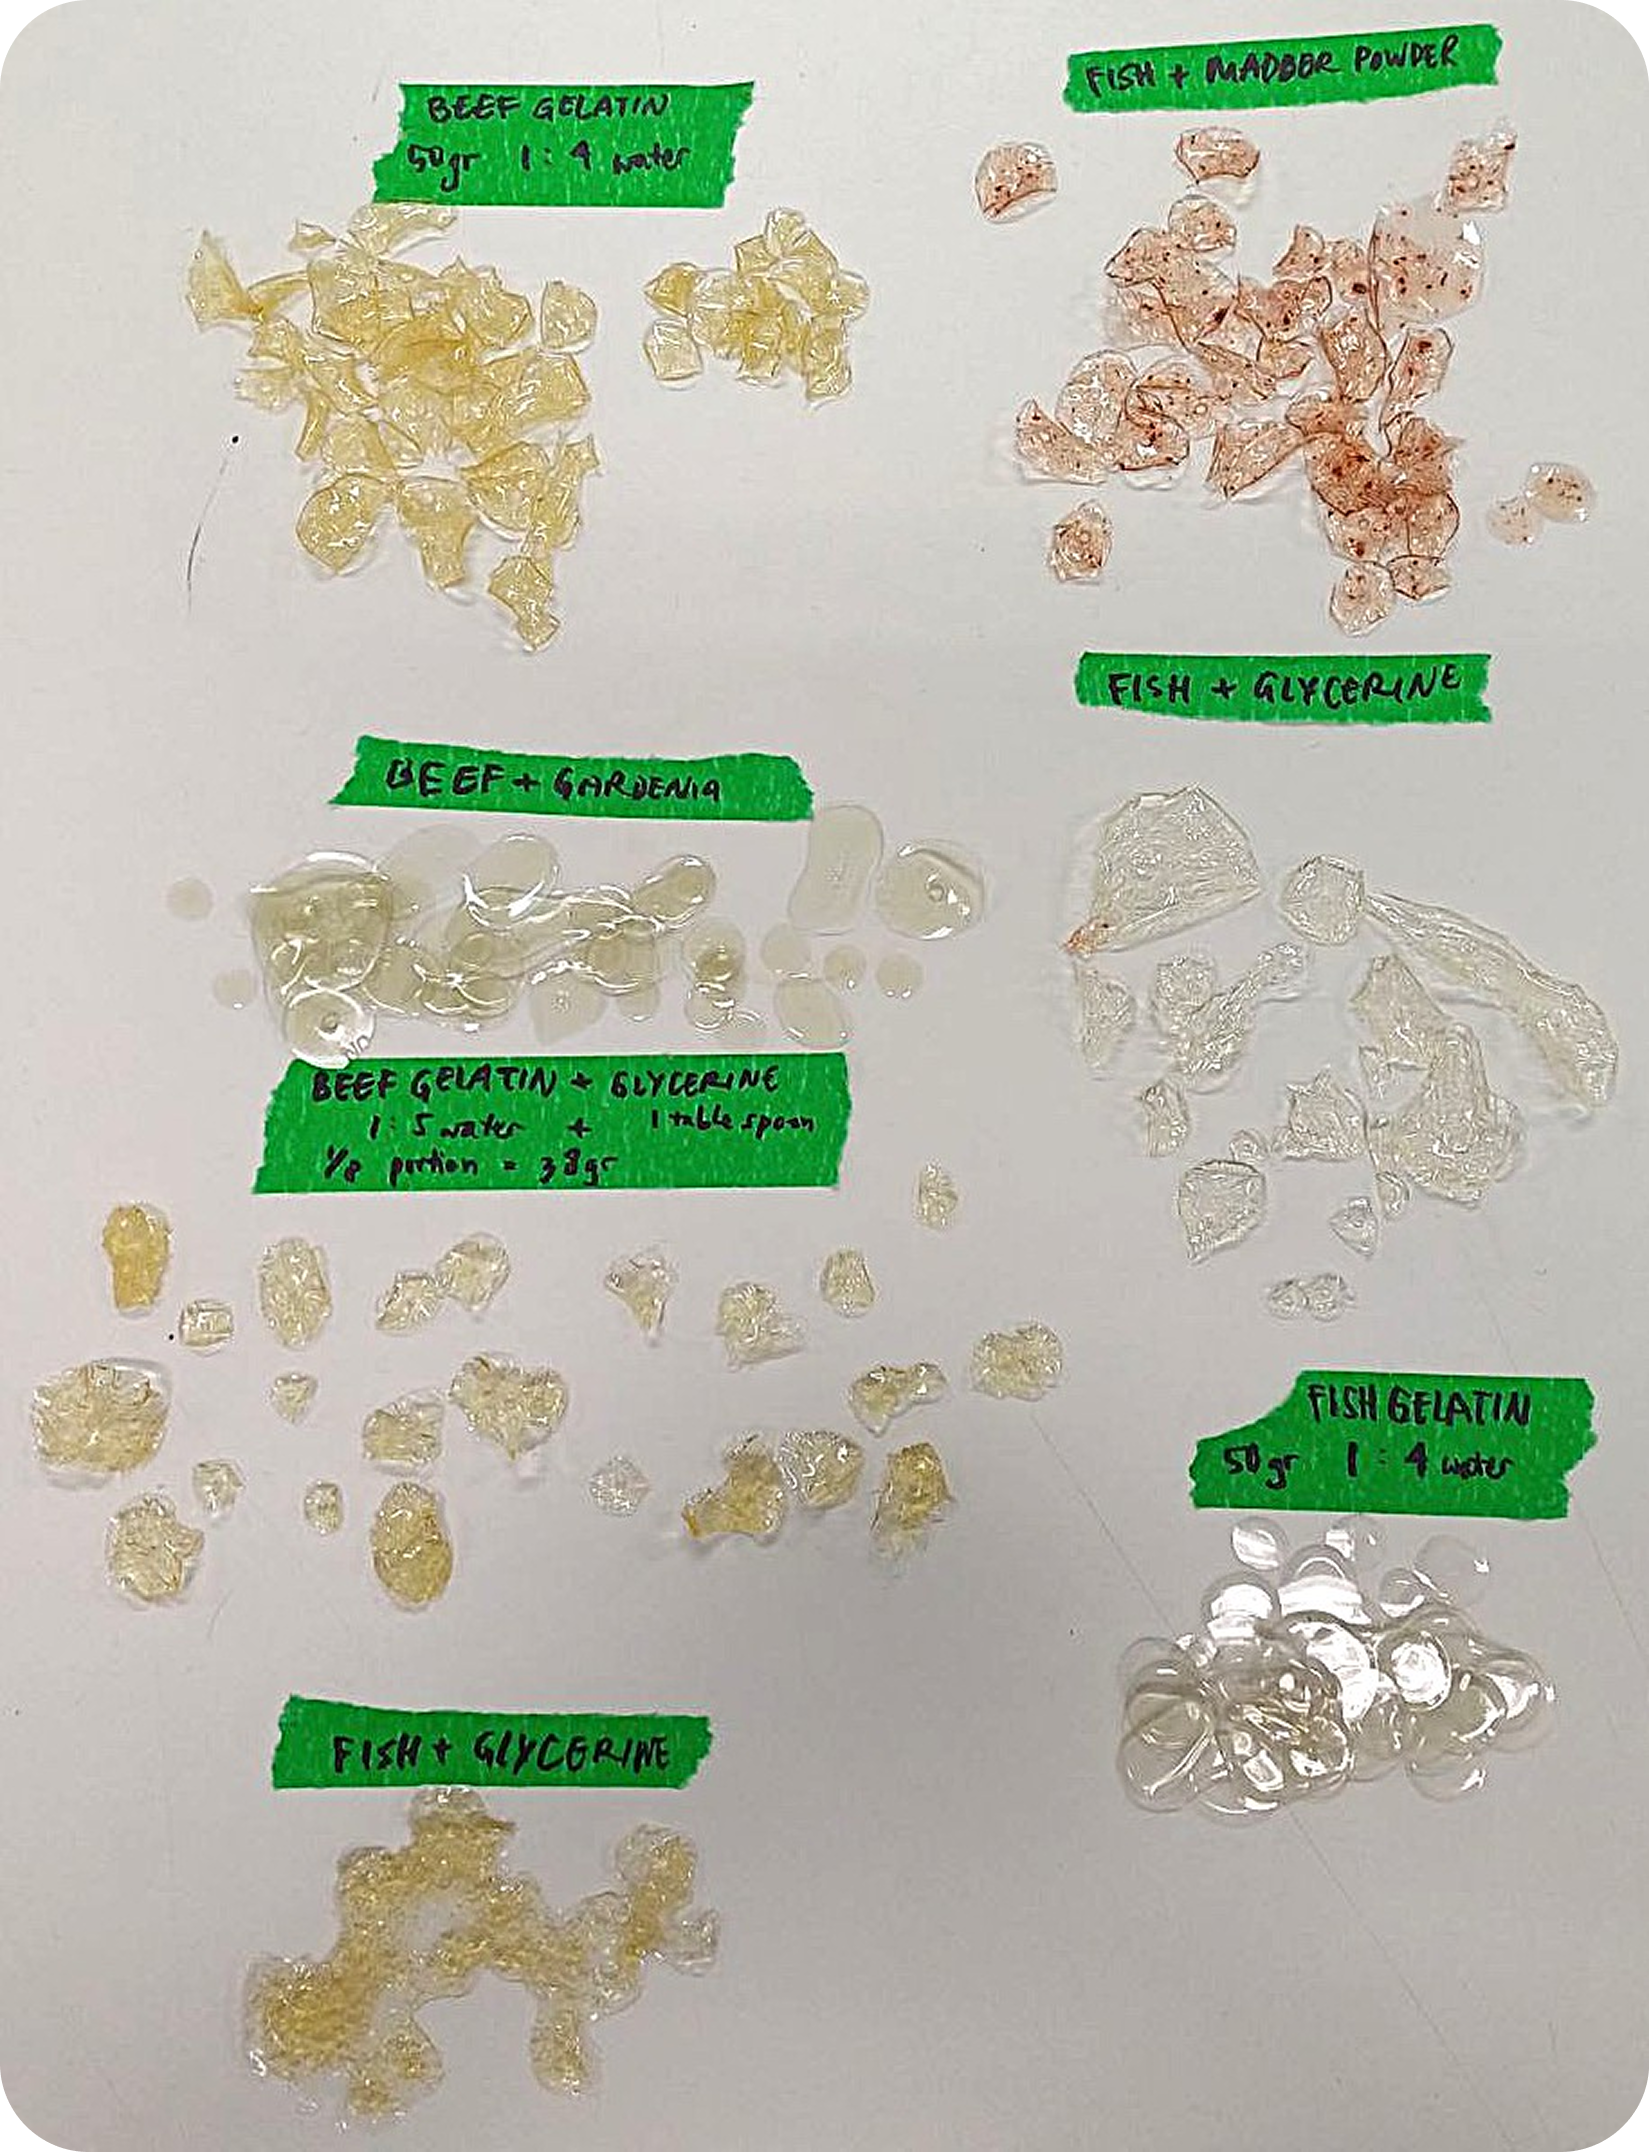
Fish gelatin dries up clear, while beef gelatin dries up yellow. To explore more colour I boil some of my exhausted dye baths and use those instead of water to dissolve the gelatin, implementing that nothing goes to waste. Of course the yellowness of the beef gelatin affects the final colours, so for example with an exhausted gardenia blue dye bath I can get green bioplastics.


MadbyMad’s approach to bioplastics interests me to further explore larger sizes of embellishments and even accessories.


1st bioplastic corset form


2nd bioplastic corset form


From there, I expanded the scale—creating more sculptural pieces, some with jewelry in mind, others as wearable forms like a corset top overlay that blurs the line between garment and art form.
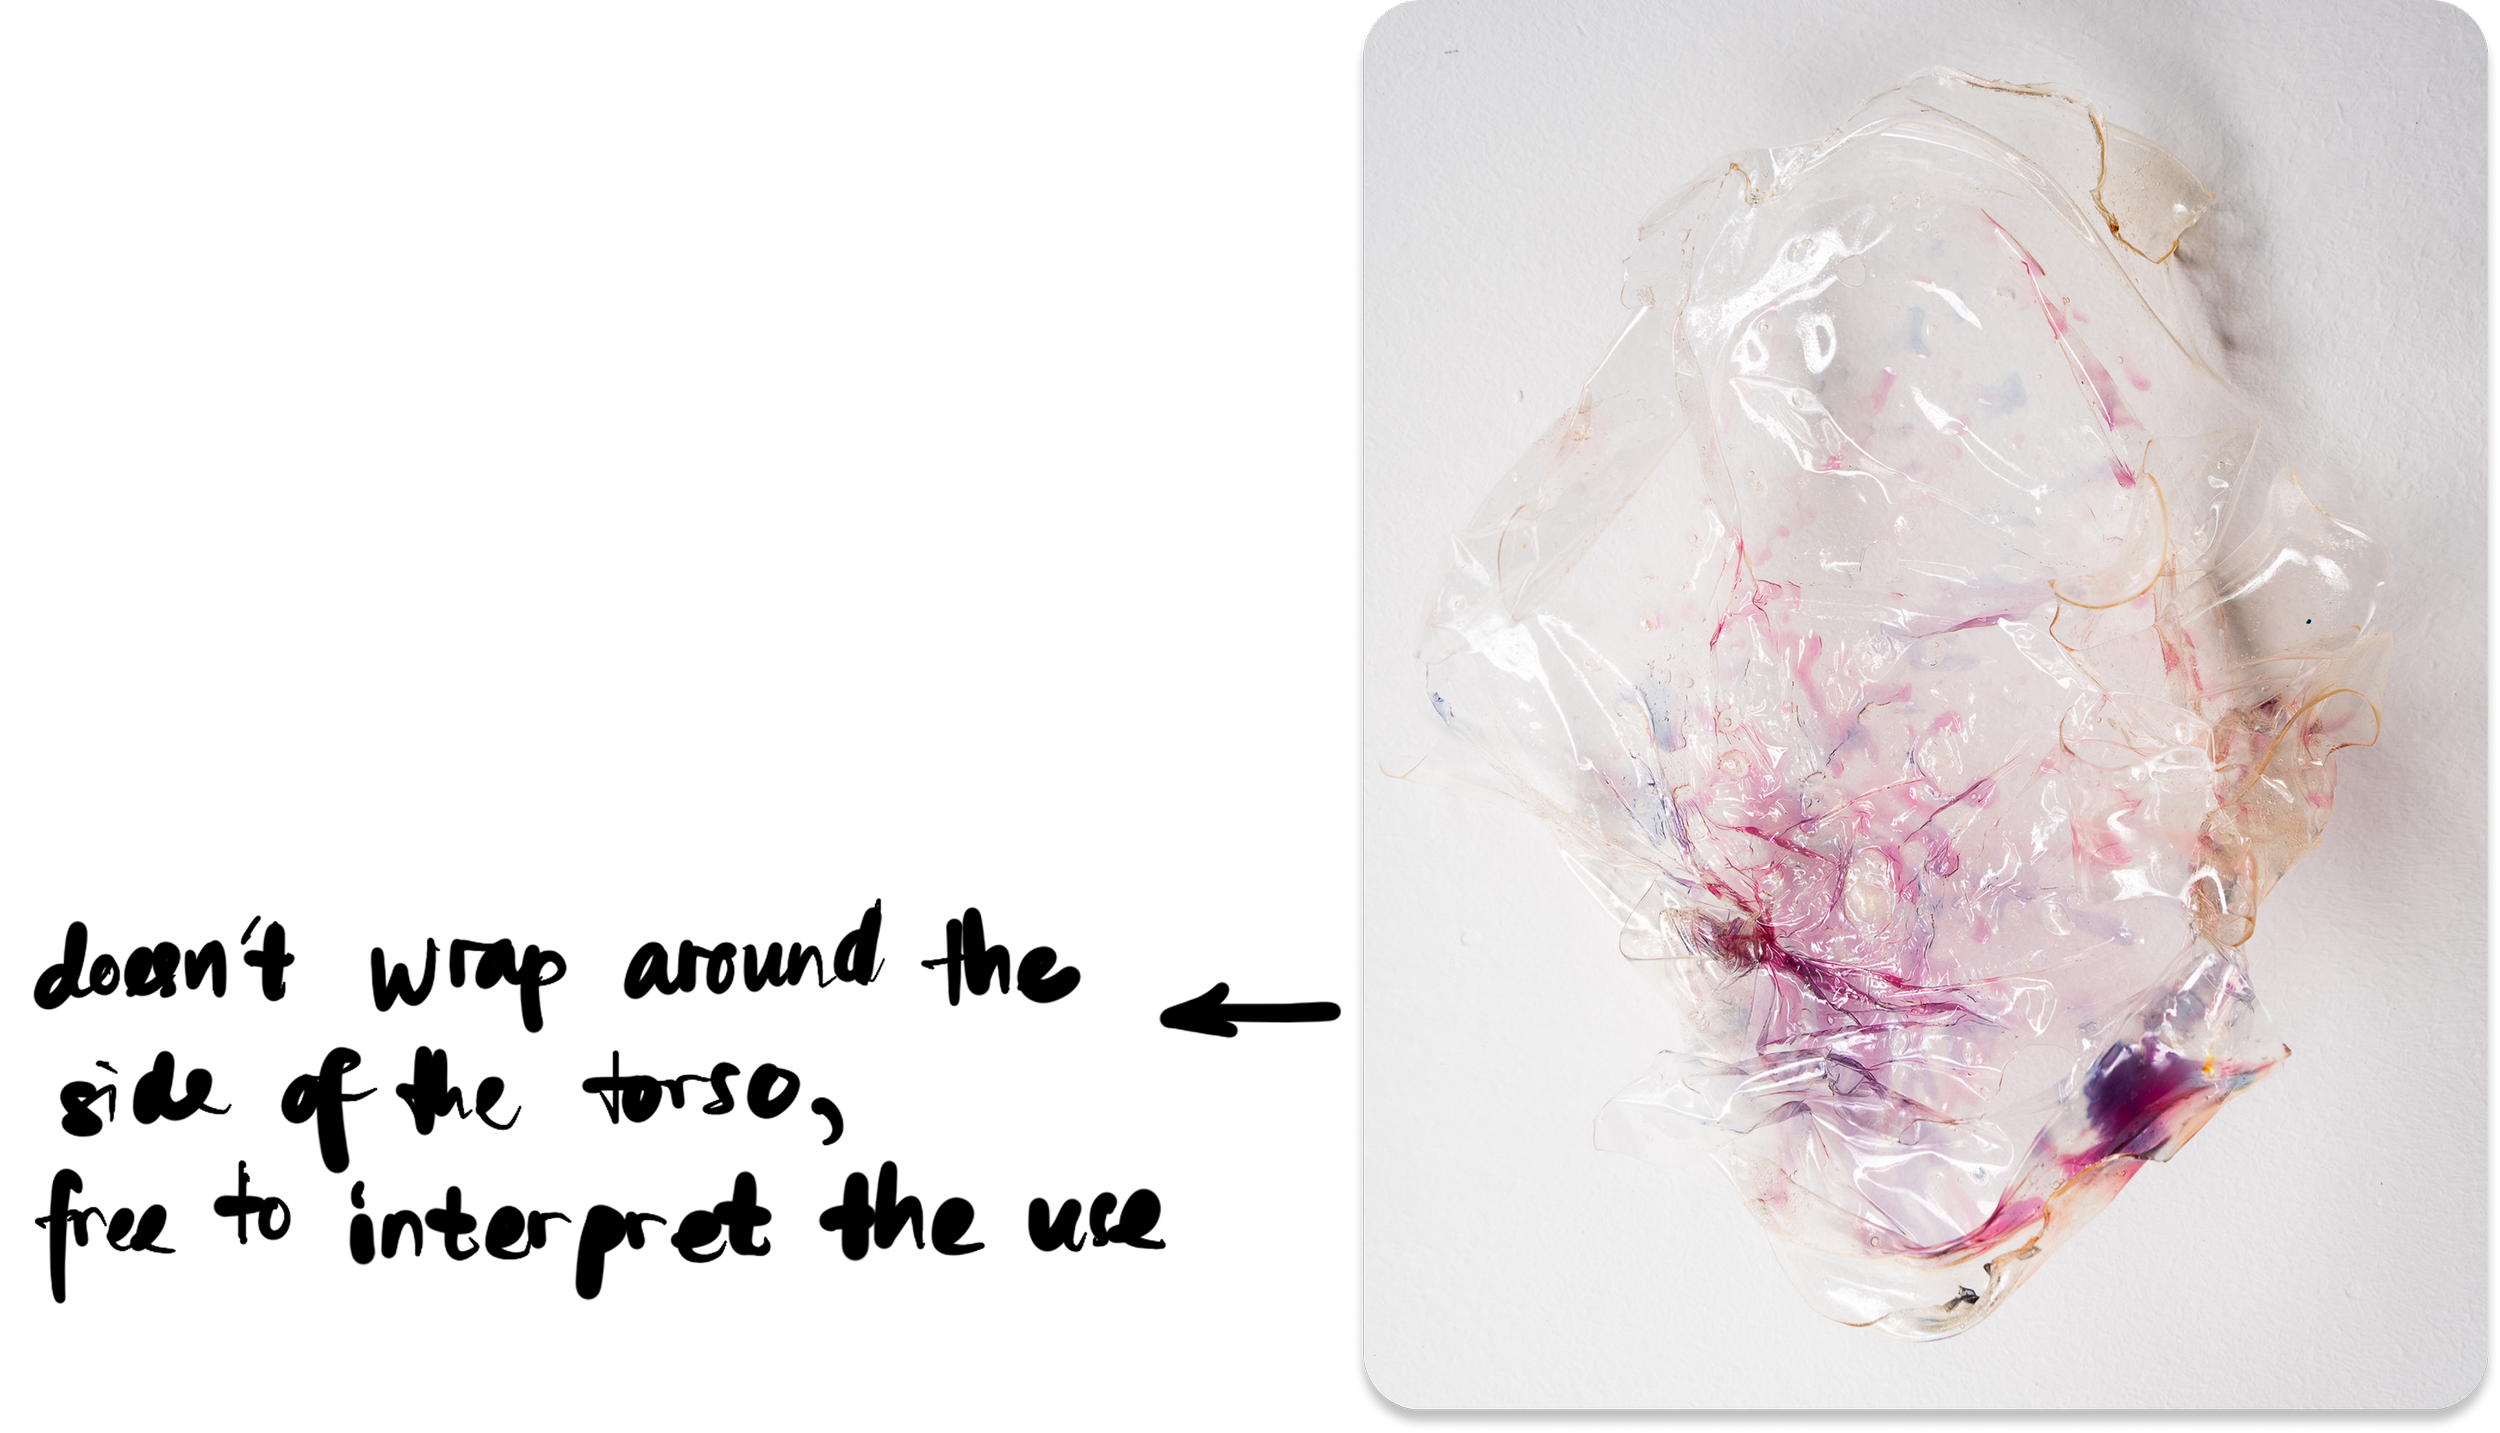
Decided not to continue on this path, just as sculptural art forms that are free for the viewer’s interpretation.
But continued on exploring larger scale embellishments that are more sculptural than beading trims or sequins.


Texture Exploration
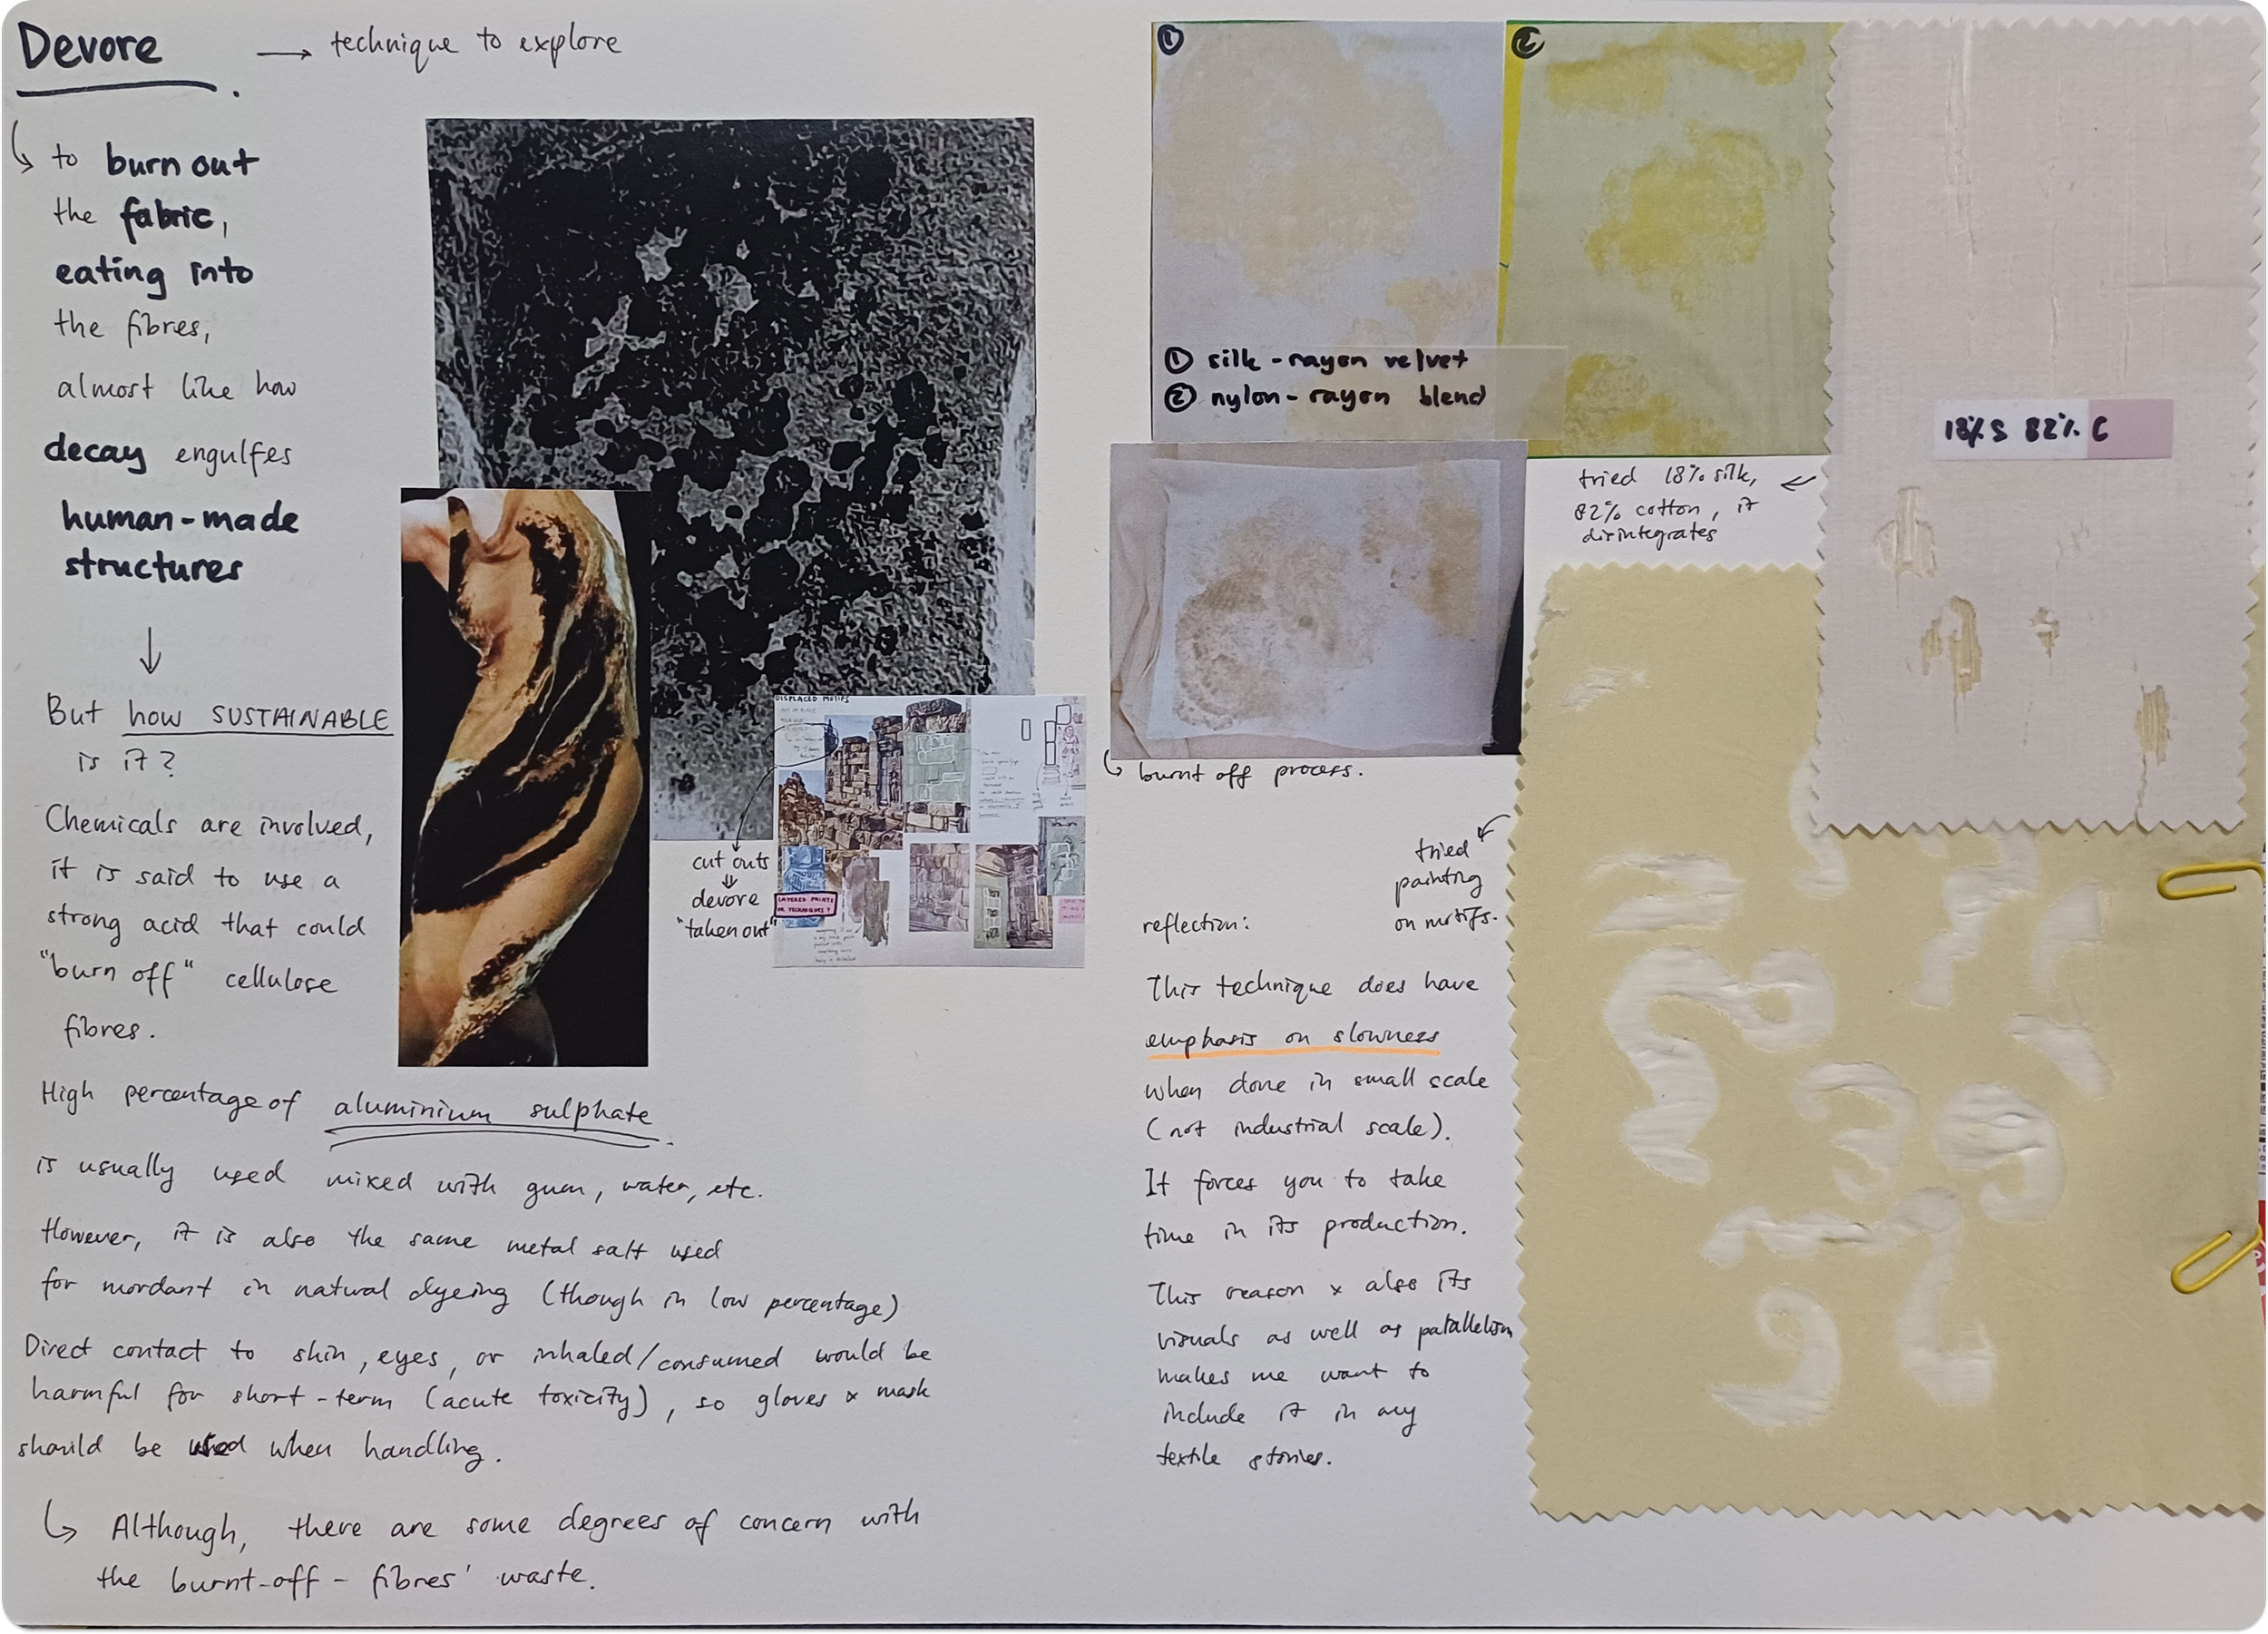
As further exploration into texture, I experimented with devoré and flocking.
Organic motifs through sponge stamping

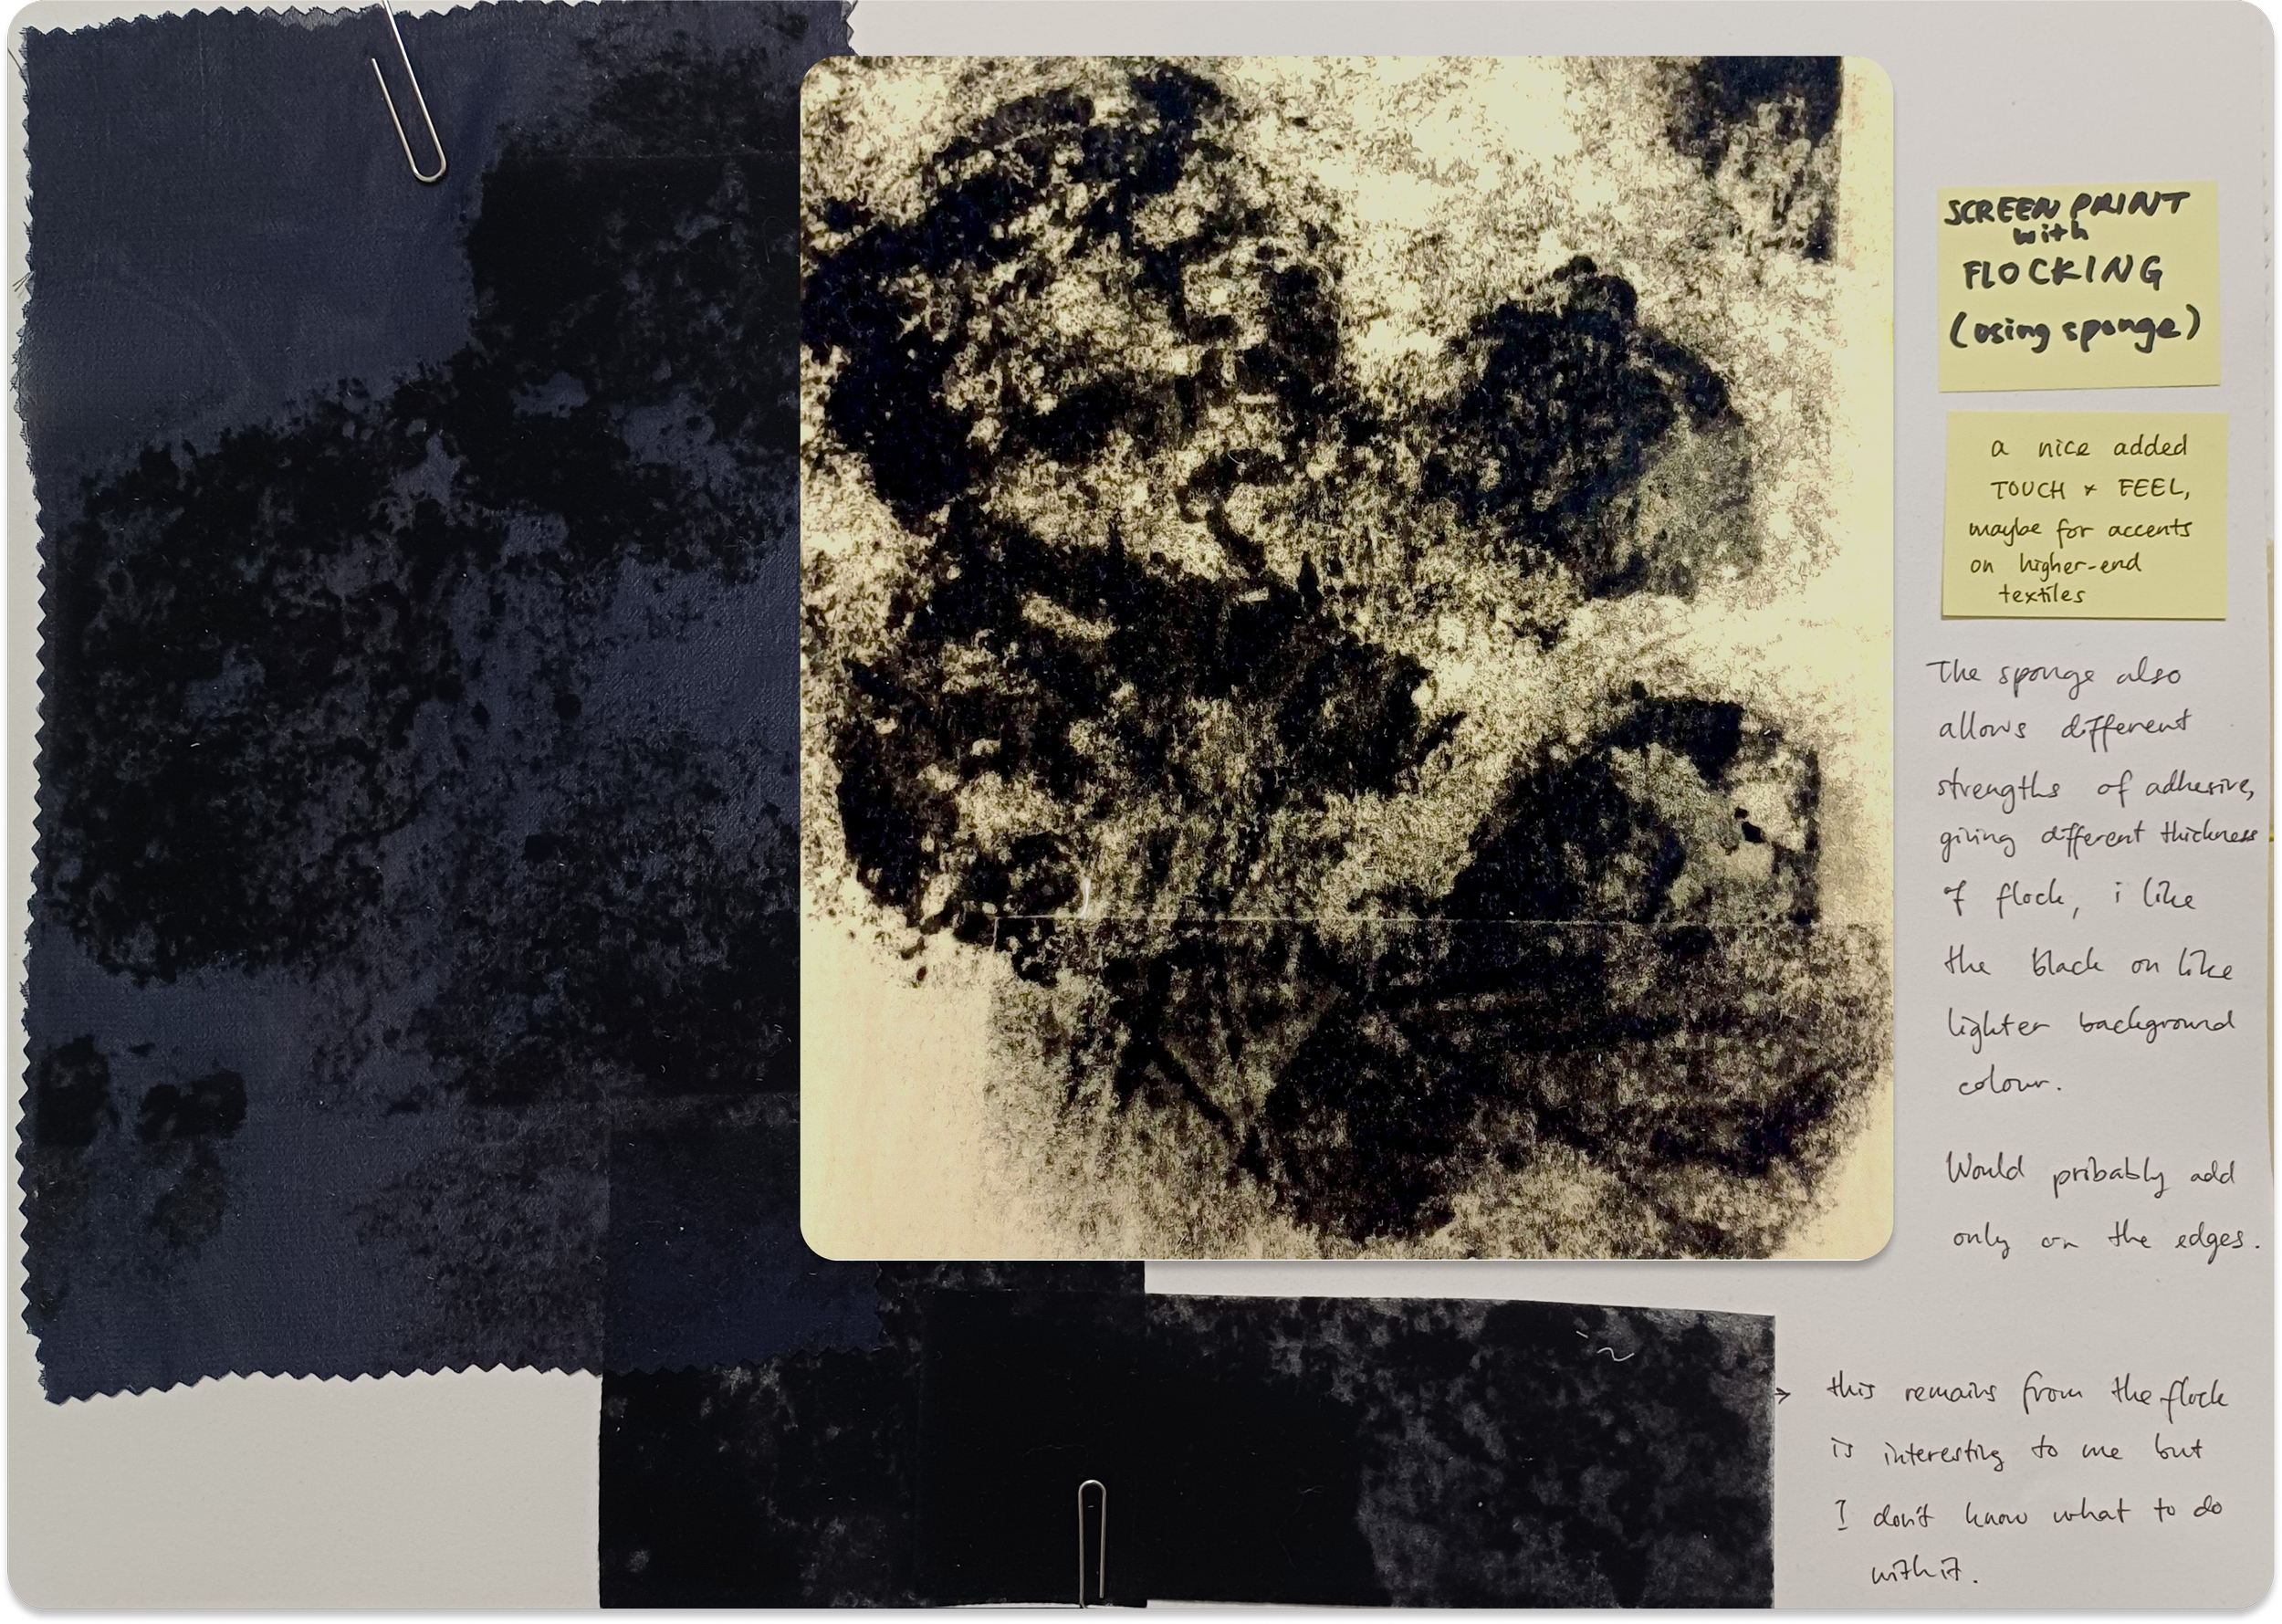
These two techniques are often seen as decorative, but with potential material links. In devoré, fibres are chemically burned away, while flocking involves bonding short fibres onto a surface. This raised a speculative question: could the fibres removed during devoré be repurposed as flocking material? Interestingly, Première Vision published an article titled 'HOCUS-POCUS: The magic of flocking as the glamour solution for textile recycling,' highlighting flocking’s potential in circular design by transforming textile wastes into textile dusts.
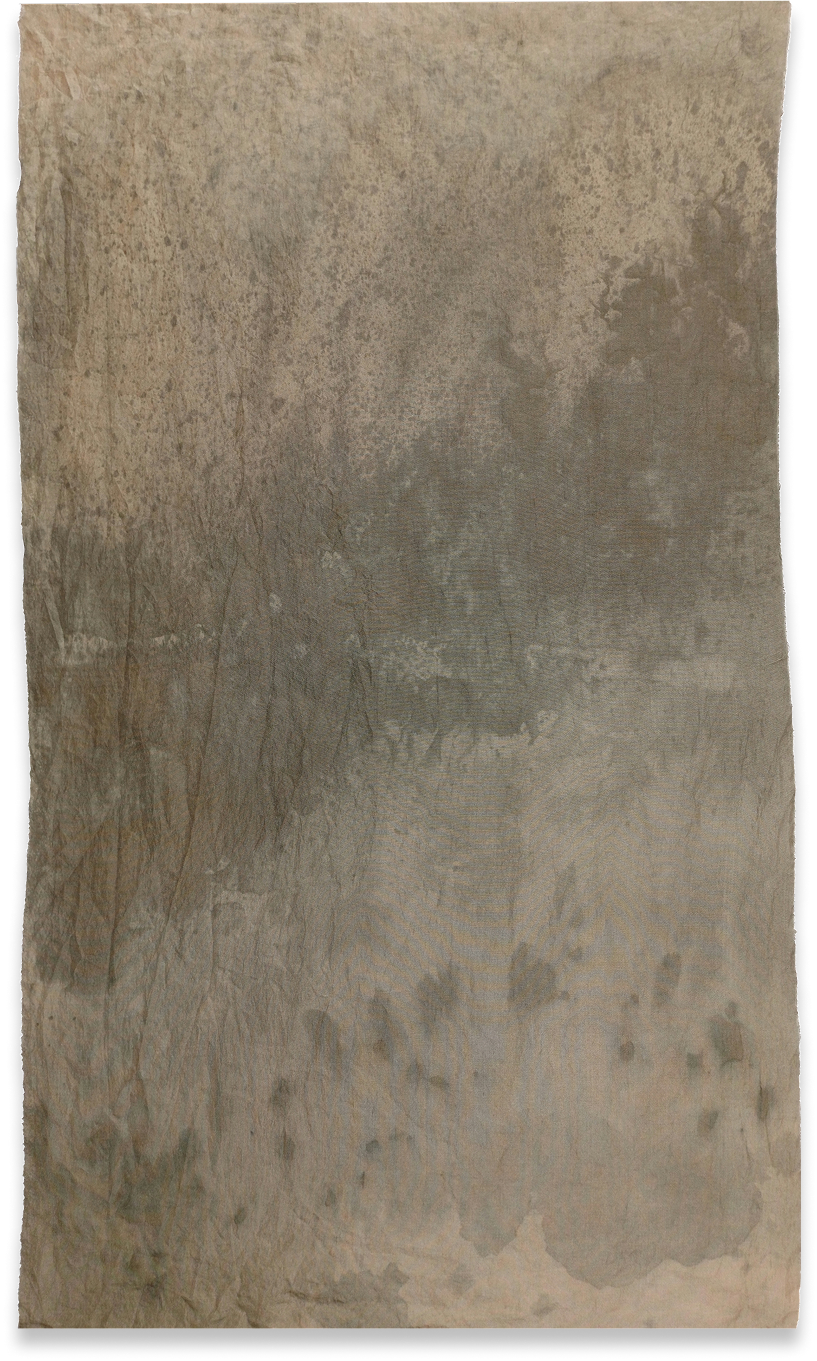
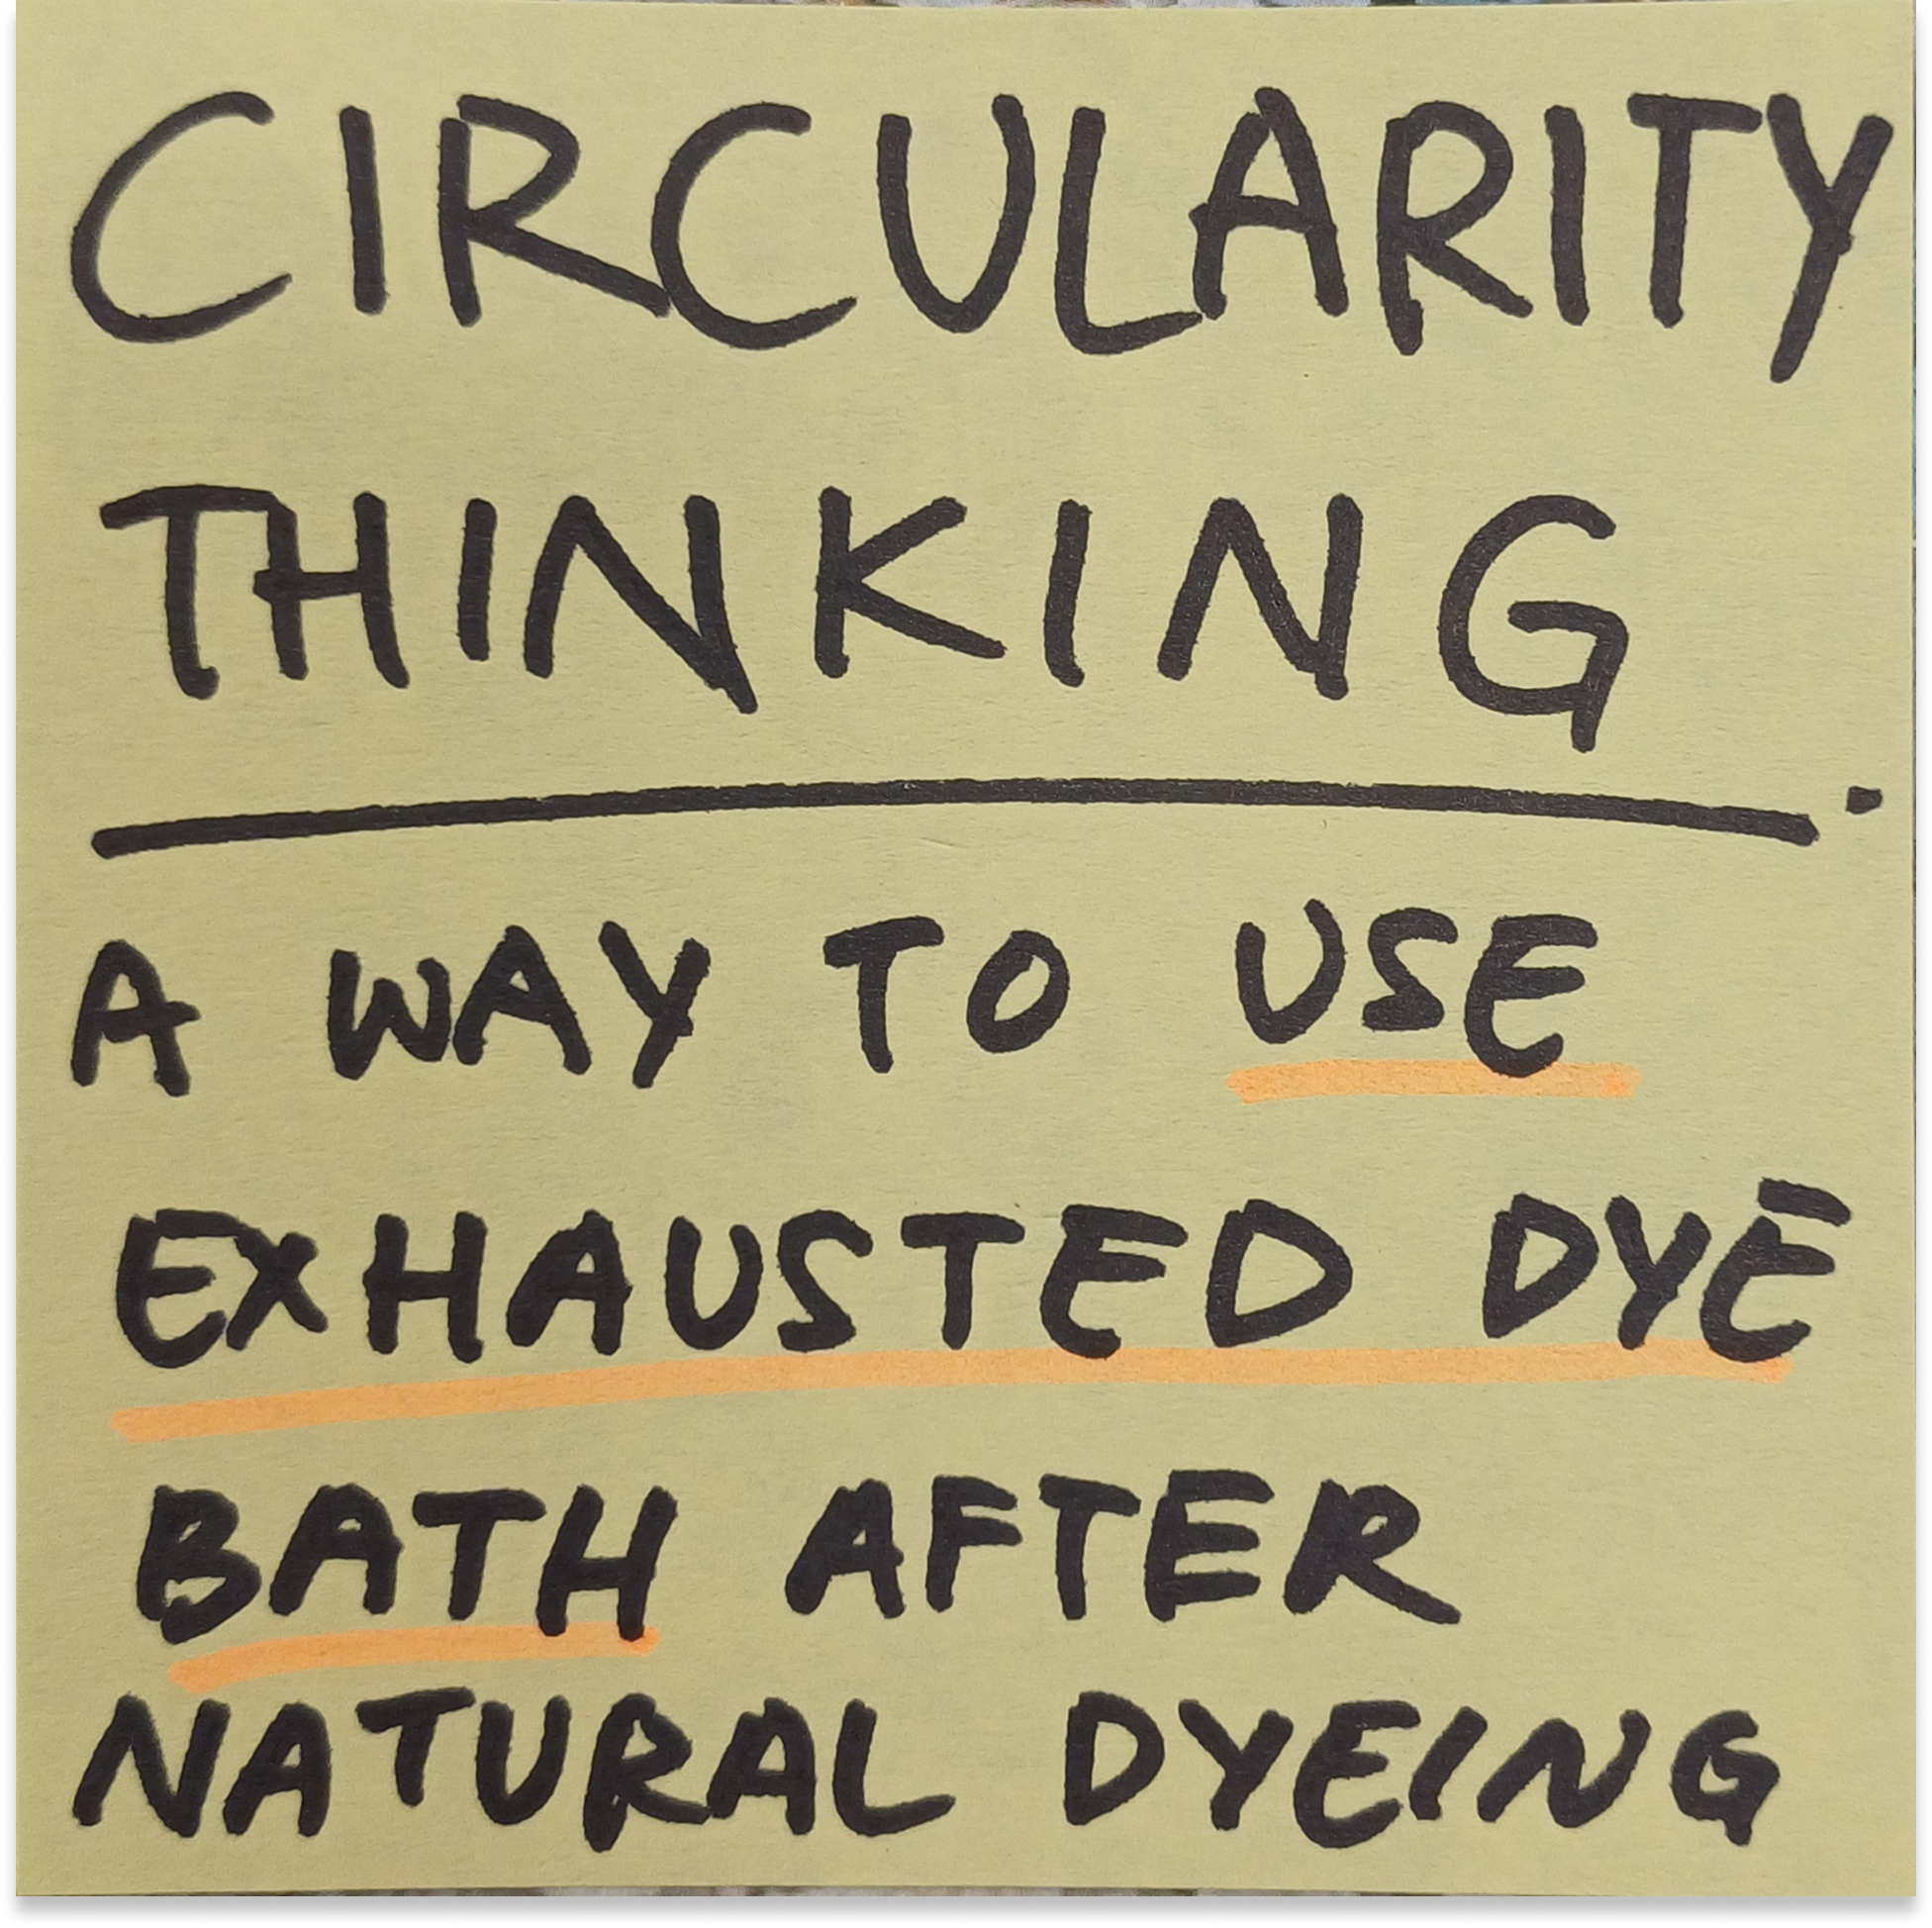
Technique: Ice Dye
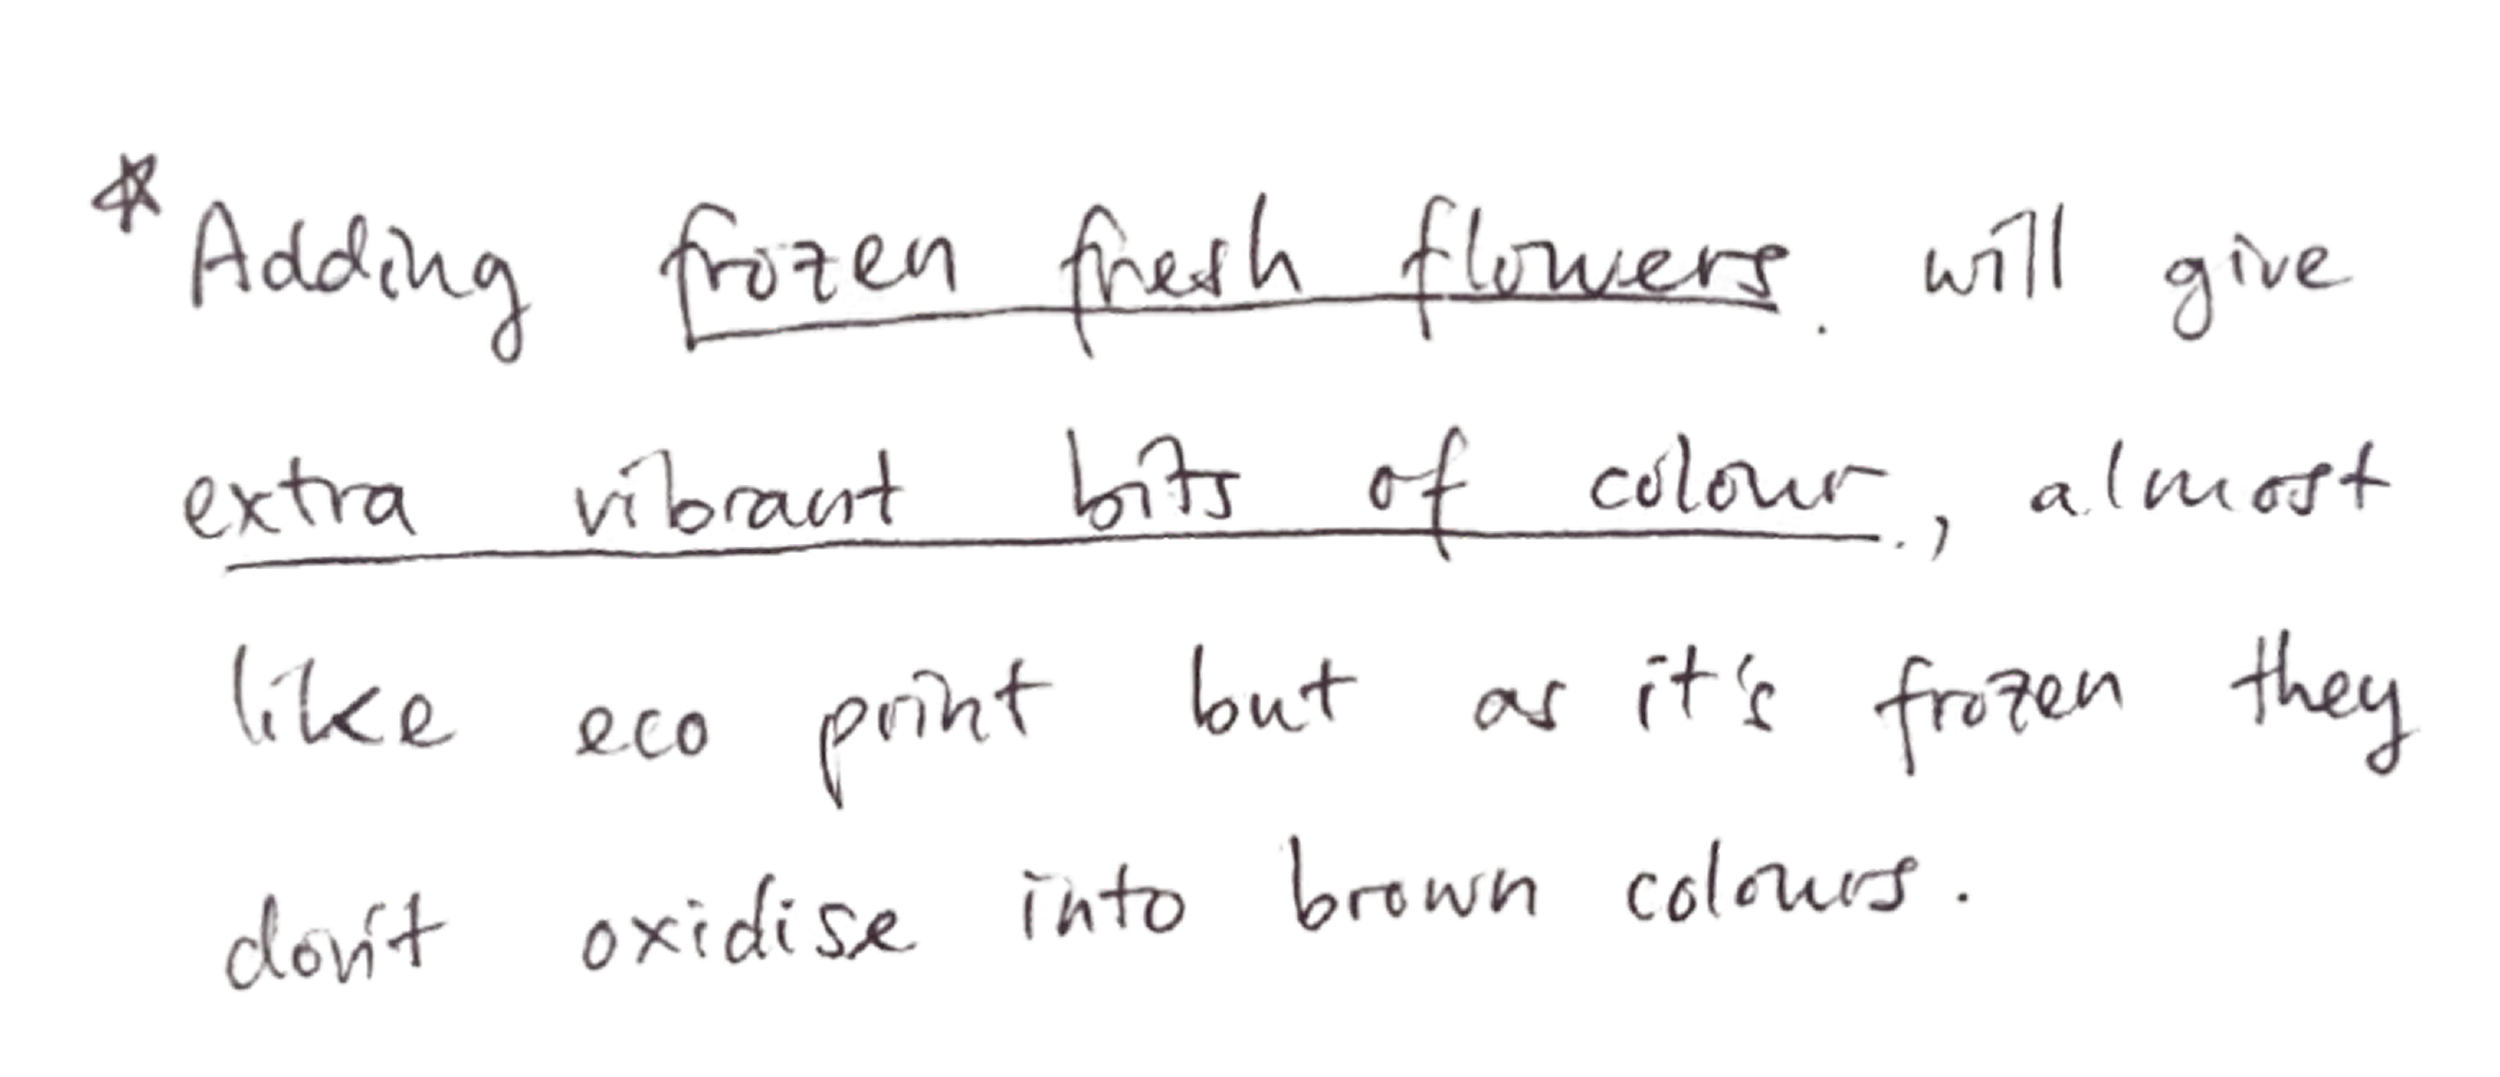
I’m interested in ice dyeing, because typically you need heat to set natural dye pigments onto fabrics. Also I would love to mimic the watercolour effects from my rain drawing explorations.


The 1st Trial Process

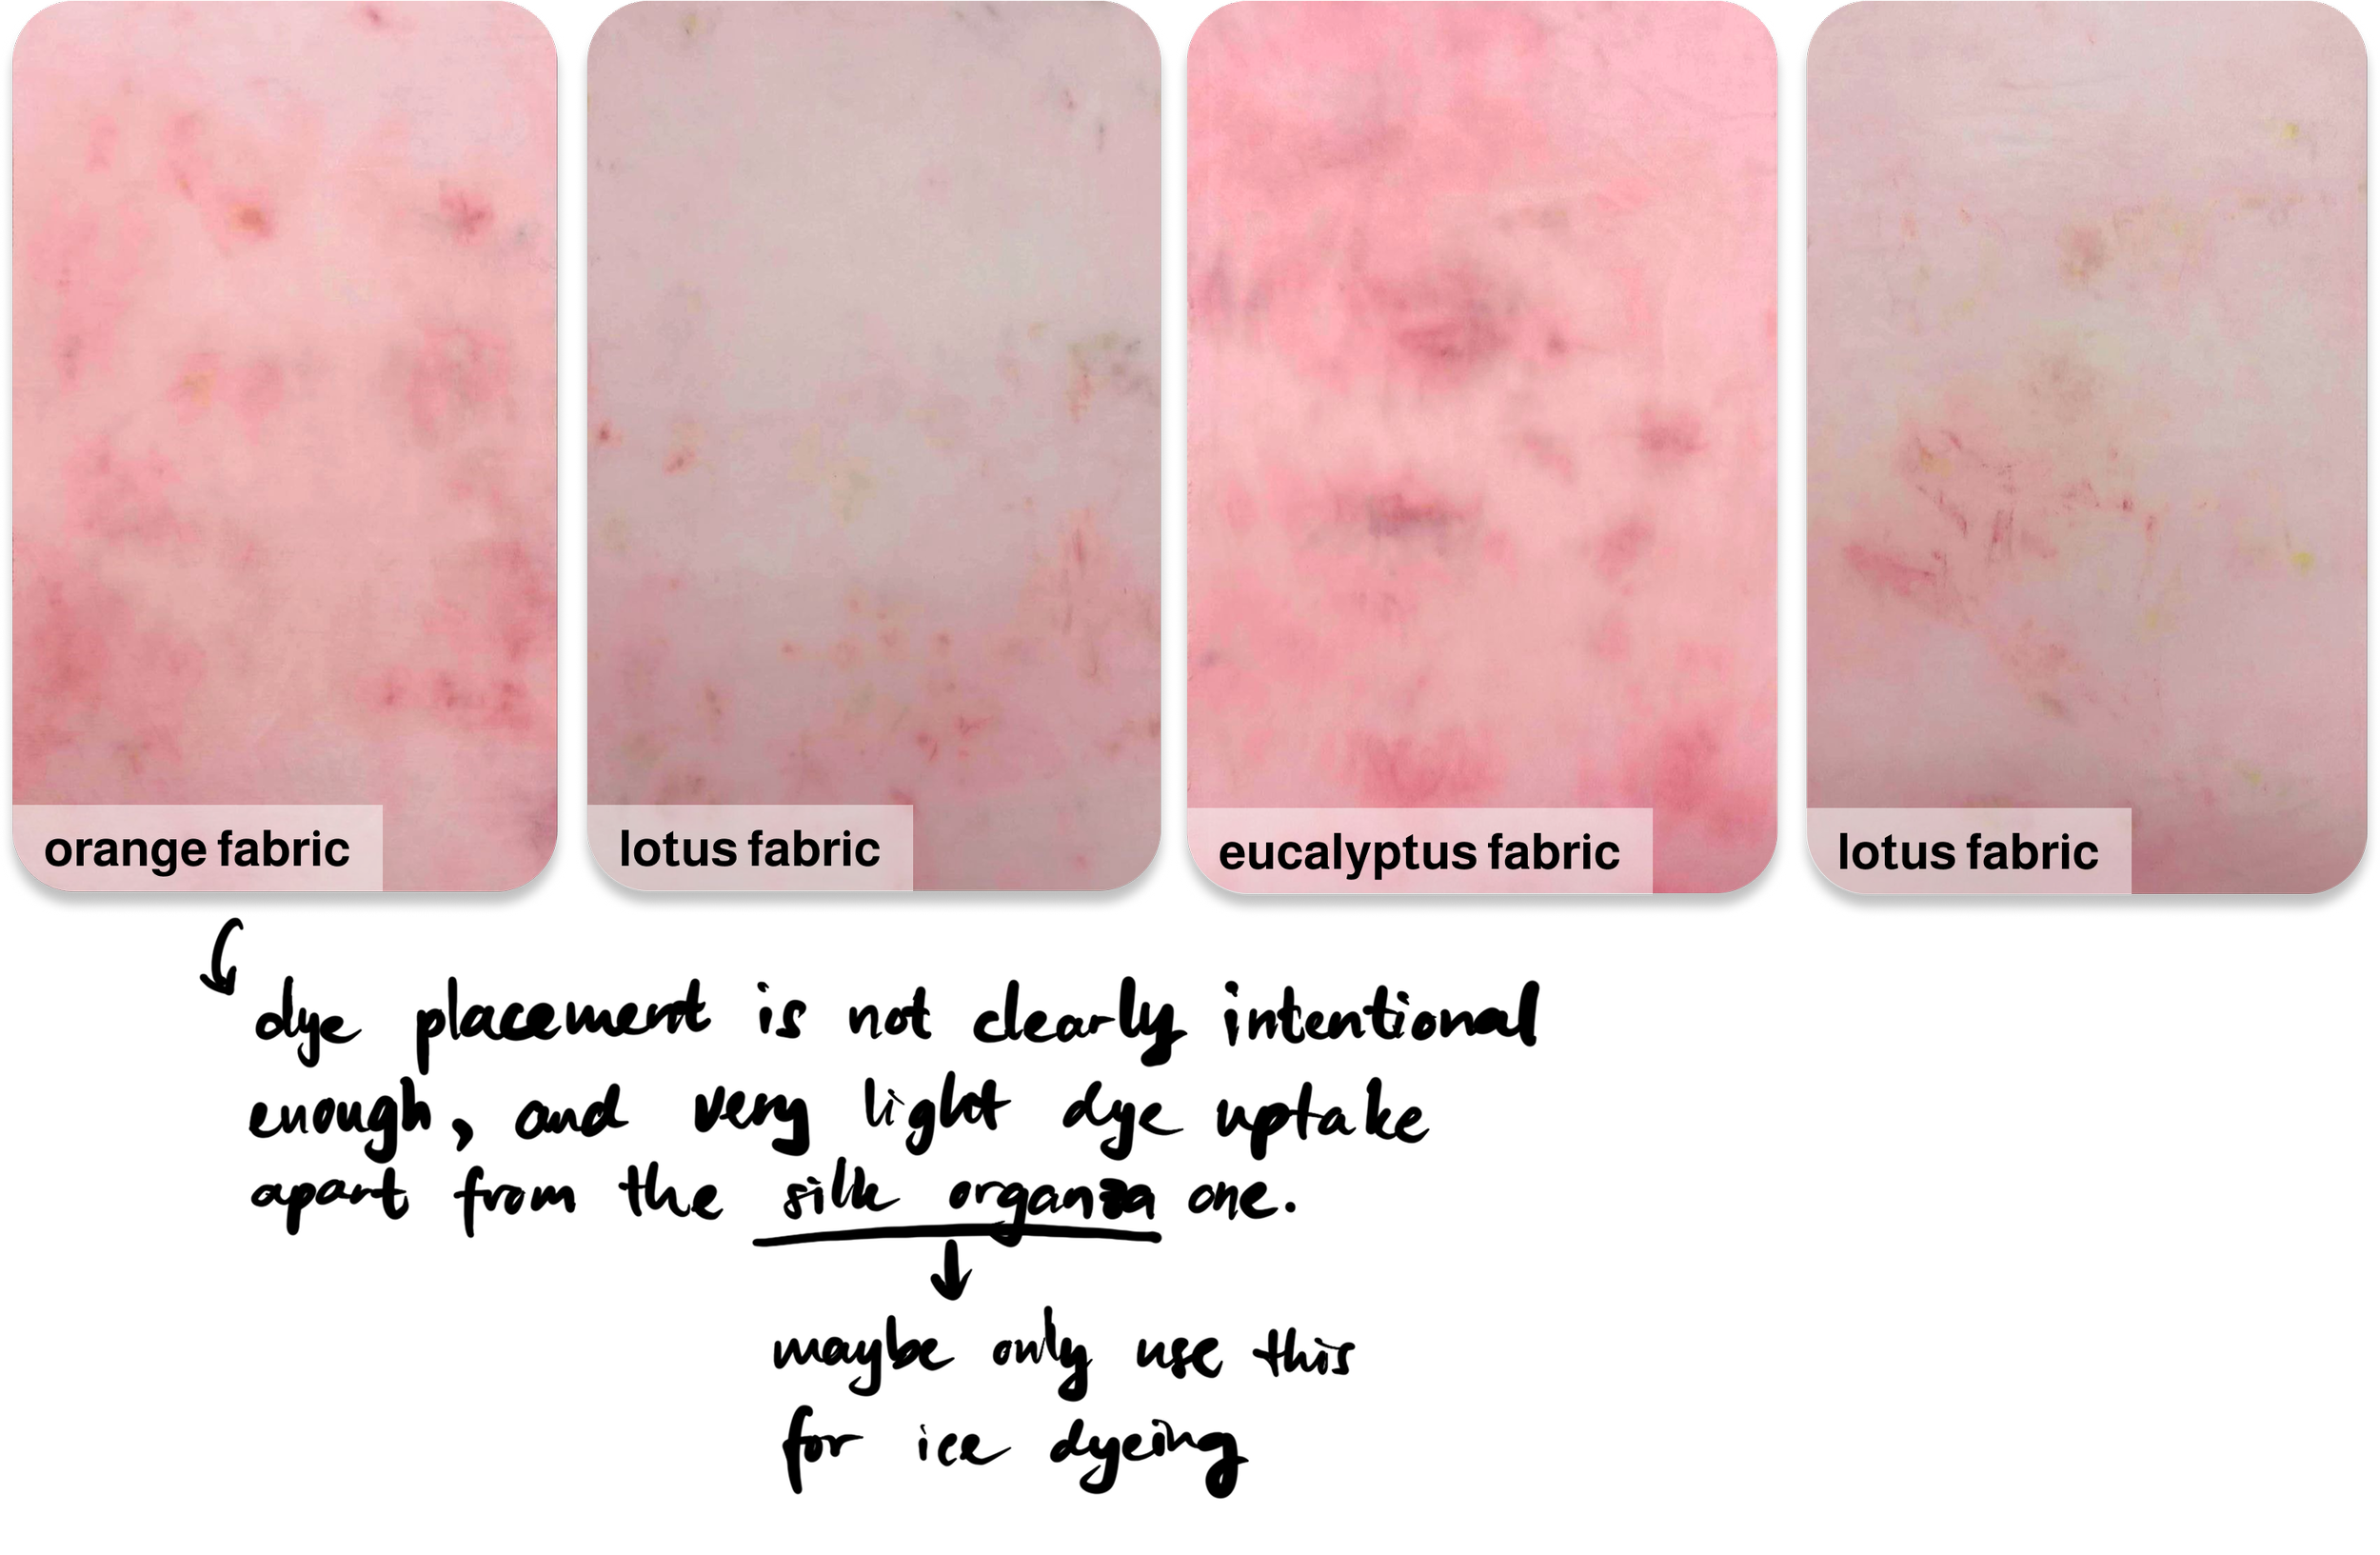
The 1st batch results
all over placement
gradient bottom placement
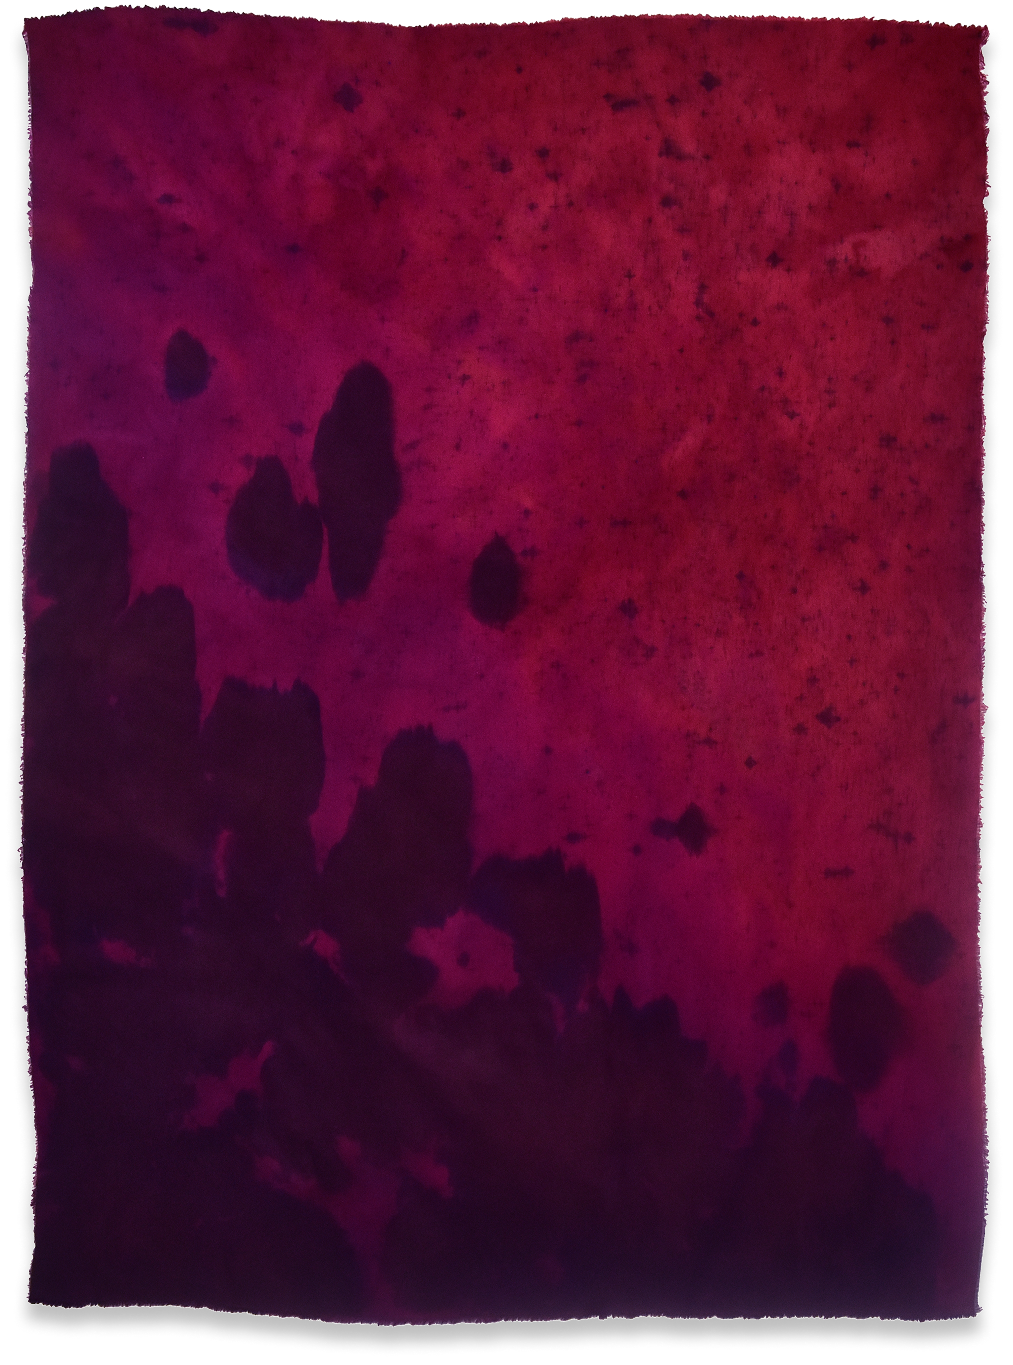
The 2nd batch process
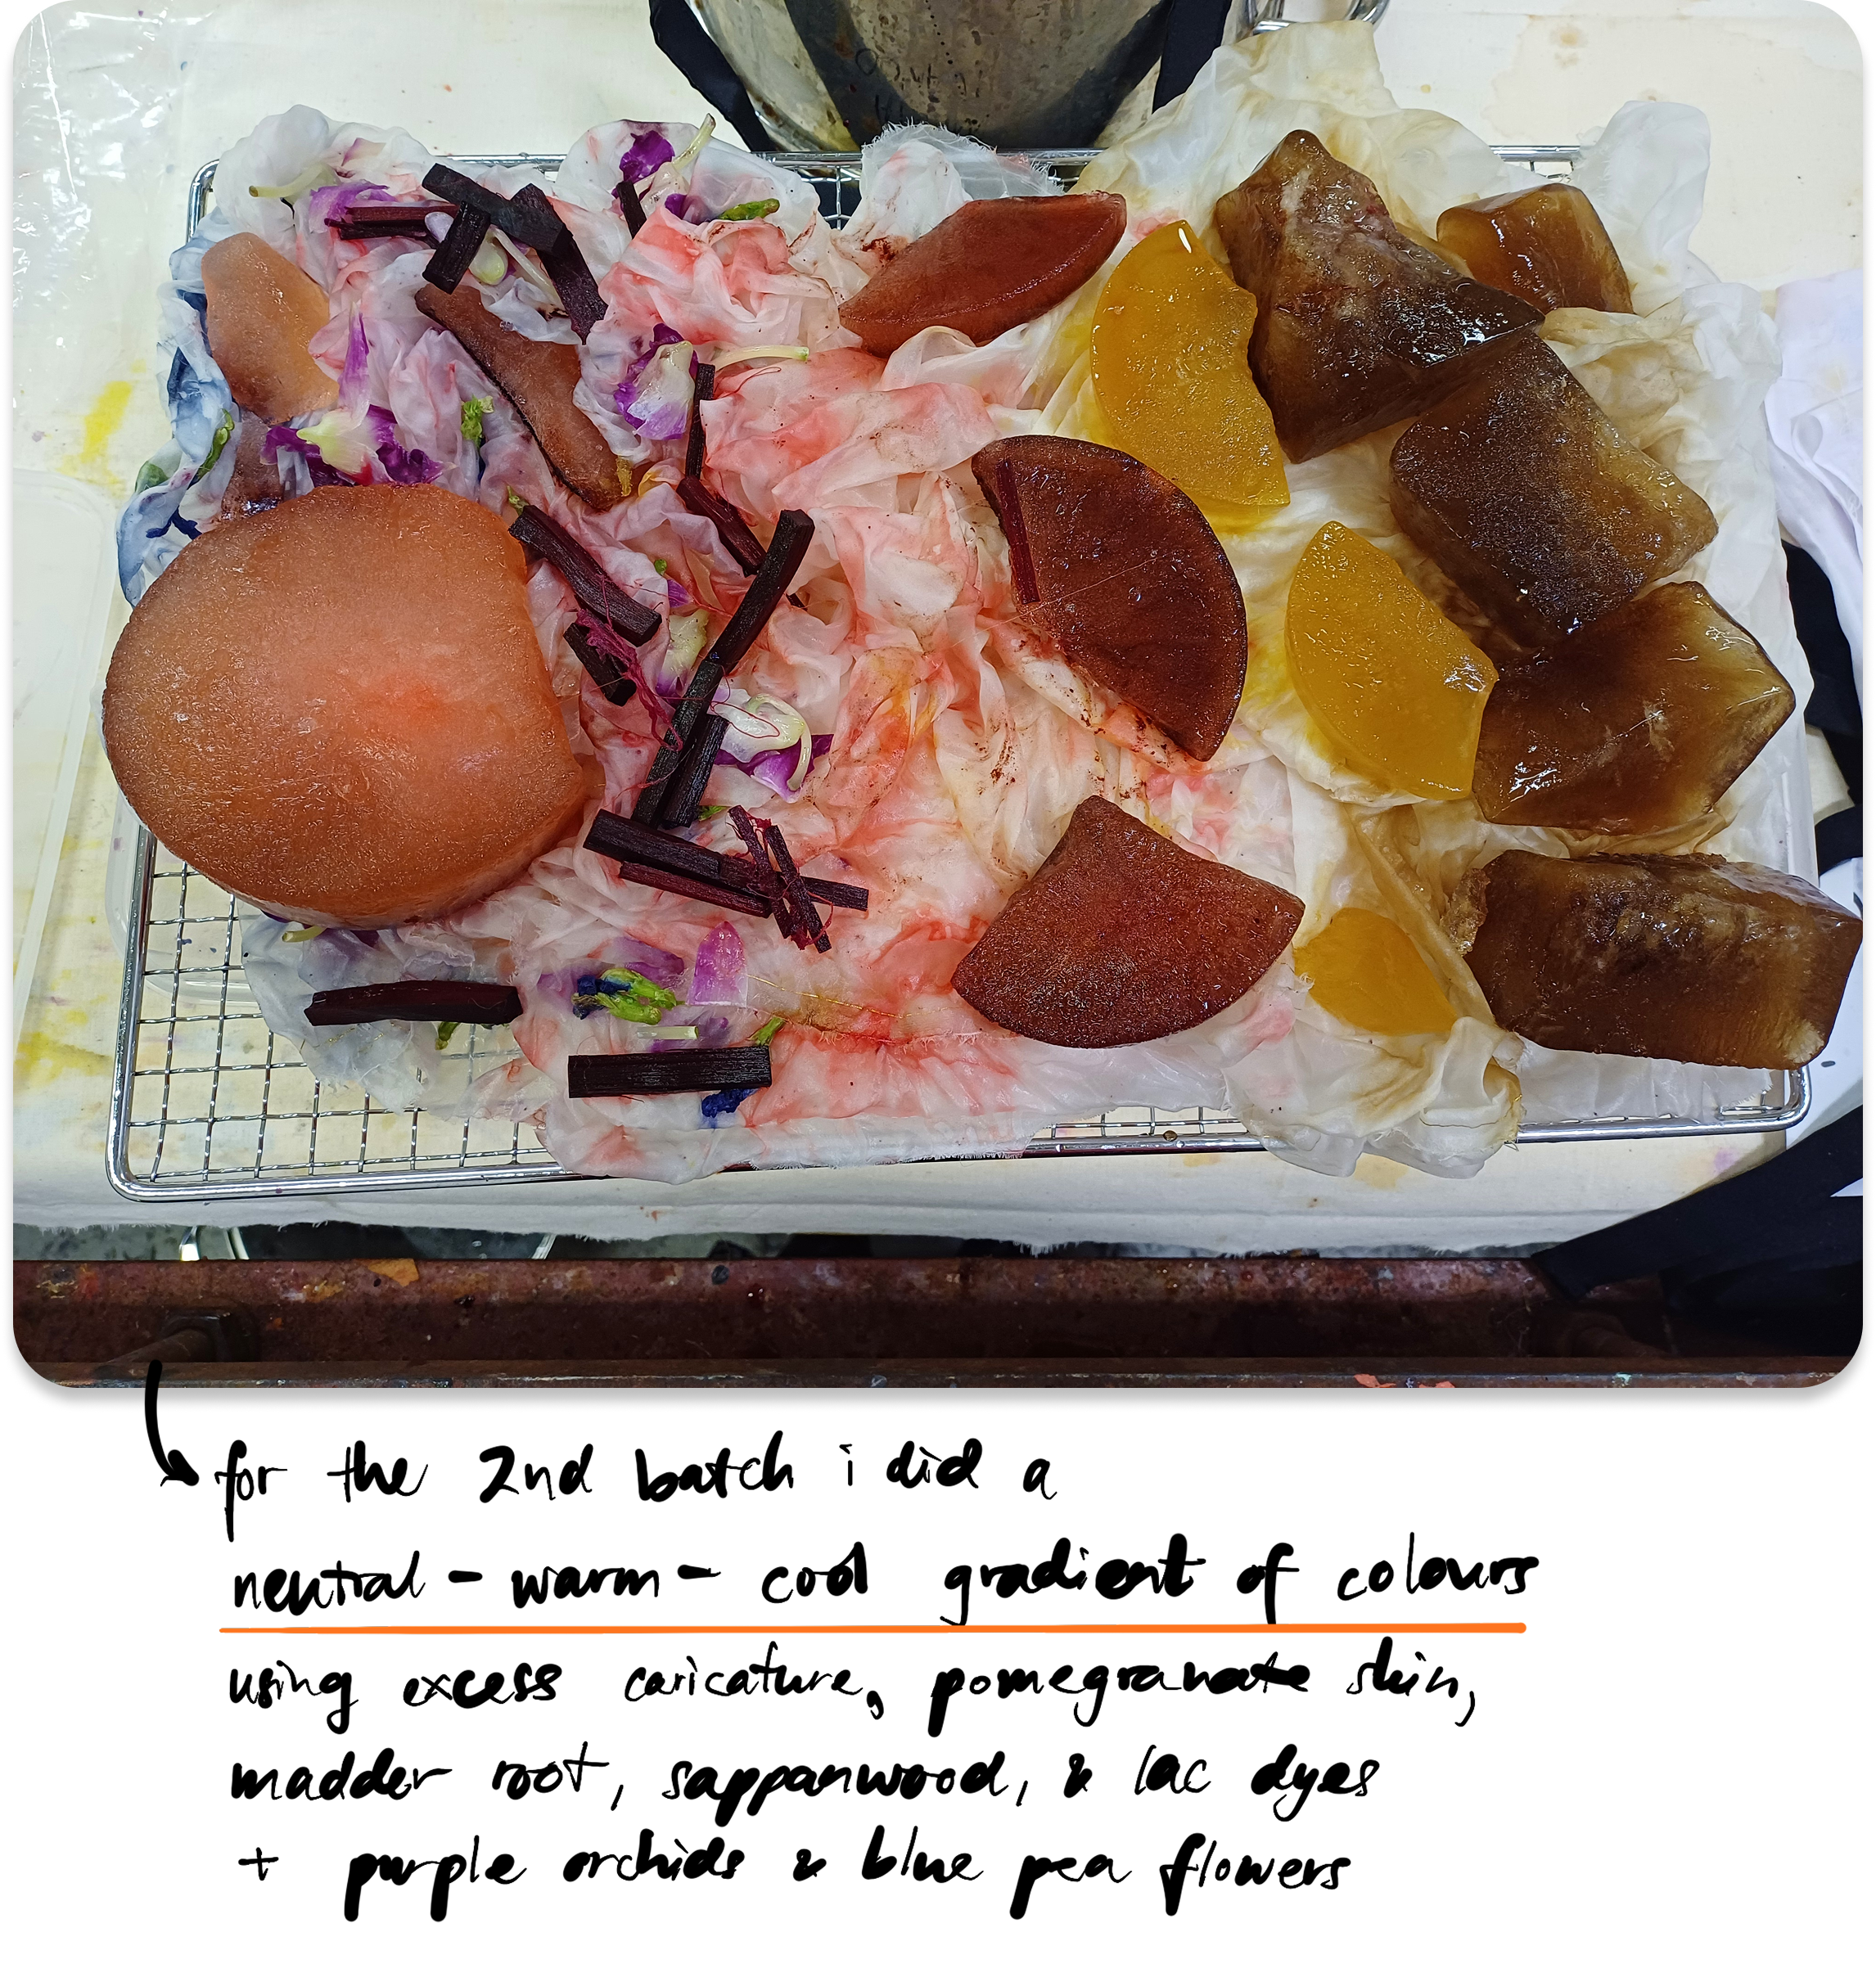
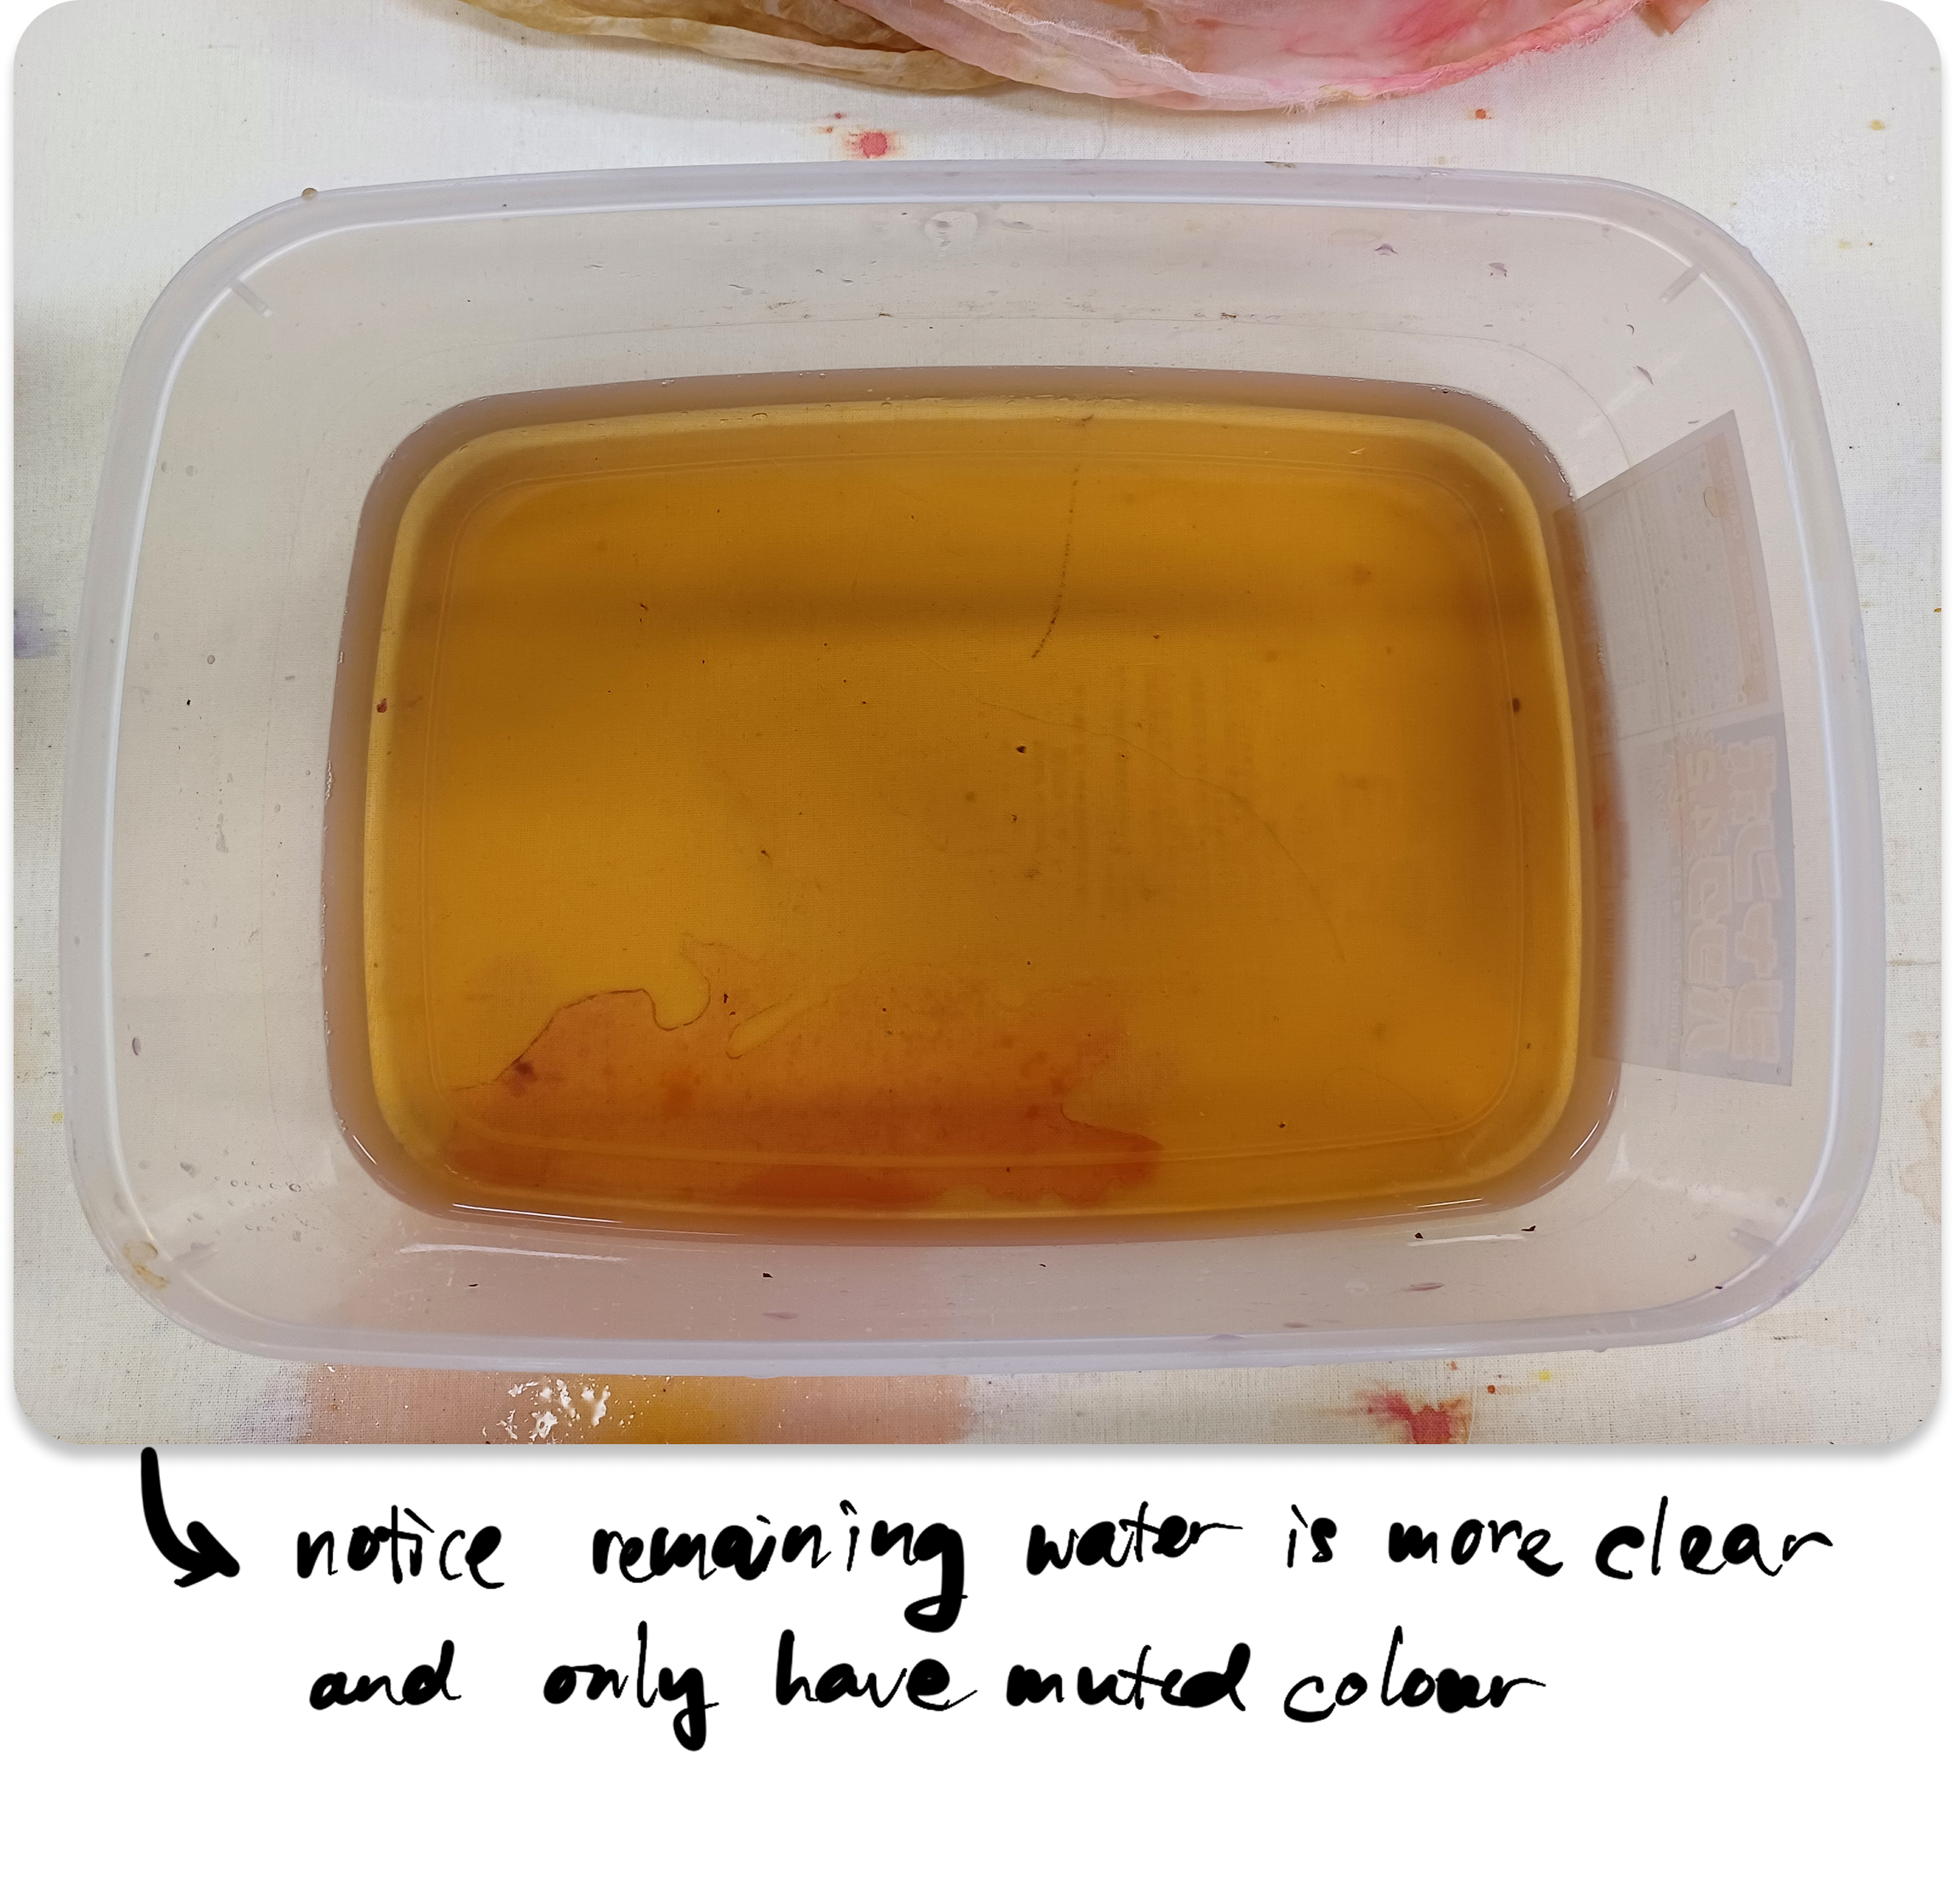


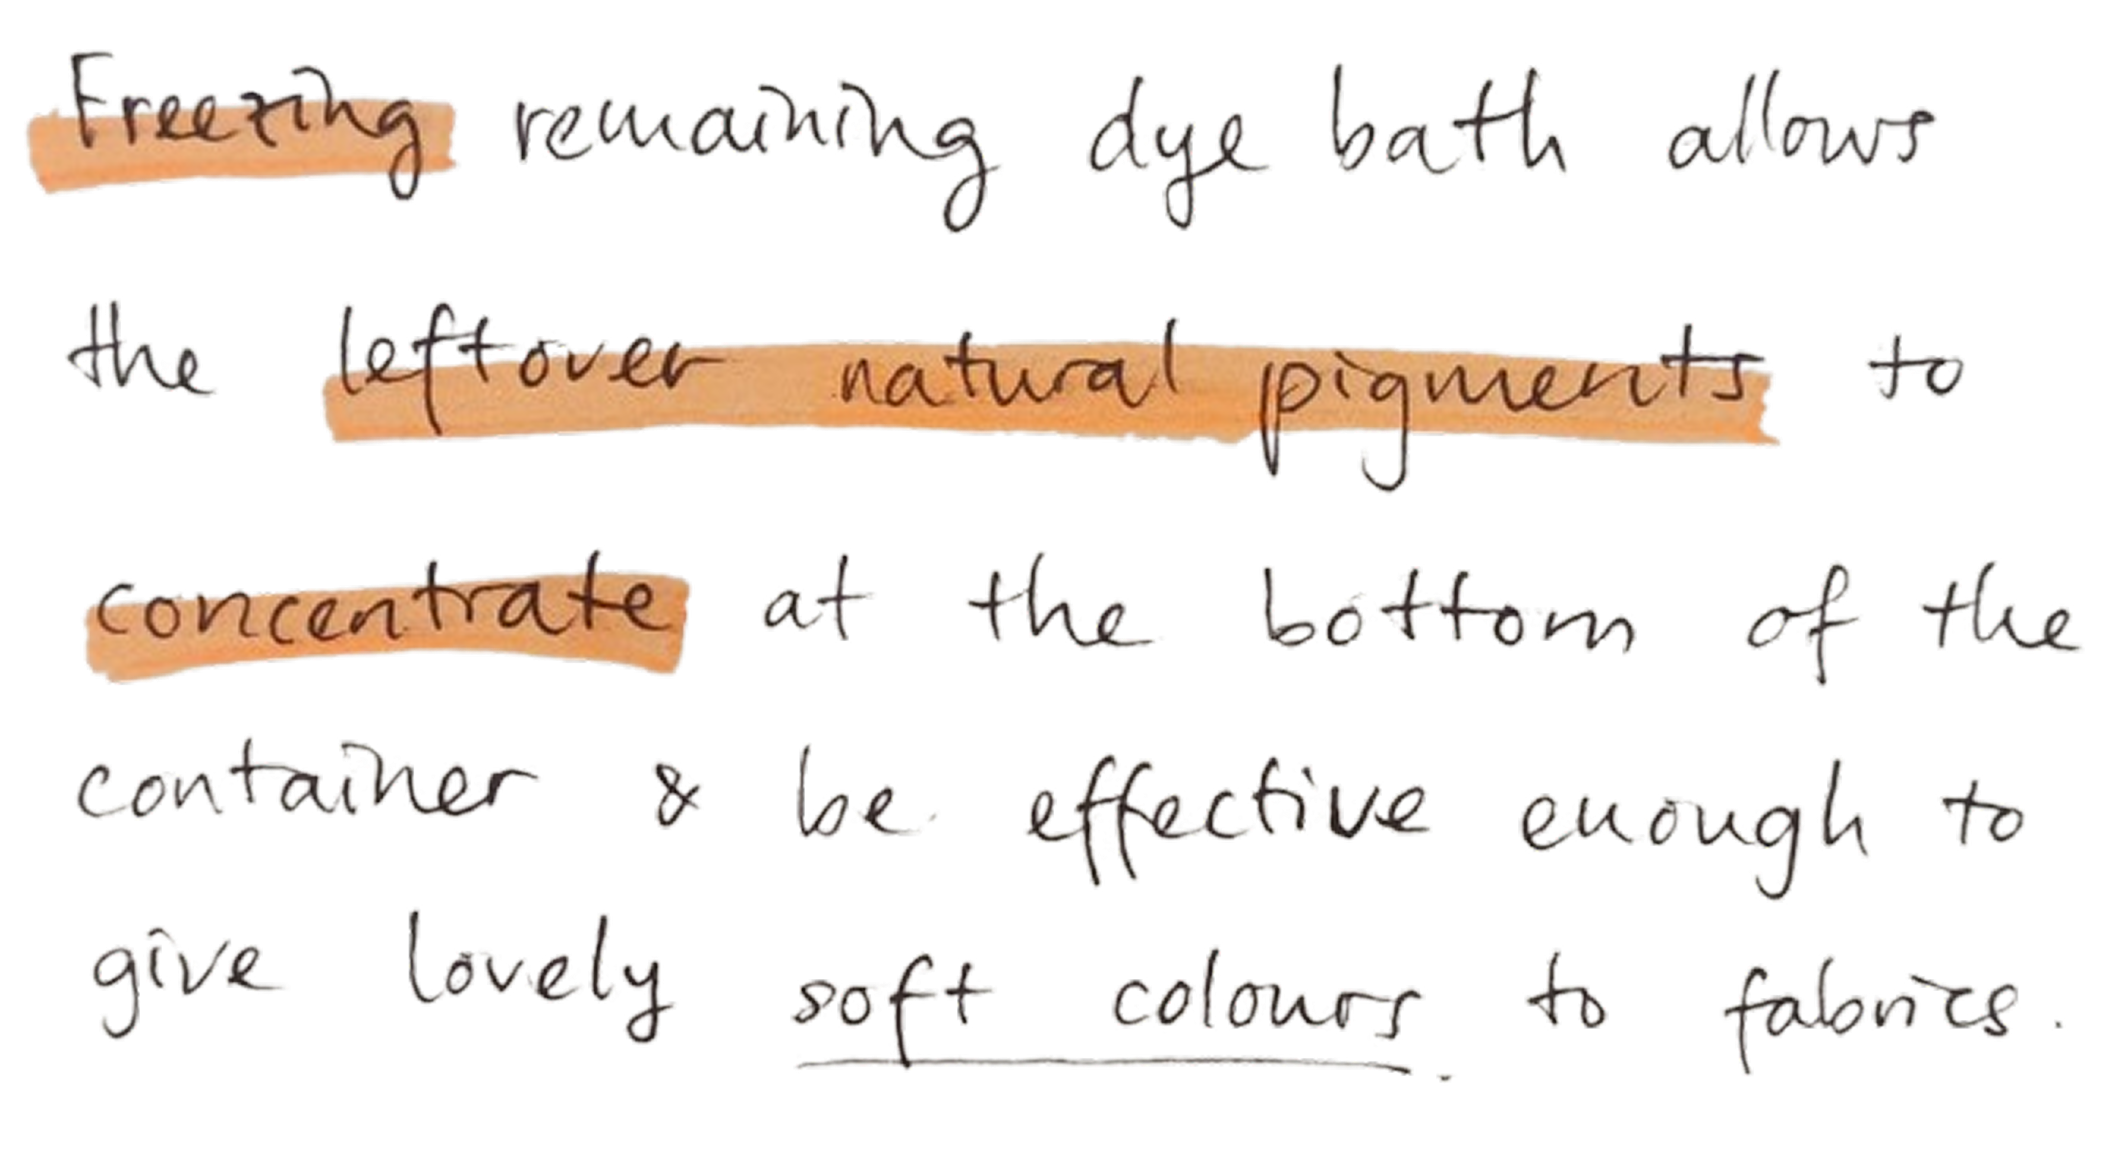
This circular ice dye method allowed me to reuse leftover dye baths—reducing colour and mordant waste going down the drain, while creating soft gradients and unexpected formations.

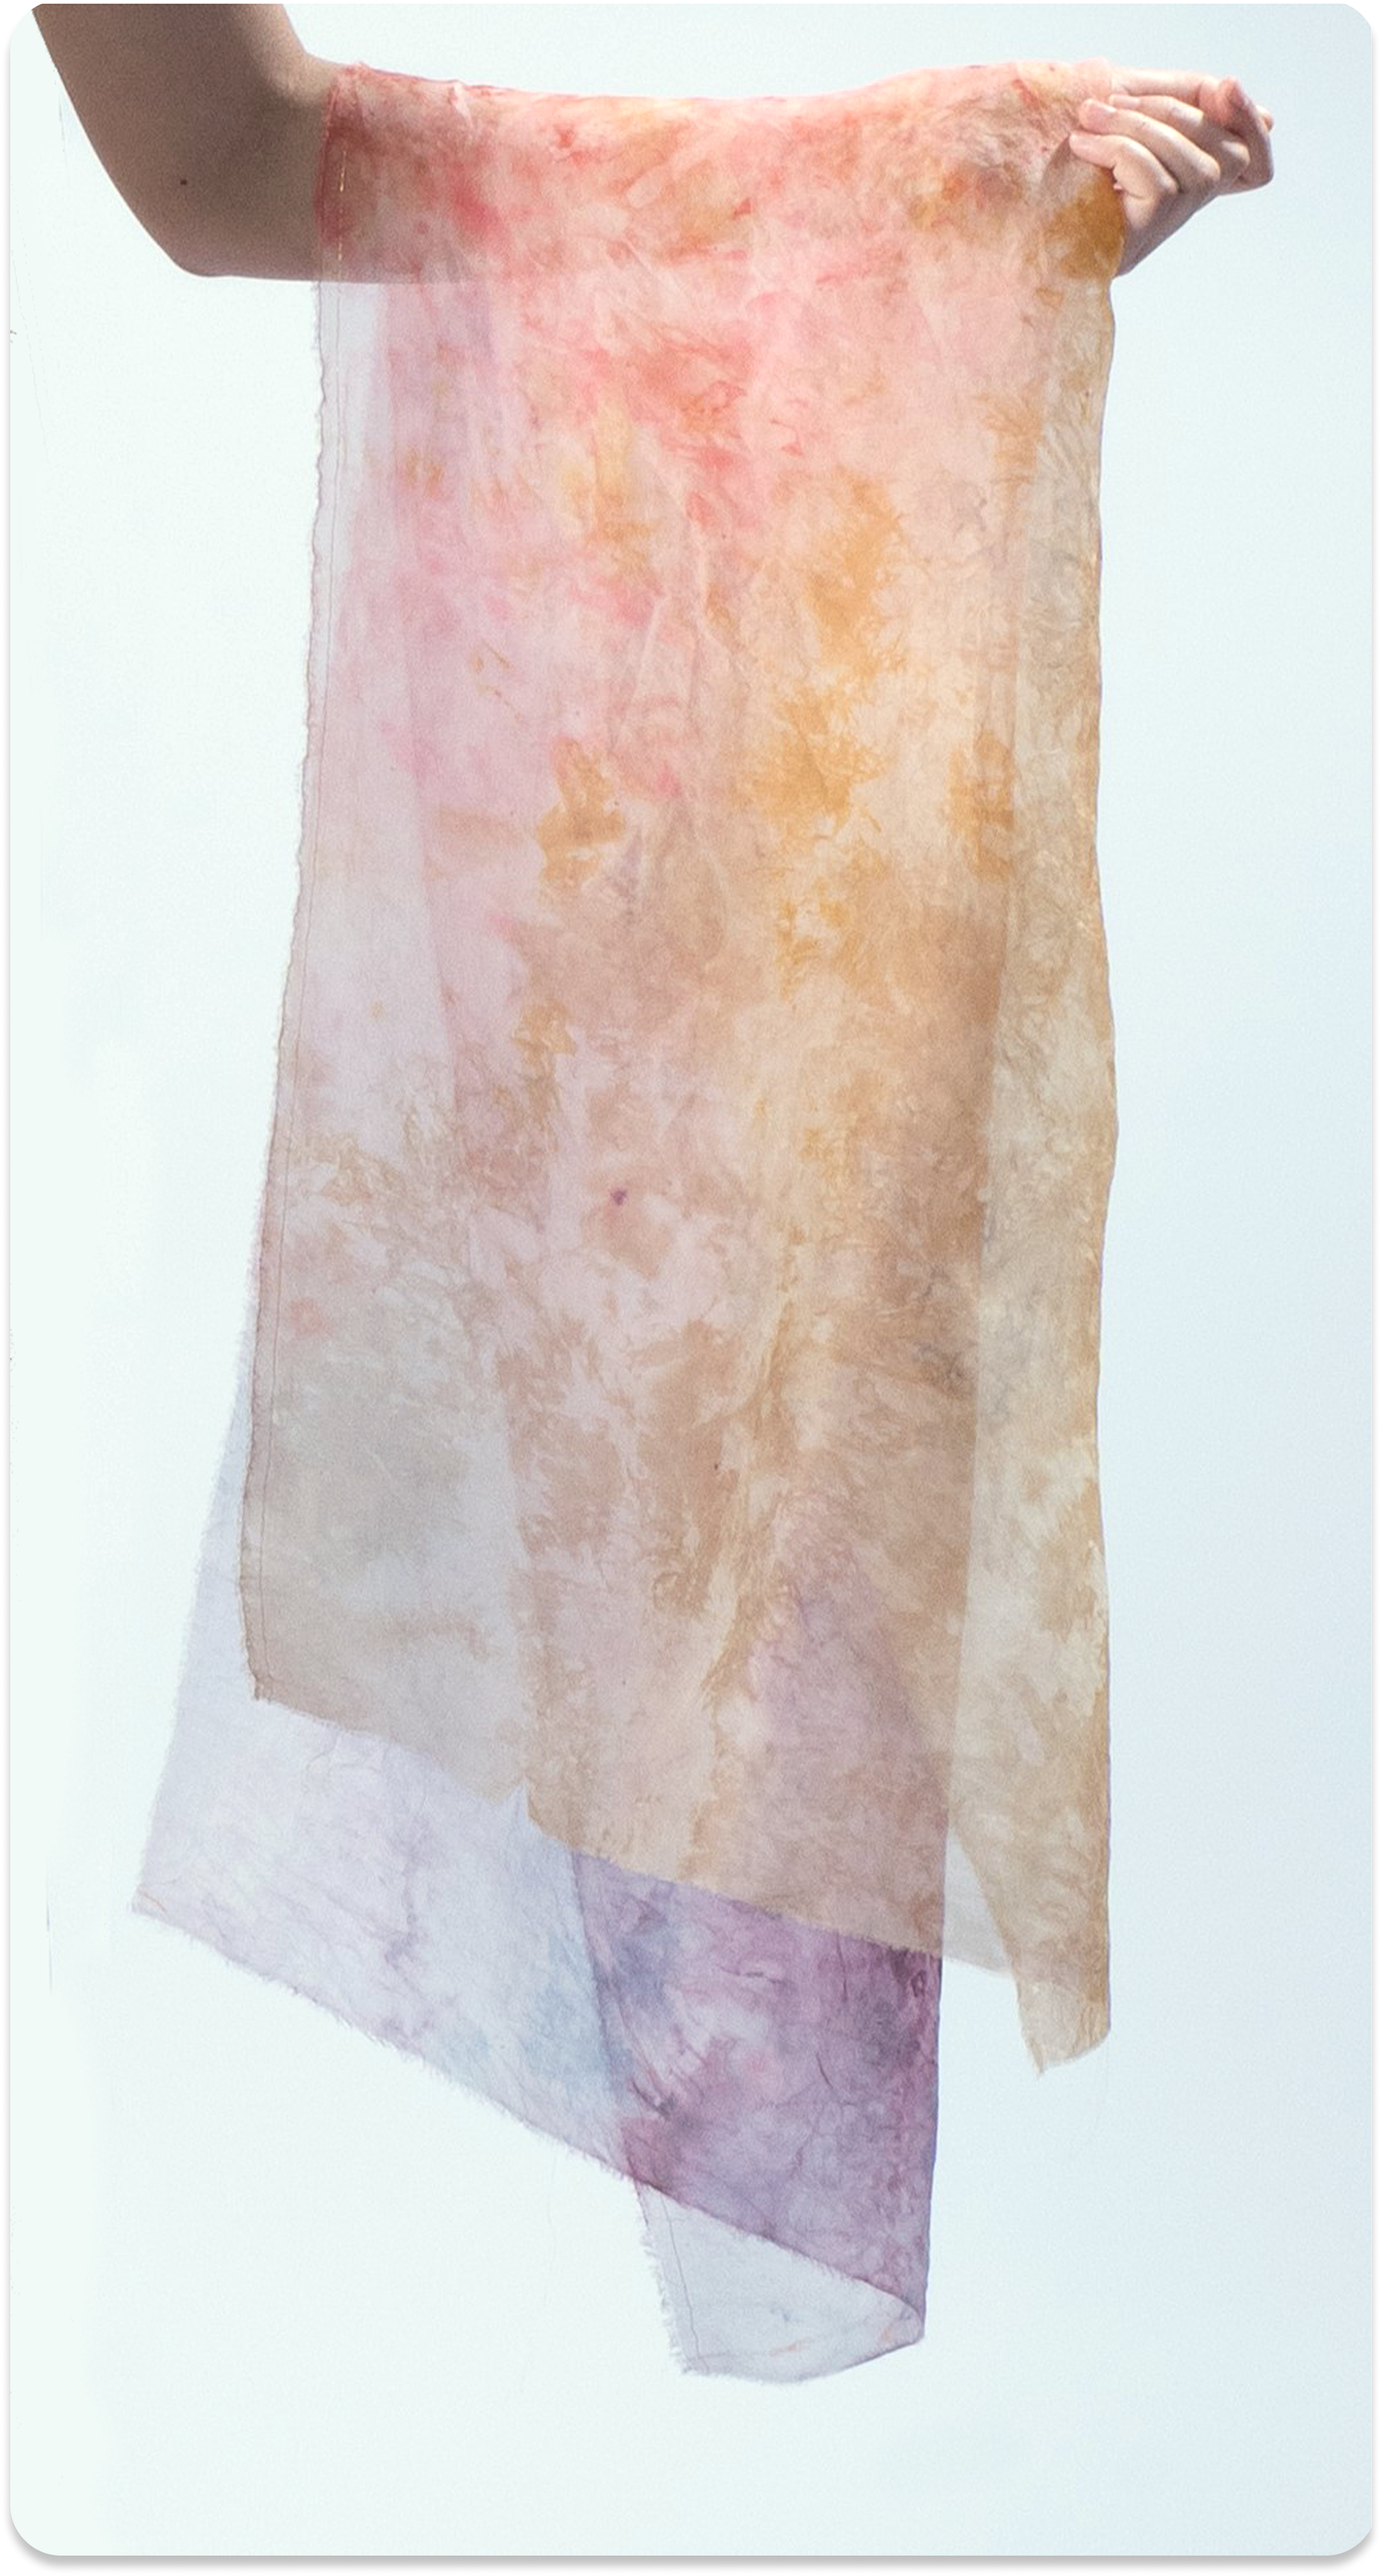
The 2nd batch results
Chapter 3: Refinements and Combinations
Refining Colours
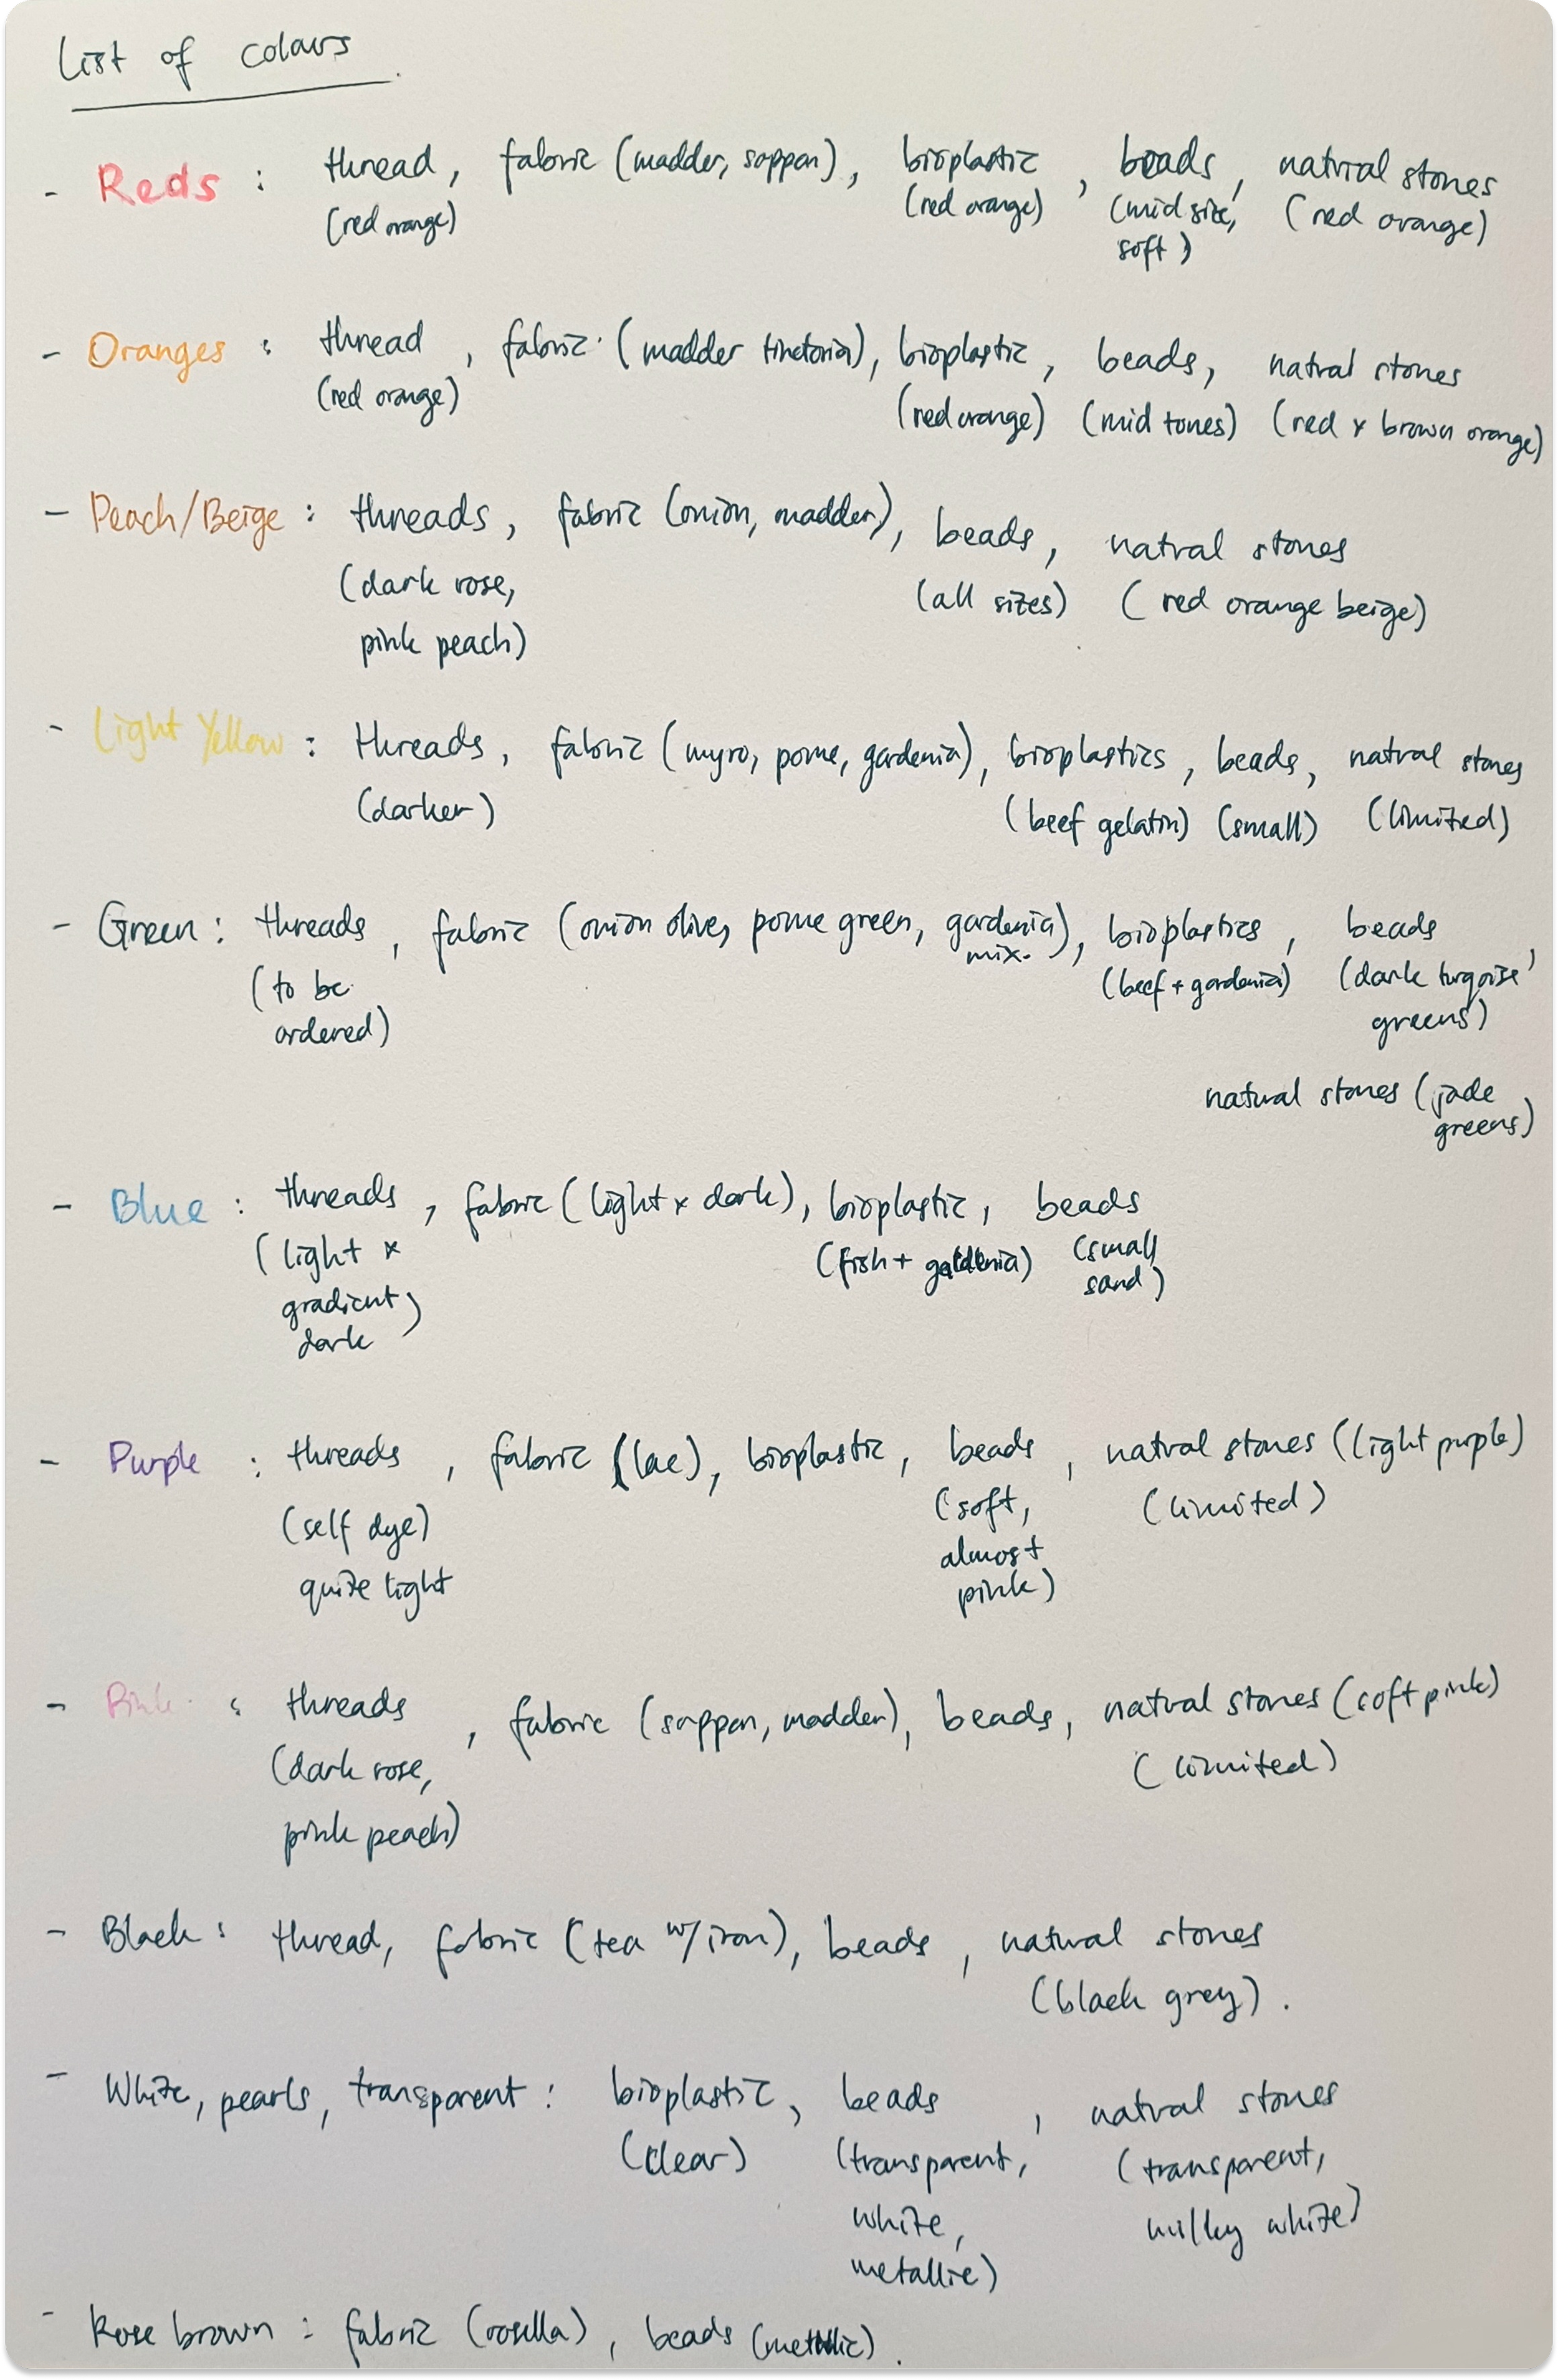
At this stage, I organized all material components—dyed fabrics, threads, trims, beads, and bioplastics—by colour to study their visual relationships.
Dyed Fabrics
Bioplastics

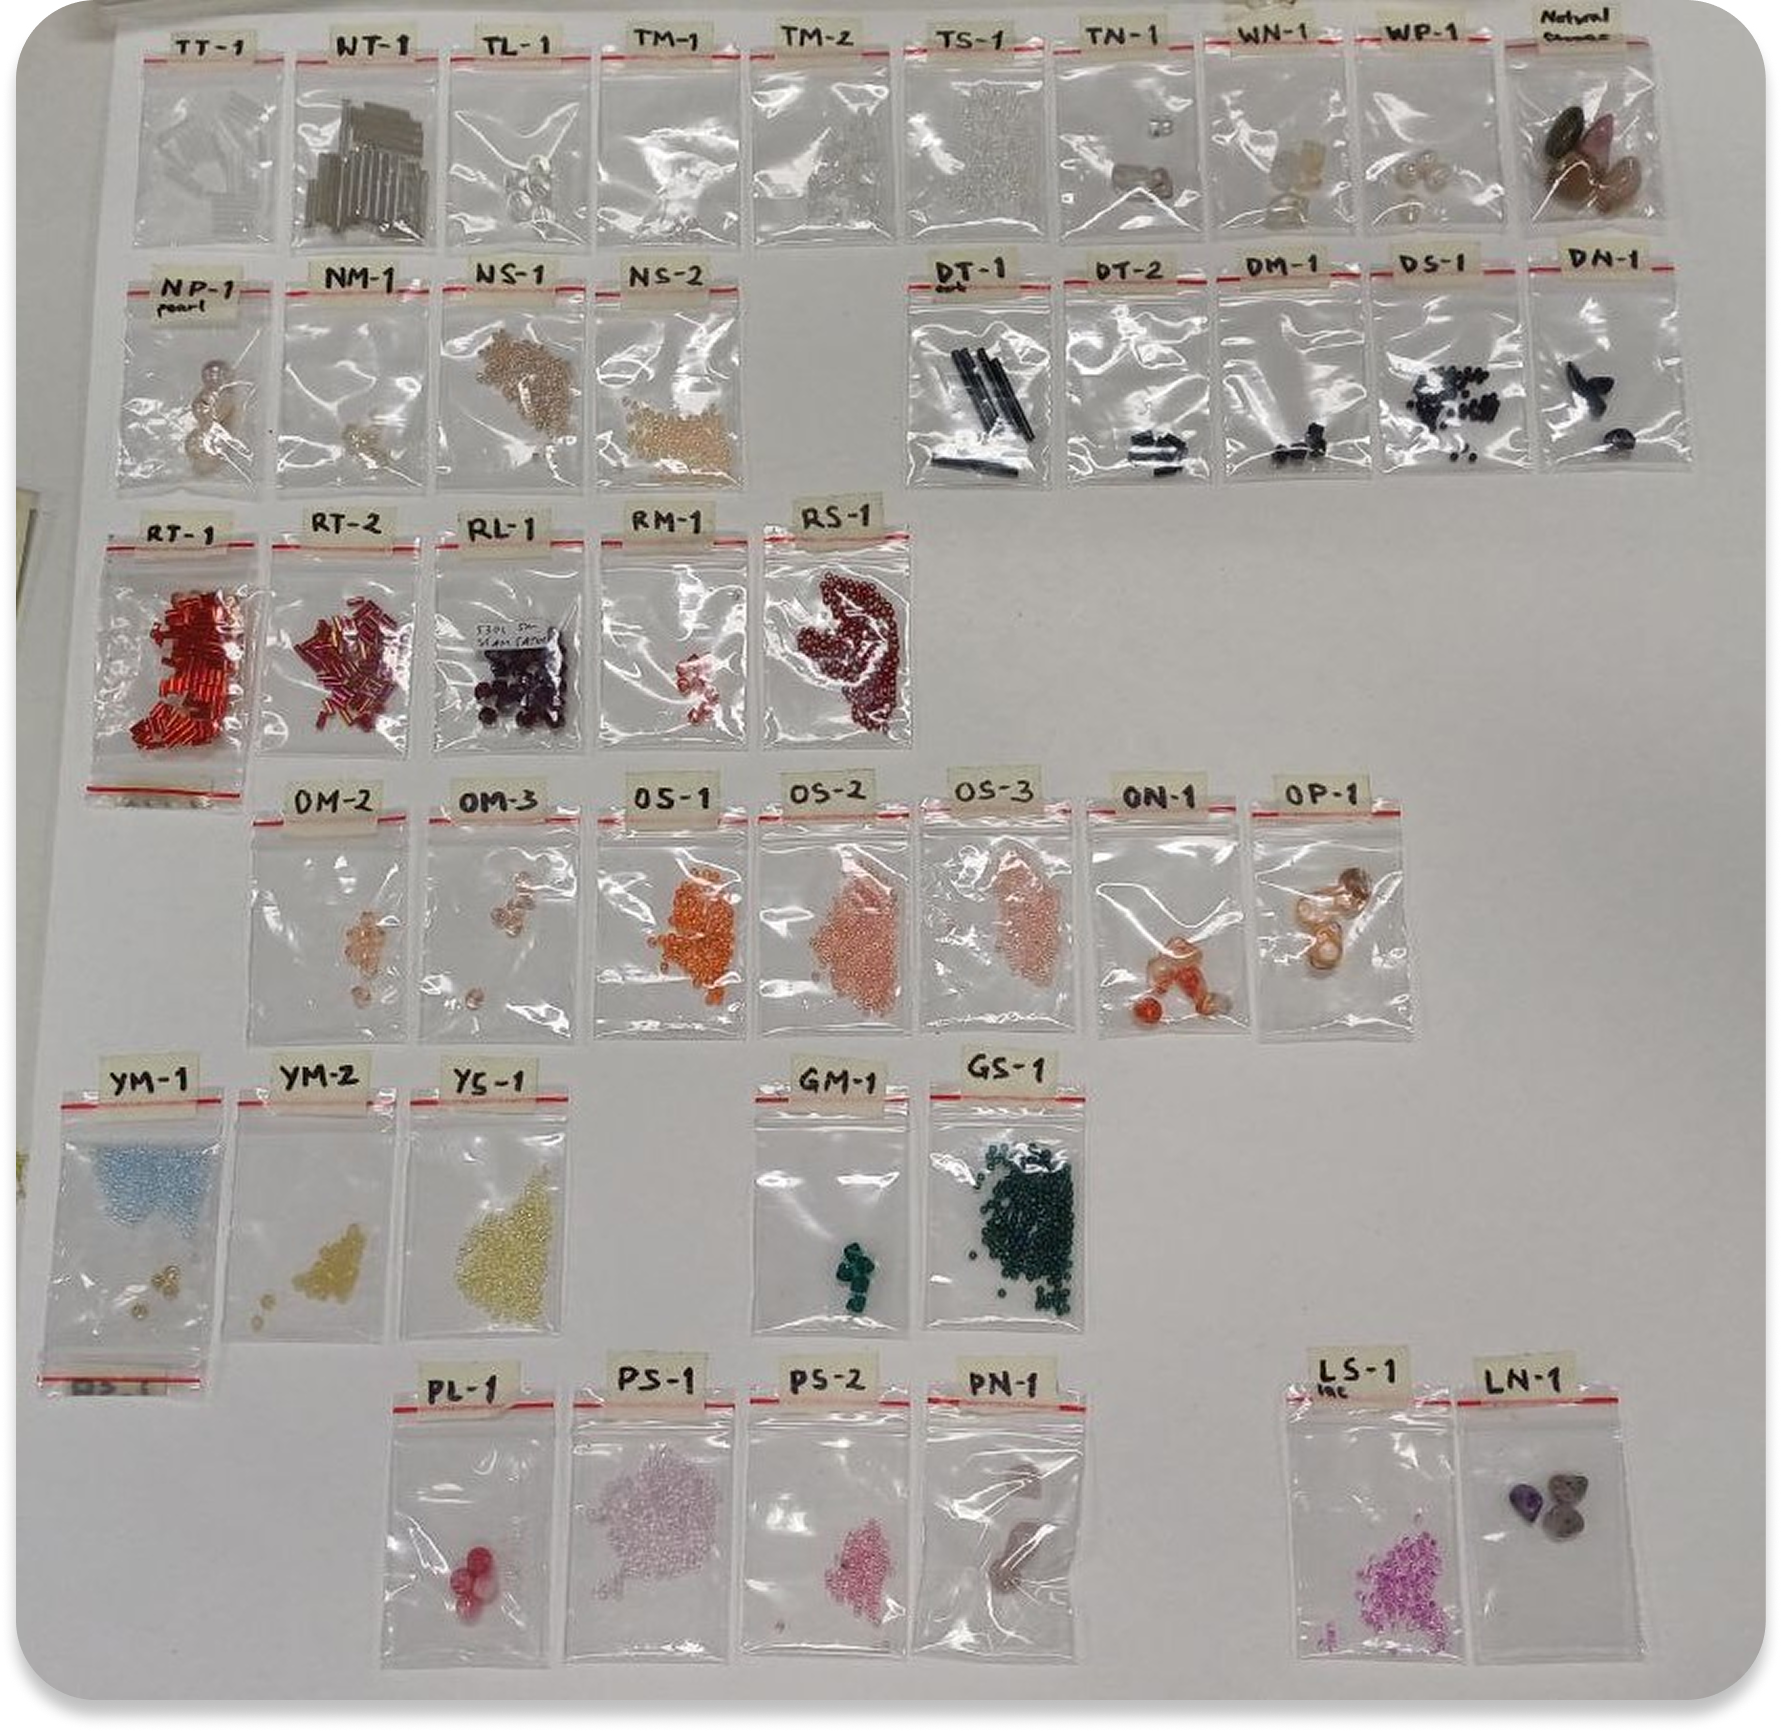
Trims (Beads, Natural Stones, Pearls)

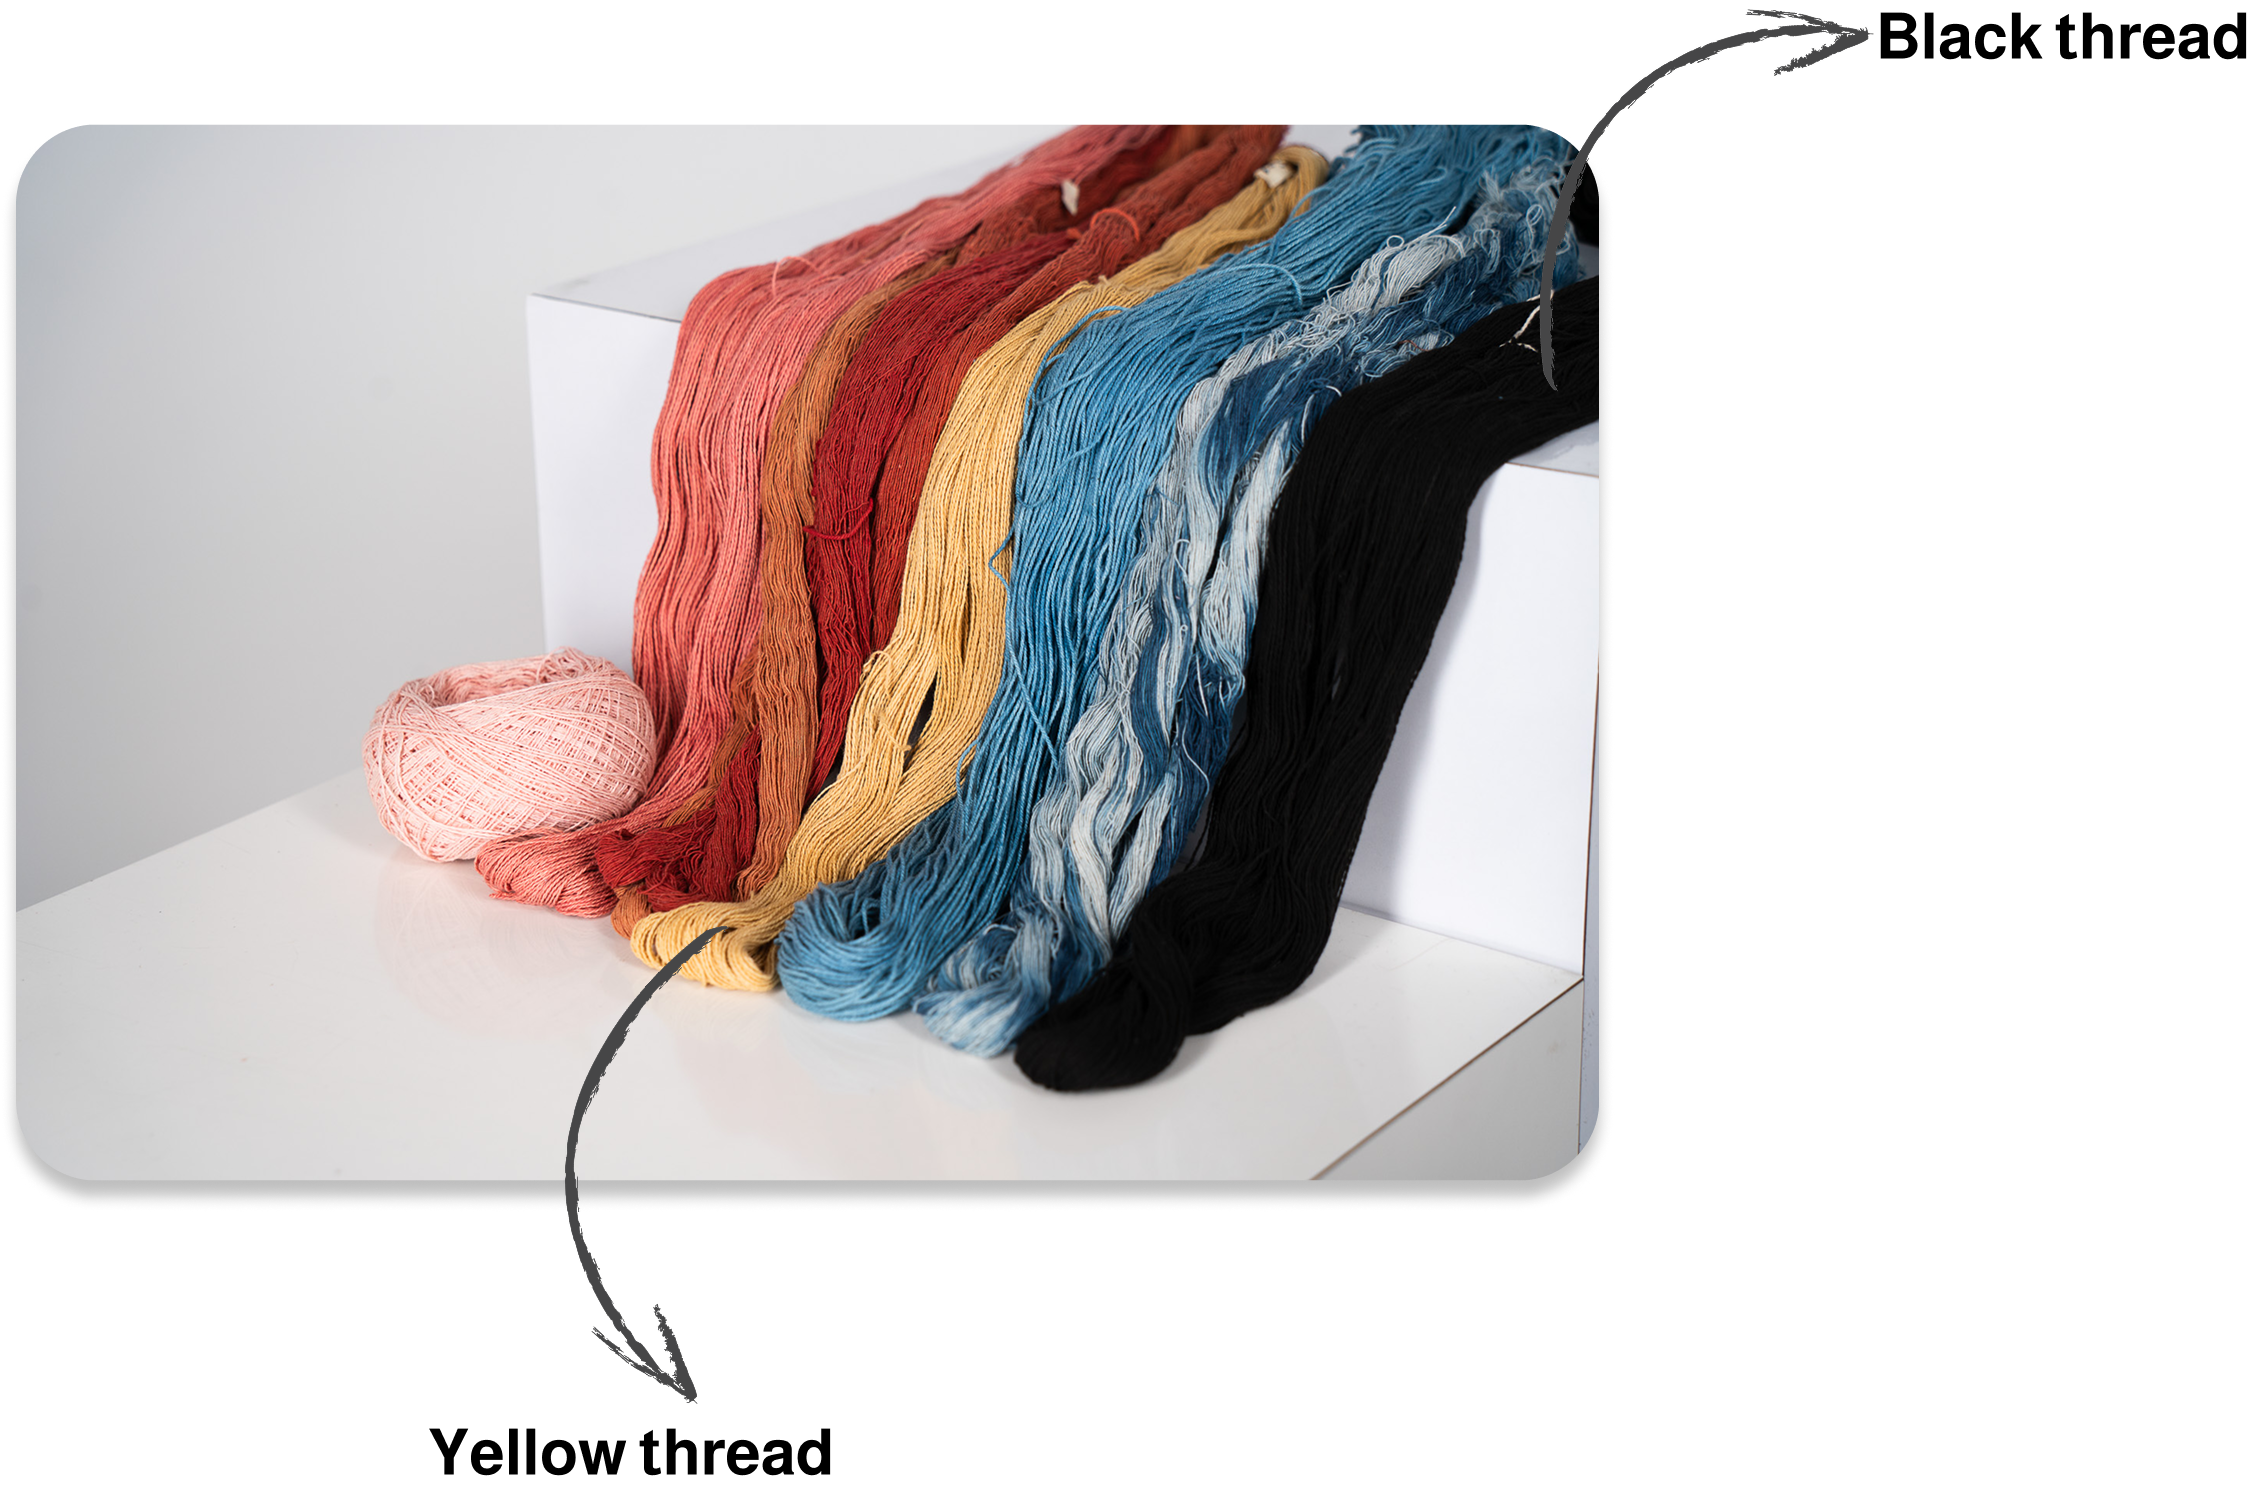
Threads

List of Colors
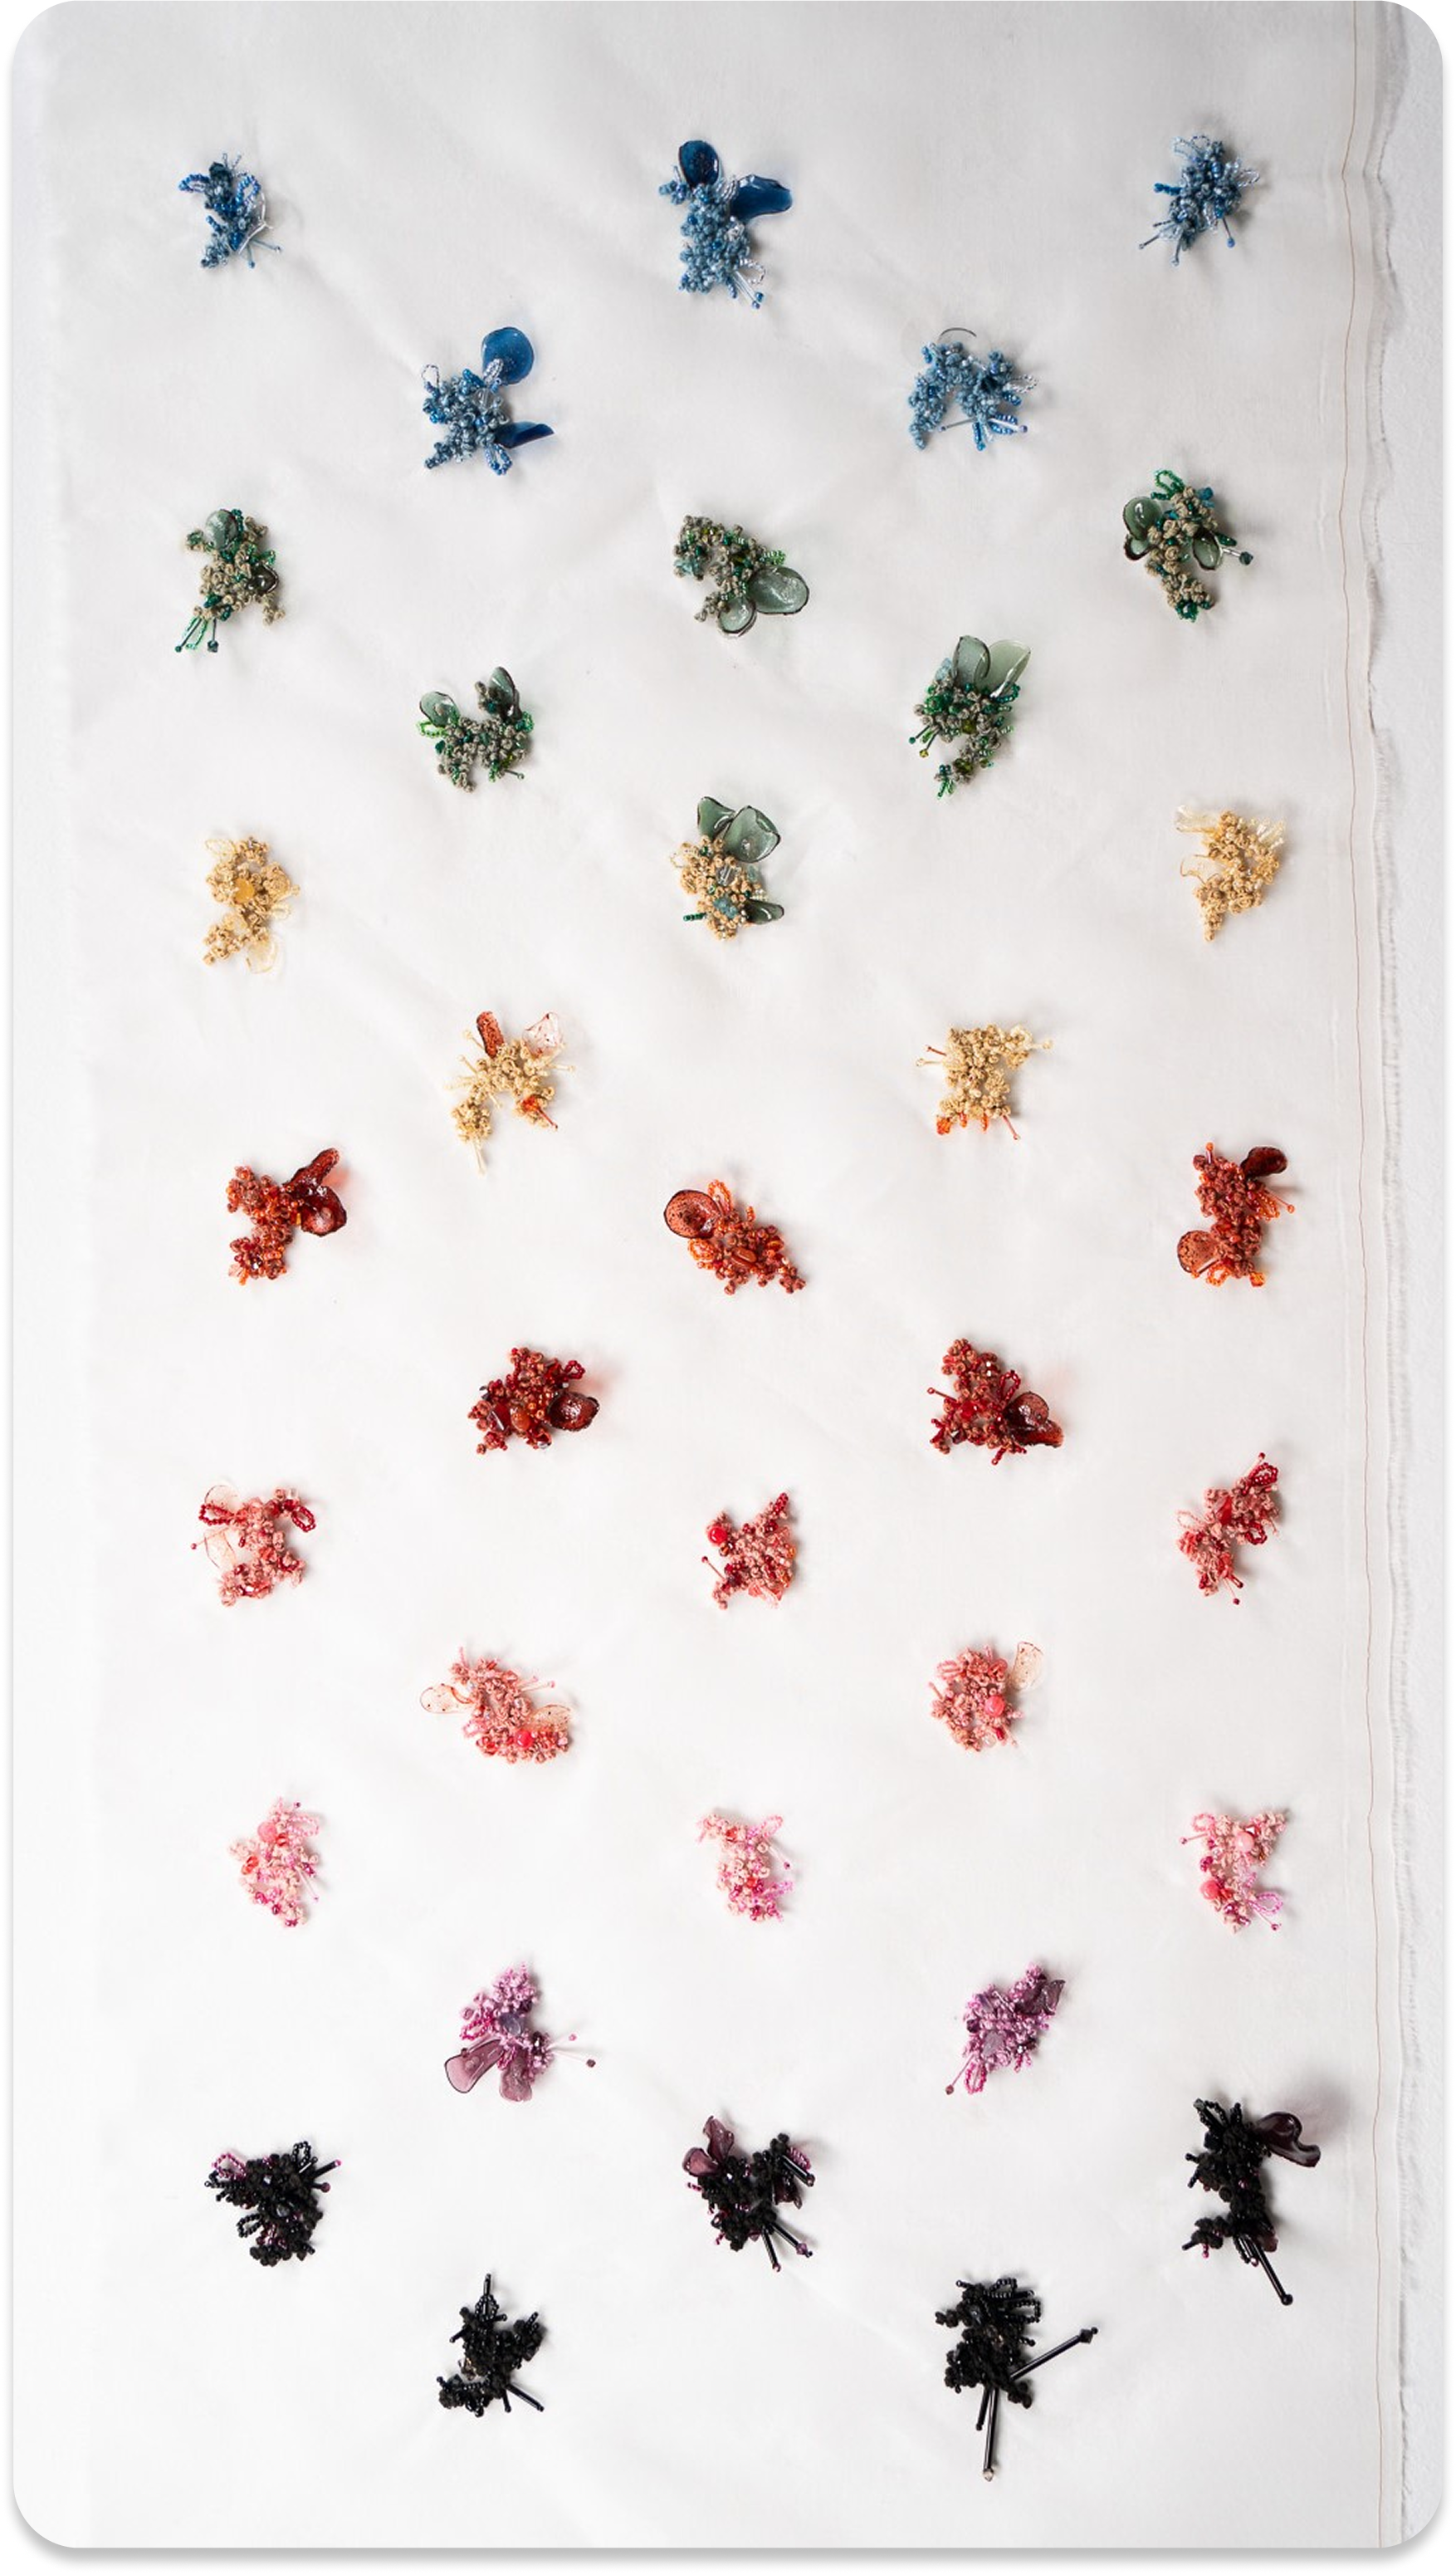
From there, I tested tone-on-tone and contrasting combinations through small embroidery clusters on A5 swatches.

High End Swatches
Following the refinement of colour combinations, I began combining material components into high-end swatches—bringing together fabric, thread, beads, and bioplastics into cohesive textile stories.
White organza base. All over, highest end look
Multi-colour bioplastic small embroidery clusters on repeat.

Source: Christian Dior Spring 2013 Couture
Bioplastics
Threads
Trims (Beads, Natural Stones, Pearls)
Testing out different colour gradients/blocking


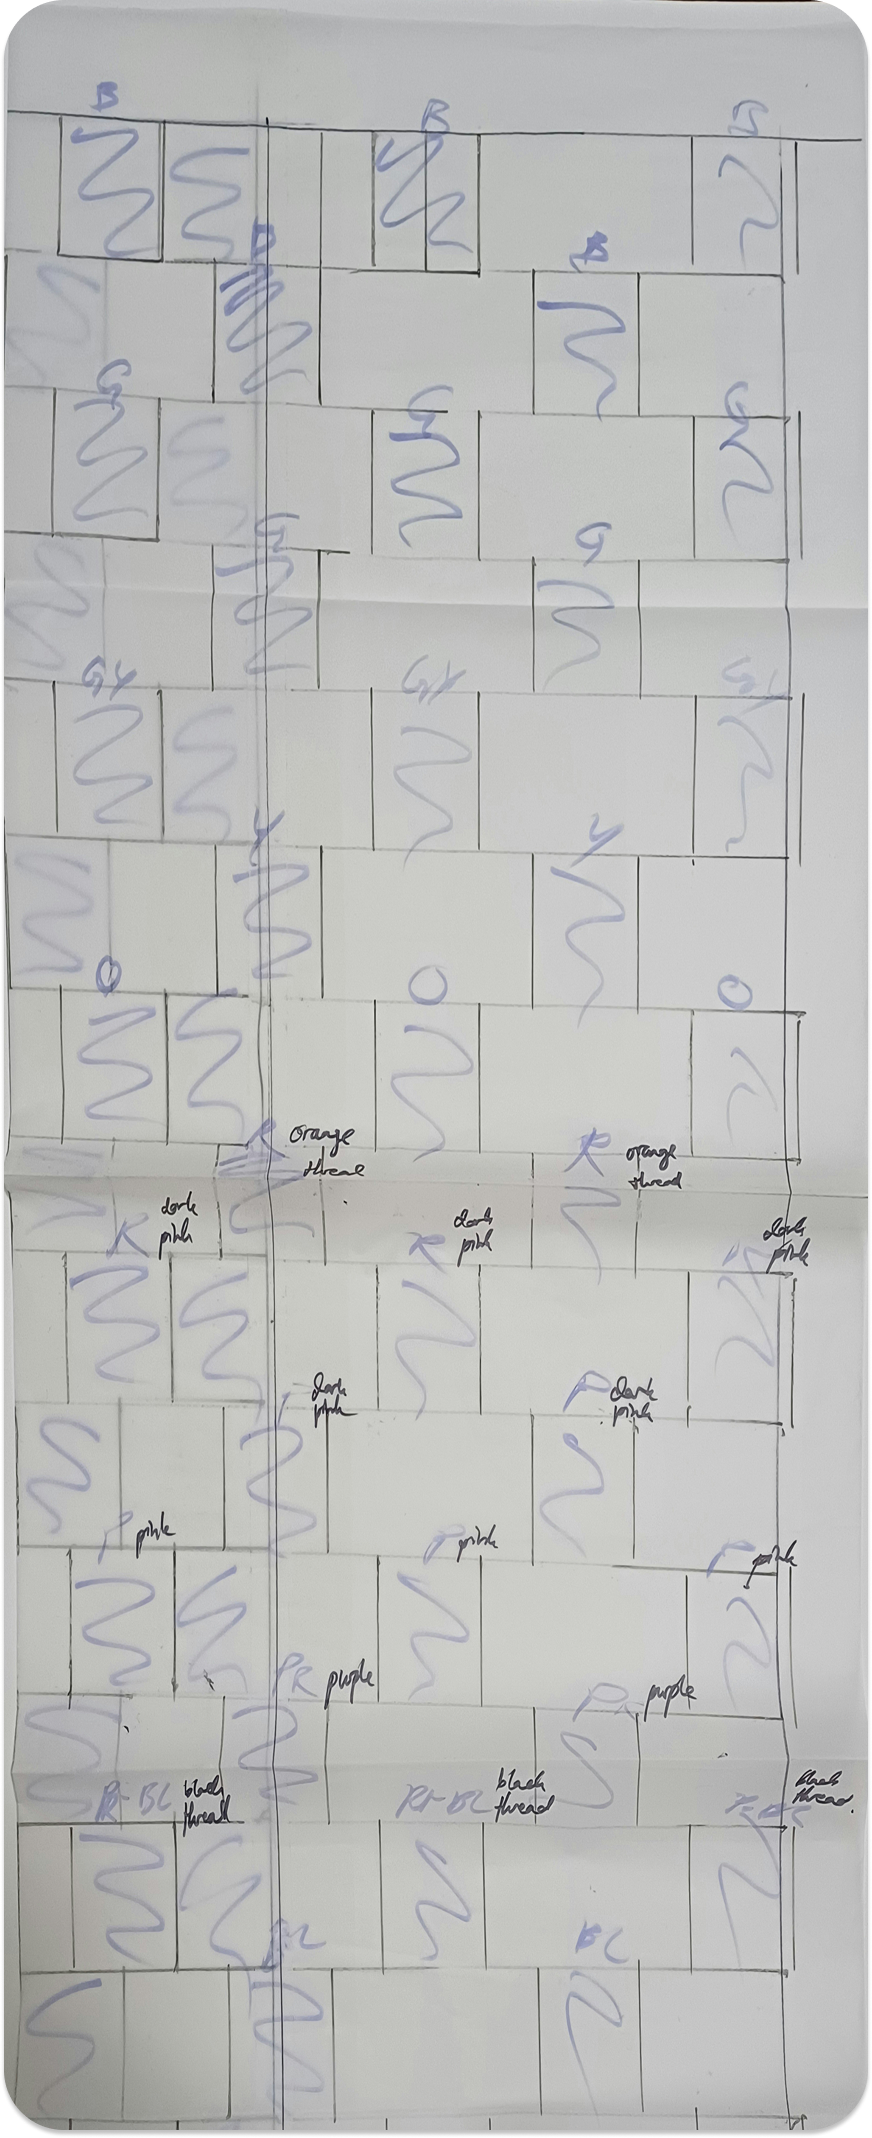

Grid planning
Final Swatches

Myrobalan yellow on orange fibre fabric base. Placement motif for flocking and black-yellow embroidery clusters, all over smaller modifier motifs with some bigger placement motifs. Add green bioplastics sparingly.

Erdem Spring Summer 2025
Bioplastics

Threads

Trims (Beads, Natural Stones, Pearls)
Myrobalan yellow on orange fibre fabric base. Placement motif for devore applique and black-yellow embroidery clusters, all over smaller modifier motifs with some bigger placement motifs. Add green bioplastics sparingly.


Flocking for swatch 2


Devore for swatch 3

Some big placement motifs
Maybe some greyed out?
A bit of all over sprayed motifs
Gardenia blue on silk wool base. Big blue embroidery clusters on big repeats with red small embroidery clusters as accents. Add blue and red bioplastics arrangements.


Christian Dior by Raf Simons AW 2014 Couture
Bioplastics
Threads

Trims (Beads, Natural Stones, Pearls)


Lighter blues
Maybe add green?